# The UrbanPiper Ecosystem

Here you will find all the necessary resources to familiarise yourself with the necessary tools that will come in handy while managing your restaurant's online and offline operations.

Take your time to go through the articles, or feel free to jump right to a topic. To make it easy for you to discover the specific topic that you're looking for, you can use the **search** (**`cmd+k`** on your Mac, or **`ctrl+k`** on windows) functionality.

### Jump right in

<table data-card-size="large" data-view="cards" data-full-width="false"><thead><tr><th></th><th></th><th data-hidden data-card-cover data-type="image">Cover image</th><th data-hidden></th><th data-hidden data-card-target data-type="content-ref"></th><th data-hidden data-type="content-ref"></th></tr></thead><tbody><tr><td><strong>Getting Started</strong></td><td>The common terms</td><td><a href="/files/pxKGGBJB2gljEQOVZSR8">/files/pxKGGBJB2gljEQOVZSR8</a></td><td></td><td><a href="/pages/7aUFmnCMx9m4smGncsXL">/pages/7aUFmnCMx9m4smGncsXL</a></td><td></td></tr><tr><td><strong>Atlas — management console</strong></td><td>For managing your back-of-house operations</td><td><a href="/files/7IwZALBYCWPfCkXgPQPW">/files/7IwZALBYCWPfCkXgPQPW</a></td><td></td><td><a href="/pages/Gw4GzplOYUMiaIgg3QXI">/pages/Gw4GzplOYUMiaIgg3QXI</a></td><td></td></tr><tr><td><strong>Store Manager (Prime)</strong></td><td>For managing your front-of-house operations</td><td><a href="/files/yOKTPLfU5WqqDEqtLVWC">/files/yOKTPLfU5WqqDEqtLVWC</a></td><td></td><td><a href="/pages/D0BMZQ5WdBI3OHNPL6MS">/pages/D0BMZQ5WdBI3OHNPL6MS</a></td><td></td></tr><tr><td><strong>POS Integrations</strong></td><td>Enable your POS to work seamlessly</td><td><a href="/files/RdrAOeY7AQVns3uQSuWG">/files/RdrAOeY7AQVns3uQSuWG</a></td><td></td><td><a href="/pages/viJdyLpv3LNhcTgRxuto">/pages/viJdyLpv3LNhcTgRxuto</a></td><td></td></tr><tr><td><strong>Ordering Channels</strong></td><td>Manage your Ordering channels directly through UrbanPiper, synced seamlessly to your POS.</td><td><a href="/files/Q79roLOBJshTpT5fMSpz">/files/Q79roLOBJshTpT5fMSpz</a></td><td></td><td><a href="/pages/xh6UZtc95GHlOyWaZSpf">/pages/xh6UZtc95GHlOyWaZSpf</a></td><td></td></tr><tr><td><strong>Data &#x26; Reports</strong></td><td>Comprehensive guides and tutorials on how to access, understand, and utilize data and reports effectively.</td><td><a href="/files/rdqahSvo3YfoVbT3t8zS">/files/rdqahSvo3YfoVbT3t8zS</a></td><td></td><td><a href="/pages/goNeXnl4boQOmbGxeL0p">/pages/goNeXnl4boQOmbGxeL0p</a></td><td></td></tr></tbody></table>


# Quickstart

<figure><img src="https://gitbookio.github.io/onboarding-template-images/quickstart-hero.png" alt=""><figcaption></figcaption></figure>

Beautiful documentation starts with the content you create — and GitBook makes it easy to get started with any pre-existing content.

{% hint style="info" %}
Want to learn about writing content from scratch? Head to the [Basics](https://github.com/GitbookIO/onboarding-template/blob/main/getting-started/broken-reference/README.md) section to learn more.
{% endhint %}

### Import

GitBook supports importing content from many popular writing tools and formats. If your content already exists, you can upload a file or group of files to be imported.

<div data-full-width="false"><figure><img src="https://gitbookio.github.io/onboarding-template-images/quickstart-import.png" alt=""><figcaption></figcaption></figure></div>

### Sync a repository

GitBook also allows you to set up a bi-directional sync with an existing repository on GitHub or GitLab. Setting up Git Sync allows you and your team to write content in GitBook or in code, and never have to worry about your content becoming out of sync.


# Publish your docs

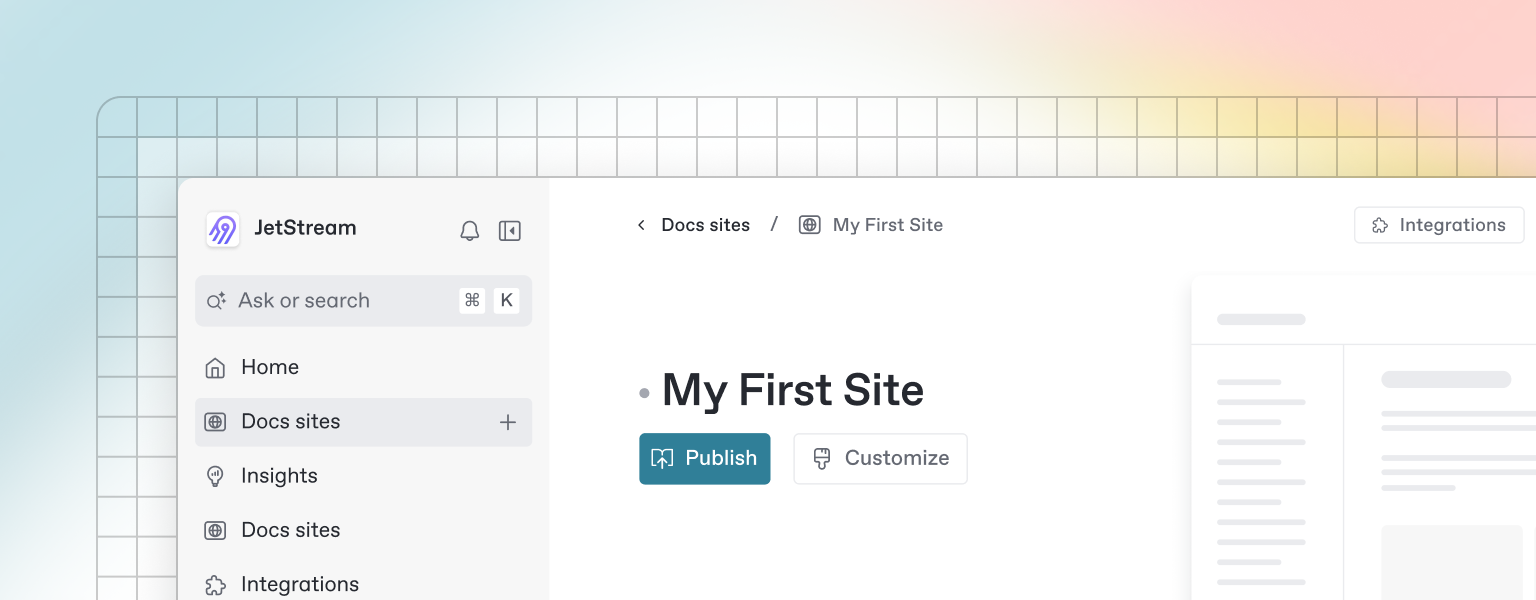
Once you’ve finished writing, editing, or importing your content, you can publish your work to the web as a docs site. Once published, your site will be accessible online only to your selected audience.

You can publish your site and find related settings from your docs site's homepage.

<figure><img src="https://gitbookio.github.io/onboarding-template-images/publish-hero.png" alt=""><figcaption></figcaption></figure>


# Your account

As a customer, your Account with UrbanPiper allows you to access all the necessary tools. Your Account is identified using an `email` or a `phone number`.&#x20;

Once you decide to signup with UrbanPiper, the onboarding team will take care of setting up your account and share with you an administrator access. Using this you can invite other individuals and associate their access with `roles` that grant them the necessary permissions to perform their day-to-day operations.&#x20;

{% hint style="info" %}
Note that every individual, except for the first administrator, will be expected to verify their email or phone number using which they would like to access any of the UrbanPiper tools.
{% endhint %}


# Restaurant Portal

The single portal through which users can access and  manage different applications of the UrbanPiper ecosystem. When working with the Business Manager, you will commonly encounter references to **Atlas** and **Prime.**&#x20;

### **Atlas – Business Manager**

This is the section which contains all the tools required for you to manage your back-of-house operations.

### Prime – Store Manager

This is the section which contains all the tools required for you to manage your front-of-house operations.

{% hint style="info" %}
While there is no explicit distinction between **Atlas** and **Prime** when you are navigating within the Business Manager, it helps to keep this distinction in mind when thinking about granting access to users based on their role in a front-of-house or back-of-house capacity.
{% endhint %}

To learn more about using the Business Manager, check out our [articles](/business-manager/introduction) about it.


# Common terms

As you start your journey with UrbanPiper, you will encounter these terms that map to different parts of the Business Manager. Each of these terms maps to a part of your restaurant setup or operation.

### Brand

This is usually the name of your restaurant. It can also be referred to as **"Concept**". In the scenario where you operate multiple brands/concepts, the Business Manager allows you to set each brand/concept separately.

### Location

These correspond to the physical locations of your restaurant. In the case you operate a chain of restaurants, each location would have a corresponding entry in the Business Manager.&#x20;

When you operate multiple Brands/Concept from your locations, you would be required to associate the locations you have created to each of the Brand/Concept.

In some cases, it helps to refer to locations as `brand-locations` as well, which provides a clear distinction when multiple brands operate from a single location.

### Menu

This is the representation of the items that you intend to sell at each of your locations. You have the flexibility to set up your menu in any way that best suits your operations. For eg: you can have a single menu for each location, a different menu for different locations, different menu for each brand, and many more such permutations.

### Platform

A "platform" refers to any system (external to UrbanPiper or within it) where you wish to have a copy of your menu sent to.  Most commonly, these platforms denote an online delivery platform. A comprehensive list of these delivery platforms can be seen [here](https://www.urbanpiper.com/integrations).

### Point Of Sale (POS)

A POS system refers to the software that is running at your store using which your operators and managers can take care of their in-house and online customers and orders.


# Your Business ID (Biz ID)

The **Business ID (**&#x61;lso referred to as **Biz ID)** is a **unique identifier** generated for your business account on UrbanPiper. It serves as the **primary reference** for identifying your business across all our internal systems.

***

### 🔍 Why is the Biz ID Important?

✅ **Support Assistance**: Our support team uses the Biz ID to quickly locate and resolve issues related to your business.

✅ **Billing & Invoices**: It is referenced in all billing-related documents and communications.

✅ **System Integrations**: Used internally for syncing data and managing integrations across platforms.

***

### 📍 Where to Find Your Biz ID?

You can find your **Biz ID** easily on **Atlas**, UrbanPiper's dashboard:

🖥️ **Top-Right Corner** of your Atlas screen, inside your profile information.

<figure><img src="/files/UM0LMbHDDViTdG88aU14" alt=""><figcaption></figcaption></figure>


# Compatible Hardware

Please find below the minimum specification requirements for buying hardware to use UrbanPiper products.

#### **Android Devices**

Device types

* Handheld: These are small screens with printer inbuilt
* Phone: these are your everyday smartphone devices with screen sizes ranging from 5.5 inches–7 inches.
* Tablets: these are everyday tablets with screen sizes ranging from 9 inches–13 inches.
* Terminals: These are POS terminals mostly with or without touch screen capability

| Device Type | RAM (GB) | Storage (GB) (at least 1 GB left free) | CPU       | Screen size (inch) | Screen Resolution (px) | OS Version                       |
| ----------- | -------- | -------------------------------------- | --------- | ------------------ | ---------------------- | -------------------------------- |
| Handheld    | 3        | 32                                     | Octa-Core | 5.5 - 7            | 1024x768px (XGA)       | <p>9+<br>Android Pie & above</p> |
| Phone       | 3        | 32                                     | Octa-Core | 5.5 - 7            | 1280x720px (HD)        | <p>9+<br>Android Pie & above</p> |
| Tablet      | 3        | 32                                     | Octa-Core | 8 -11              | 1920x1080px (Full HD)  | <p>9+<br>Android Pie & above</p> |
| Terminal    | 3        | 32                                     | Quad-Core | 14 - 15            | 1024x768px (XGA)       | <p>9+<br>Android Pie & above</p> |

#### **iOS Devices**

| Device Type | RAM (GB) | Storage (GB) (at least 1 GB left free) | CPU | Screen size (inch) | Screen Resolution (px) | OS Version |
| ----------- | -------- | -------------------------------------- | --- | ------------------ | ---------------------- | ---------- |
| Phone       | 3        | 32                                     | A9  | 5.5 - 7            | 1920x1080px (Full HD)  | 12         |
| Tablet      | 3        | 32                                     | A9  | 8 -11              | 2048x1536px (QXGA)     | 12         |

#### **Printers**

| Specifications                                              |   |                                                   | Web     |     | Devices |     |
| ----------------------------------------------------------- | - | ------------------------------------------------- | ------- | --- | ------- | --- |
|                                                             |   |                                                   | Windows | Mac | Android | iOS |
| <p>Receipt Printer Types<br>(Command Mode)</p>              | 1 | ESC/POS                                           | Yes     | Yes | Yes     | Yes |
|                                                             | 2 | STAR LINE                                         | Yes     | Yes | Yes     | Yes |
|                                                             | 3 | STAR GRAPHIC                                      | Yes     | Yes | Yes     | No  |
| <p>Receipt Printer Interfaces<br>(Connectivity Methods)</p> | 1 | USB                                               | Yes     | Yes | Yes     | Yes |
|                                                             | 2 | Bluetooth                                         | Yes     | Yes | Yes     | Yes |
|                                                             | 3 | Ethernet - LAN or WiFi                            | Yes     | Yes | Yes     | No  |
|                                                             | 4 | Parallel                                          | Yes     | Yes | No      | No  |
|                                                             | 5 | Serial                                            | Yes     | Yes | No      | No  |
| Receipt Printer Sizes                                       | 1 | <p>2 inch / 58 mm<br>(32 characters per line)</p> | Yes     | Yes | Yes     | Yes |
|                                                             | 2 | <p>3 inch / 80 mm<br>(48 characters per line)</p> | Yes     | Yes | Yes     | Yes |
|                                                             | 3 | Custom size                                       | Yes     | Yes | Yes     | Yes |

#### **Laptops**

| Browser       | Version | Screen Size      | Screen Resolution |
| ------------- | ------- | ---------------- | ----------------- |
| Google Chrome | latest  | 13 inch or above | 1024x768px (XGA)  |

{% hint style="info" %}
**Notes:**

* Any device that adheres to the Minimum Specification Requirements (MSR) will work fine with our products.
* Devices that do not meet these requirements may or may not work properly, and we cannot guarantee their performance.
* If you would like us to test a particular device, please arrange for it to be shipped to our office. We will need 20-25 working days to complete the testing and provide certification.
* If any device meets the MSR but still does not perform well, please raise a concern with us.
  {% endhint %}

<br>


# UrbanPiper Status

Check and be notified about the UrbanPiper platform's uptime status

If you're facing issues accessing UrbanPiper services, we recommend checking our **System Status Page** for real-time updates:

👉 <https://status.urbanpiper.com/>

#### 🔎 What does the status page show?

Our status page provides up-to-date information on the operational status of all UrbanPiper systems and services, including:

* Integrations (e.g., with POS and delivery platforms)
* Dashboard performance
* API availability
* Scheduled maintenance
* Known incidents or outages

<figure><img src="/files/mQk49vPZlG1Z2rrIfr6z" alt=""><figcaption></figcaption></figure>

#### 🔁 Real-Time Updates During Service Disruptions

In the event of any system degradation or outage, we post real-time updates to keep you informed. You can track:

* Issue identification and investigation
* Ongoing resolution progress
* Final incident resolution and root cause (post-mortem)

#### 📨 Stay Notified&#x20;

You can subscribe to receive status alerts via email or SMS directly from the status page.

***

{% hint style="info" %}
Before reaching out to support, checking this page can quickly clarify whether the issue is part of a known incident.\
\
Still need help? [Contact Support](/basics/contact-us)
{% endhint %}


# Contact Us

**Need Help? We’re Here for You!**

If you couldn’t find what you were looking for in our [Help Center,](https://help.urbanpiper.com/) our Support Team is ready to assist you.

Click the chat icon at the top right corner of your Manager Portal to connect with one of our support agents.

<figure><img src="/files/1wB01sl5mflRtETZibkK" alt=""><figcaption></figcaption></figure>

🖥️ Our agents can use screen sharing or call you, if needed, to help resolve your issue quickly.

📧 Prefer email? You can also reach us at **<support@urbanpiper.com>**.


# Partner with Us

At UrbanPiper, we believe in building a powerful ecosystem of integrations to help your business thrive. By partnering with leading technology providers, we act as a central hub that connects your favorite services and platforms, giving you a seamless, unified experience. This means you can manage everything from a single dashboard, simplify your operations, and focus on what you do best.

### Our Core Integrations 🔗

We have built a vast network of integrations with the platforms you already know and trust. This ensures that all your critical business functions are working together smoothly.

| Category               | What it means for you                                                                                    | Our Partners Include...                     |
| ---------------------- | -------------------------------------------------------------------------------------------------------- | ------------------------------------------- |
| Online Aggregators 🍔  | Manage all your incoming orders from various platforms in one place.                                     | Zomato, Swiggy, Uber Eats, and more.        |
| POS Systems 💻         | Connect your UrbanPiper platform directly to your billing and inventory systems for seamless operations. | Foodics, oodo, Ginesys, RanceLab, and more. |
| Logistics Partners 🛵  | Access a network of delivery providers to ensure your orders get to your customers efficiently.          | Dunzo, Shadowfax, and others.               |
| Payment Gateways 💳    | Offer your customers a smooth and secure checkout experience.                                            | Razorpay, PayU, and others.                 |
| Marketing & Loyalty 💖 | Power your marketing efforts and reward loyal customers with dedicated platforms.                        | Gupshup, and more.                          |

### The Benefits for Your Business ✨

By leveraging our partner ecosystem, you gain access to a host of advantages designed to simplify your day-to-day operations and accelerate your growth.

* Unified Dashboard: See and manage all your orders from every channel in one place. No more switching between apps!
* Streamlined Operations: Eliminate manual data entry, reduce human error, and automate your workflows, from order placement to delivery.
* Expanded Customer Reach: Easily connect with new customers on the most popular delivery and discovery platforms.
* Data-Driven Insights: Get a holistic view of your business performance, empowering you to make smarter, more informed decisions.

### Ready to Grow with Us?

UrbanPiper is more than just a platform; it's your all-in-one solution for managing and growing your online business. Ready to see the difference?[ Book a demo](https://www.urbanpiper.com/integrations#) today to learn more about how our integrations can transform your operations.

<br>


# Introduction

UrbanPiper's Business Manager is designed to simplify the back-of-house operations for your restaurant. It offers features that allow you to manage multiple brands and locations, organize menus across various online food delivery platforms such as DoorDash, Grubhub, and Uber Eats, user management, and access analytics for informed decision-making.\
\
To access the Business Manager, you need to login to your Restaurant Portal at [login.urbanpiper.com](/business-manager/introduction) using your credentials.

<figure><img src="/files/SSrMlINnBtOxcw5aoPF5" alt=""><figcaption><p>Login to your Customer Portal</p></figcaption></figure>

<figure><img src="/files/9TUVC5mVs19b0w6awMr7" alt=""><figcaption><p>Analytics on your Business Manager</p></figcaption></figure>

#### **Key Features of a Business Manager**

1. **Brand Management**
   * **Multi-Brand Support**: Allows restaurants to manage each brand independently, making it ideal for groups with diverse brand offerings.
   * **Consistency and Customization**: Helps maintain a unified brand identity across platforms while enabling each brand to tailor operations to meet unique goals.
2. **Location Management**
   * **Multi-Location Control**: Offers centralized oversight for all outlets, allowing managers to monitor performance, menus, and operations in one place.
   * **Real-Time Updates**: Ensures immediate changes across locations, such as new promotions or menu updates, for seamless and synchronized operations.
3. **Menu Management**
   * **Unified Menu Control**: Restaurants can manage and update their menus across all platforms through a single interface.
   * **Enhanced Features**: Supports item availability management, pricing adjustments, and seasonal offers, providing flexibility for dynamic menu adjustments.
4. **Analytics & Reporting**
   * **Sales and Performance Reports**: Generates reports on key metrics, including sales trends and revenue growth, helping businesses identify strengths and areas for improvement.
   * **Visual Analytics**: Provides intuitive visuals and detailed performance metrics for in-depth insights into business operations.
5. **User Management**
   * **Role-Based Access Control**: Allows the creation of multiple user roles with custom access levels for store managers, staff, and administrators.
   * **Secure Permissions**: Protects sensitive data through permission settings, ensuring only relevant access for each team member.


# Creating a Brand

{% embed url="<https://urbanpiper.portal.trainn.co/share/v6PHwomkfNNyqWRzRJ9ZrA>" %}

## How to Create a Brand

UrbanPiper allows you to manage all your brands from a single place. Follow these steps to create a new brand:

1. Navigate to the **Brands** section from the navigation menu.
2. Here, you can view all the existing brands that have already been created.
3. To create a new brand, click on **Create New**.
4. Enter the name of the brand and click **Next**.
5. Choose the location you would like to associate with this brand.
6. Click on **Create** to add this new brand.

We have now successfully created a new brand.

{% hint style="success" %}
At any given point of time you can create as many Brands as you want. Just make sure that you associate your locations correctly as explained in [Creating a new Location](/business-manager/creating-a-new-location).
{% endhint %}


# Creating a new Location

{% embed url="<https://urbanpiper.portal.trainn.co/share/thL637P4WHKx06rv9C4zcQ>" %}

## How to Add a New Location

In this article, we will guide you through adding a new location on UrbanPiper.

1. **Log into your Atlas portal:** Begin by logging-in into your Atlas portal.
2. **Navigate to Locations:** Click on the 'Location' tab.
3. **Add a New Location:** Click on 'Add Location'.
4. **Select Number of Locations:** Choose the number of locations you want to create.
5. **Enter Location Details:** Fill in the details for the new location, including:
   * Name
   * Address
   * City
   * The contact number of the restaurant
   * Email address (if available)
6. **Proceed to Next Step:** Click 'Next' once all the details are entered.
7. **Multi-Brand Setup (Optional):** If applicable, associate the Brand with the location and click 'Next'.
8. **Catalog Options:** Choose to either copy the catalog from existing locations or skip to add it later.
9. **Select Platform or DSP:** Choose the platform or DSP with which you want to associate the location.
10. **Finish:** Click 'Finish' to add the location.

Your new location is now created.


# Setting up Schedules for Locations

{% embed url="<https://urbanpiper.portal.trainn.co/share/3ykCkZHVj88v5NtJCLz2QA>" %}

## How to Create Associate Schedules for Operating Hours at a Location

In this guide, we will learn how to create schedules to set the operating hours for a given location. Follow these steps to create and associate schedules effectively.

1. **Navigate to Schedules:**
   * On the navigation section, click on **Groups**.
   * Then, click on **Schedules**.
2. **Create a New Schedule:**
   * Click on **Regular Schedules** and then **Create New**.
   * Enter the name of the schedule.
   * Click on **Next** to proceed.
3. **Add Timings:**
   * Select the type of schedule: **Daily**, **Weekdays**, **Weekend**, or **Custom**.
   * Select the open and close time.
   * You can choose to add further timings if applicable.
   * Once the timings are created, click on **Save**.
4. **Associate Locations:**
   * Click on **Associate Your First Location**.
   * Select the list of locations you want to associate with the schedule.
   * Click on **Update** to finalize the association.

Now, the schedule has been successfully created and associated with the selected location. Thank you for following this guide!


# Creating a Menu

{% embed url="<https://urbanpiper.portal.trainn.co/share/QhB4CTEaUAPXb464NJTwGg>" %}

## How to Create a New Menu

In this video, let's see how to create a new menu on UrbanPiper from scratch.

### Steps to Create a New Menu

1. Click on the **Create New** button on the menus list.
2. Define the following four parameters for the new menu:
   * **Name:** The name of the menu.
   * **Associated Brand:** The brand associated with the menu. UrbanPiper allows you to run multiple brands out of the same portal. You can choose any one of these brands while creating the menu. Note that if you want to run the same menu on two different brands, you need to duplicate the menu and associate it with the other brand.
   * **Description:** A thorough description of the menu.
   * **Cover Image:** An image representing the menu.
3. Fill in the rest of the attributes:
   * For this example, we will call this a *regular menu*, a menu which the restaurant runs on a day-to-day basis.
   * Provide a thorough description for it.
   * Upload a cover image.
4. Once all the details are filled, click on **Submit** to create the menu.
5. To further proceed, you can either start with creating your first section or copy another menu.

And that's it! That's how you create a menu on UrbanPiper.


# Configuring your Menu

{% embed url="<https://urbanpiper.portal.trainn.co/share/oDc5q9lCcWv0jtQcs5vB4A>" %}

\ <br>

## How to Add Items and Sections to your Menu

In this guide, we'll walk through the steps to add items and sections to your menu. Follow along to easily manage your menu items.

#### Step 1: Select the Menu

First, navigate to the menu you want to modify. In this example, we'll use the regular menu associated with the Piper Pizza brand.

#### Step 2: Create a New Menu Section

Next, choose to create a new menu section. This will prompt you to enter the details of your first section.

* Name the section (e.g., "Pizzas").
* Associate a schedule.
* Optional: Add a description and cover image.

Once you've created your first section, you can continue to add more sections by clicking on the "Create Section" button. For example, add another section for "Appetizers" and then click on submit.

#### Step 3: Add Items to a Section

Now, let's add items to the "Pizzas" section:

* Go to the "Pizzas" section and click on "Add Items".
* Associate the pizzas from your base items.
* Click "Save" to complete the associations.

#### Step 4: Create Subsections

Let's create a subsection under "Appetizers":

* Go to "Appetizers" and create a subsection.
* Name the first subsection (e.g., "Garlic Bread").
* Associate the items (e.g., two types of garlic bread) to this subsection.

To add another subsection, follow the same steps. For example, create a subsection called "Fries". If you don't have any fries in your items, you can create a new item on the fly and save it.

#### Step 5: Edit Item Attributes

You can also edit attributes such as item name and price. For instance, you can associate an image to an item for better visual representation.

### Conclusion

And that's it! You've successfully created sections and items on your menu. Easy as that.

<https://drive.google.com/file/d/1VhD0398Gmj-LwI4MriLxQIN7x0wKRUrx/view?usp=sharing>


# Adding Modifier Groups and Modifiers

{% embed url="<https://urbanpiper.portal.trainn.co/share/slUFNxGGHTfebTm7EnQmXA>" %}

## How to Add Modifier Groups and Modifiers to Your Menu

In this video, let's see how to add modifier groups and modifiers to your menu. Before we get into the details of how to go about this, let's first learn about the different kinds of modifier groups on Urban Piper.

### Types of Modifier Groups on Urban Piper

There are two types of modifier groups on Urban Piper:

* **Add-ons:** Optional modifications such as extra onion or extra chicken.
* **Variants:** Mandatory selections that you want an end user to make while buying an item. For example, size is a mandatory selection in a lot of restaurants, it has to be one of regular, medium, or large.

So, the modifier group size is a modifier group of type variants, while toppings are a modifier group of type add-ons.

### Associating Modifier Groups and Modifiers to the Menu

Now that we have understood the types of modifier groups, let's move forward and understand how to associate these on the menu. Follow these steps:

1. Open the regular menu and select the item you want to modify, for example, an 8-inch golden corn pizza.
2. Click on the update button in the modifier group tab.
3. Associate the modifier group size to this pizza. Since size is a modifier group, you will also have to associate the modifiers belonging to size.
4. If you want to create new modifiers, click on the button to enter the details and save. However, in this case, we will associate the existing ones.
5. To change the price of a modifier, simply go and change the default sales price. For example, if it costs 100 rupees for a regular pizza, edit the default sales price to 100 and save it.
6. Similarly, you can edit the prices of the medium and large pizzas too.

And that's it! That's how you associate modifier groups and modifiers to a menu.


# Create and Manage Taxes

{% embed url="<https://urbanpiper.portal.trainn.co/share/zxTlq4W5vd2c03blDiQm0w/>" %}

This guide outlines how to set up and manage taxes for your Zomato orders using our platform, ensuring compliance and accurate billing.

***

### Setting Up Taxes

Follow these steps to configure your tax rates:

Access the Catalog:

* From your dashboard, go to the Catalog option.

Navigate to Taxes:

* Select Taxes from the Catalog menu.

Add Tax Rate:

* Click on Add Tax Rate.
* Enter the required information for your tax.
* GST Division: For GST rates like 5%, 9%, 12%, or 18%, the platform will automatically divide the rate equally into SGST and CGST (e.g., 5% GST will become 2.5% SGST and 2.5% CGST).

Select Applicable Modes:

* Choose the modes that will apply the tax to your item prices or charges.

Save Details:

* Fill in all necessary details and click Save.

Create CGST:

* After completing the SGST setup, repeat the same procedure to create the corresponding CGST.

***

### Associating Items and Location Groups with Taxes

By default, all items and location groups are automatically associated with the taxes you create. If you need to limit taxes to specific items or locations, follow these steps:

Create Unique Item and Location Groups:

For Item Groups:

* Go to the All Apps section.
* Select Groups.
* Click on Add Item Group, fill in the details, and click Create.
* Navigate to your items and update them to associate with this newly created item group.

For Location Groups:

* Select the Location Group option on the left-hand side.
* Set up a new location group, fill out the details, and associate the relevant locations by clicking Update.

Update Tax Association:

* Once your unique item and location groups are set up, go back to the Taxes option and refresh the page.
* After the page reloads, select the specific tax rate.
* Navigate to the Items and Location tab within that tax rate's settings.
* Remove any previous default location and item group associations.
* Click on Add New.
* Associate the specific item group with the relevant location group, and then click Add to link them to this tax.

***

### Additional Notes on Tax Liability and Packaged Goods

Understanding tax liability is crucial for accurate billing:

* Tax Rates Above 5%: For any tax rate above 5%, it is considered the Merchant's liability.
* If the tax rate on an item is above 5%, the item must be accompanied by a “packaged goods” tag.
* 5% Tax - Aggregator's Liability (Default): A 5% tax on an item will by default be the aggregator's (Zomato's) liability.
* 5% Tax - Merchant's Liability (with Tag): To make a 5% tax on an item the Merchant’s liability, the item must also be accompanied by a “packaged goods” tag.

***

### Adding "Packaged Goods" Tag

To mark an item as a "packaged good":

Navigate to Items:

* In the Catalog section, go to Items.

Add Tag:

* Select the specific item.
* Click on Show More to reveal additional options.
* Proceed to add the “packaged goods” tag to the item.

Associate with Groups:

* Associate this item with the appropriate item group you created (if not already done).
* Repeat the steps in the "Associating Items and Location Groups with Taxes" section to link this item (via its item group) to the correct tax rate.


# Create and Manage Charges

{% embed url="<https://urbanpiper.portal.trainn.co/share/9oQWSrypJ94iWrfUH5K9Mw>" %}

In this guide, we will walk you through the process of setting up packaging charges for Zomato. Follow the steps below to configure the charges effectively.\ <br>

### Access the Catalog

1. Select the Catalog option from the menu above.

### Navigate to Charges

2. Select the Charges option located on the left-hand side.

### &#x20;Add a New Charge

3. In the top-right corner, click on Add Charge.
4. Fill in the necessary details for the charge.

### Choose the Applicable Mode

Below are the modes you can choose from:

* Item Quantity: Based on the quantity of items ordered by the customer.
* Order Subtotal: Based on the order-level packaging charges.
* Item Price: Option to include a percentage-based packaging charge for the items.

### Set the Amount and Create the Charge

5. After choosing the appropriate mode, set the amount.
6. Click on Create.

### &#x20;Associate with Items and Location Groups

By default, all items and location groups are linked to the packaging charge. To specify certain items, follow these steps:

#### Create a New Item Group

1. Go to All Apps and select Group.
2. Click on Add Item Group.
3. Enter the name and click on Create.
4. Click on Items and then Update Items.
5. Select the preferred item to associate with the item group.

#### Create a New Location Group

1. Click on Add Location Group.
2. Fill in the name and click on Create.
3. Associate the location by clicking on Update and selecting the preferred location.
4. Click on Update Location.

### Associate Item and Location Group with the Charge

7. Refresh the page once.
8. Return to Charges and click on Items and Locations.
9. Delete the previous item group and location group associated by default.
10. Click on Add New Pair.
11. Select the newly created item group and location group.
12. Click on Add.

### Publish the Menu

To reflect these changes on Zomato, publish the menu for your location.

Thank you for watching!

<br>


# Understanding Fulfilment Mode for an item

#### Overview

Fulfillment Modes (also known as *Fulfilment Types*) determine how your customers receive their orders — whether through delivery or by picking them up directly from your outlet. This article explains what fulfilment modes are, how to enable them, and how pricing or item availability may vary based on fulfilment type.

***

### **1. What is a Fulfilment Mode (or Fulfilment Type)?**

A *Fulfillment Mode* defines how a customer receives their order.\
Most Delivery Service Providers (DSPs) support the following standard fulfilment types:

* **Delivery:** The DSP delivers the order directly to the customer’s address.
* **Pickup:** The customer visits your restaurant or store to collect the order.

***

### **2. Can a Fulfilment Mode be enabled from UrbanPiper Atlas?**

By default, the **Delivery** mode is automatically enabled for your outlet by the DSP.

To enable **Pickup** mode:

* Contact your **DSP Point of Contact (POC)**, or
* (Where supported) Enable it directly via your **DSP’s partner portal**.

> **Note:**\
> The ability to enable or disable fulfilment modes depends on each DSP’s features. Some DSPs may not support this functionality.

***

### **3. Why enable Pickup Fulfilment Mode?**

Enabling the **Pickup** mode can help your outlet:

* Offer customers more flexibility and quicker service.
* Drive additional in-store footfall and brand engagement.
* Reduce reliance on delivery partners during peak times.

***

### **4. What happens when Pickup Fulfilment Mode is enabled?**

Once **Pickup** mode is enabled:

* Customers can choose between **Delivery** and **Pickup** while placing their order.
* If **Pickup** is selected, the customer will visit your outlet to collect their order.
* This provides a more flexible ordering experience and can help balance your order load.

***

### **5. Can an Item have different pricing for different Fulfilment Modes?**

Yes. Some DSPs allow **different pricing** for items based on the selected fulfilment mode.

**Example:**

| Item             | Delivery Price | Pickup Price |
| ---------------- | -------------- | ------------ |
| Pizza Margherita | $10.00         | $9.00        |

> **Note:**\
> Support for fulfilment mode–specific pricing varies by DSP.\
> Please confirm with your **DSP POC** before making pricing changes in **UrbanPiper Atlas**.

***

### **6. Can an Item be excluded from a particular Fulfilment Mode?**

Yes. Some DSPs allow you to restrict specific menu items to certain fulfilment modes only.

**Examples:**

* *Ice Cream Sundae* → **Pickup only** (not available for delivery).
* *Meal Combo* → **Delivery only** (not available for pickup).

This feature is useful for managing items that may not be suitable for certain fulfilment methods due to:

* Packaging or storage limitations
* Temperature sensitivity
* Longer preparation time

> **Note:**\
> Item-level fulfilment restrictions depend on DSP support.\
> Please verify with your **DSP POC** before updating fulfilment mode restrictions in **Atlas**.


# Importing your Menus

{% embed url="<https://urbanpiper.portal.trainn.co/share/58DqFYSuncT3xFQeAbEp4w>" %}

## How to Import a Menu from a POS System

In this video, we will learn how to import a menu from a POS system. If you have a live POS integration on Urban Piper, you can make menu changes on the POS and import them to be published on the DSPs directly. This allows you to manage your menu from a single platform, which is your POS in this case.

### Steps to Import the Menu from the POS

1. Head to Atlas and click on **Menu Management**.
2. Click on **Menus**. The screen will show you the active menu for your business.
3. Click on **Import Menu**.
4. Select the location from where you want to publish the menu.
5. Click on **Import**. A menu pull request will be triggered, and the menu will be updated from the POS.
6. You can also import the menu directly from the POS by clicking on the menu and selecting the menu.

Your menu import is in progress. It usually takes 2 to 5 minutes for the menu to be updated. Once the menu is pulled from the POS, you can make the necessary changes and publish the menu on the DSPs.


# Publishing your Menu

{% embed url="<https://urbanpiper.portal.trainn.co/share/Vt3JQbQUmm2Dtz6e6PkK4w>" %}

## How to Publish Your Menu on Urban Piper

In this video, let's see how to publish your menu on Urban Piper.

### Types of Publishes

Let's start with learning about the different kinds of publishes you can do on Urban Piper:

* **Regular On-Demand Publish:** When you do an on-demand publish by clicking on *Publish Now*, we start the process of updating your menu as soon as you confirm that you want to publish your changes.
* **Scheduled Publish:** This option is used to update the menu at a later point in the future.

### Ways to Publish a Menu

Now that you've understood the difference between the two, let me show you the different ways in which you can publish a menu on Urban Piper:

#### 1. Through the Menus List

If you have made your changes already and simply want to publish the menu, click on *Publish Now* or *Scheduled Publish* button on the menus list to publish your menu.

#### 2. Within a Menu

You can also publish a menu within the menu itself:

* **Publish Now or Schedule Publish:** Use the *Publish* button in the menu.
* **Preview Menu:** To do this, select the location and platform whose menu you want to preview. Our internal verification engine runs checks on your menu. If there are no errors or warnings, the menu is ready to publish. Once you've verified your menu, you can click on *Publish*.

### Publishing Steps

1. Select the locations you want to publish to.
2. Select the platforms you want to publish to.
3. Click on *Publish*.

### Scheduled Publish Steps

1. Click on the *Scheduled Publish* button.
2. Select locations and platforms in a similar way to a regular publish.
3. Our internal validation checks for errors and warnings on the menu.
4. Select the date and time.
5. Clicking on *Submit* confirms the schedule for a later point of time.

### Canceling a Scheduled Publish

If you have set up a schedule, you can cancel it using the same flow as scheduling a publish. You'll see a *Cancel Scheduled Publish* button instead in that case.

And that's about it. That's how you publish a menu on Urban Piper.\
\
Watch the Arabic tutorial:

{% embed url="<https://drive.google.com/file/d/1mnUfYGH8h0YeHV4FrlDO4IE0dUVSkfIB/view?usp=drive_link>" %}


# Viewing your Orders

{% embed url="<https://urbanpiper-support.portal.trainn.co/share/c9H3wMiP34fZOGDFAzeOoQ>" %}

## Keeping a track of your Orders

In this video, we explore how to effectively manage orders using the Urban Piper Business Manager. This tool empowers you to oversee all orders processed across various locations and platforms, complementing the day-to-day order management by operators and cashiers using the Order Tracker tool.

{% hint style="warning" %}
This section will move under the 'Analytics' section in the near future.
{% endhint %}

### Viewing your Orders

1. **Login:** Visit [login.urbanpiper.com](https://login.urbanpiper.com) and log in using your credentials.
2. **Access Orders:** Click on the 'Orders' section to view a list of orders processed across different locations and platforms for your business.

#### Order List View

* **Order ID:** Unique identifier for each order.
* **Platform IDs:** Identifiers for the platforms where orders were placed.
* **Date and Time:** When the order was placed.
* **Location:** The location for which the order was placed.
* **Customer Details:** Quick view of the customer information.
* **Payment Mode:** The method of payment used by the customer.
* **Order Status:** Current status of the order.
* **Amount:** Total amount for the order.

#### Order Details

To view detailed information about an order, click on the respective tab. This will display:

* **Order Summary:** List of items in the order, including any add-ons or customizations.
* **Special Instructions:** Any specific instructions provided by the customer.
* **Delivery Info:** Details about the delivery.
* **Customer Info:** Additional customer information.

#### Order Lifecycle

To acknowledge your orders and manage its delivery states, we recommend using our [Store Manager](/store-manager/prime-app/logging-in-to-store-manger).


# User Access

{% embed url="<https://urbanpiper.portal.trainn.co/share/e4oUhGbfTtJqgWnaq7VsAA>" %}

## User Access in Atlas

### Navigation

Let's begin by navigating to the User Access section:

1. In the Navigation panel, click on the **Settings** tab.
2. From the drop-down, select the **User Access** tab.

Note: This section is visible only to users with Admin LOL.

### Inviting a New Employee

To invite a new employee to join your team on Atlas:

1. Click on the **Invite** button.
2. Add the employee's email address.
3. Assign a role to the employee based on their responsibilities within your organization.

Access to various sections on Atlas is limited by user roles. For example, you can give access only to sections related to Marketing and Support roles for a specific user.

### Sending the Invite

Once you've set up the invite:

1. An email invite will be sent to the employee's email address.
2. If the invite is not immediately visible, search your inbox with the subject line: *Your Atlas invite has arrived*.
3. Click on the **Join Team** button in the invite.

### Completing the Profile

Upon accepting the invite, the employee will be prompted to:

1. Complete their profile with details like first name, last name, and phone number.
2. Validate their phone number with a one-time password.
3. Pick a unique username and set a password.
4. Enter their email address to create a new user account.

Once completed, the employee can log in to Atlas using their new username and password.

### Tracking Invites

While waiting for staff to accept their invites, you can track them:

1. Go to the **Invites** tab to see all pending invites.
2. You have the option to resend or cancel an invite.

### Understanding User Roles

Navigate to the **Roles** tab to view all user roles on Atlas:

* **Admin:** Provides unfettered access across the entire Atlas portal.
* **Default:** The role with the least access, allowing users to view catalogs and locations only.

To assign a role:

1. Click on the name of the role to view its details and permissions.
2. Click on the **Users** tab to view users associated with this role.
3. To assign a role to a new user, click on the **Update** button and select the user.

### Updating User Roles

To update a user's role:

1. Go to the **Users** tab and click on the name of a user.
2. Update the role and click on the **Save** button.

### Conclusion

This concludes the User Access section. We covered navigation, inviting new employees, tracking invites, understanding user roles, and updating user roles.

Thank you for watching!


# Understanding Standard Roles in Prime & Atlas

Easily assign roles to your employees based on their responsibilities within your organization. This ensures your team has the right access to efficiently manage your business on both Prime and Atlas.

***

### Standard Roles in Prime

Prime offers 6 standard roles, primarily for managing your in-store operations. You can also assign roles with limited access based on specific locations.

* Captain: Perfect for your front-of-house team. Captains take customer orders, especially for dine-in. Please note, they cannot settle bills; that's handled by Cashiers. This role is exclusively available on the Prime app (mobile/tablet).<br>
* Online Order Processor: This role is all about managing online orders. They handle tasks like printing bills/KOTs (Kitchen Order Tickets) and updating order statuses.<br>
* Online Order Supervisor: Beyond an Online Order Processor's duties, Supervisors can also manage your store's availability (open/close) and update outlet stock.<br>
* Cashier: Your counter expert! Cashiers manage operational shifts using registers, process bills, and complete settlements.<br>
* Manager: Managers oversee your store's daily operations. They handle inventory transactions and review important reports and analytics<br>
* Administrator: Typically, the store owner, Administrators have full access to Prime. They are responsible for critical functions like adding new stores and managing users.<br>

#### Custom Roles in Prime

Prime gives you the flexibility to create custom roles tailored to your specific needs. With custom roles, you can assign very specific permissions, giving you granular control over what each team member can do. This feature is exclusive to Prime.

***

### Standard Roles in Atlas

Atlas provides a range of standard roles for managing your broader business operations and data. The location-level access is not available in Atlas

* Admin: The most powerful role in Atlas. An Admin has complete control over the platform, managing user accounts, system configurations, and all operational settings. This role is ideal for owners or top-level managers.

* Hub: Focuses on the central setup and crucial store-level configurations in Atlas. Hub users can view and update foundational settings, ensuring your business functions correctly within the platform.

* Catalogue: Manages all your product and service listings within Atlas. Users with this role can view, create, and update categories, items, modifiers, taxes, and charges, keeping your digital offerings accurate.

* Marketing: Equips your team to run promotions and engage customers in Atlas. This role allows users to view and create campaigns, manage customer segments, and implement discount strategies, driving sales and loyalty.

* Billing: Provides oversight of all financial transactions and credit management in your Atlas account. Billing users can access detailed transaction records and invoices, and initiate credit purchases.<br>

* Sales Analytics: Designed for in-depth analysis of your sales performance in Atlas. Users can access comprehensive reports on orders and revenue, helping them identify trends and make data-driven decisions.<br>

* Operation Analytics: Offers critical insights into the efficiency of your operations managed through Atlas. This role allows users to monitor order status metrics and analyze workflows to pinpoint areas for improvement.<br>

* Support: Tailored for customer service and feedback handling in Atlas. Support users can access customer details, manage feedback, and analyze NPS (Net Promoter Scores), crucial for enhancing customer satisfaction.

* Non-HQ Analytics: Provides access to analytics data, but strictly limited to specific locations. Users cannot download full business data or reports without a location filter, ensuring localized data security.<br>

* Non-HQ Report: Similar to Non-HQ Analytics, this role limits report access to designated locations only. Users cannot download reports that cover the entire business or access data for unauthorized locations.


# How to Reset Your Password ?

{% embed url="<https://urbanpiper.portal.trainn.co/share/ms29SQxkXPuI5lY3DcpR9g>" %}

People often forget their user ID and password when logging into our platform. Here's a simple guide to updating your password.

### Step-by-Step Guide

1. Visit [login.urbanpiper.com](https://login.urbanpiper.com/).
2. Enter your registered phone number or email address.
3. Your user ID will be your registered email address or phone number.
4. Click Continue.
5. Select the Forgot Password option.
6. Check your registered phone number or email for an OTP.
7. Kindly input the OTP.
8. Create a new password. Please make sure your password is strong and unique.
9. Click on Reset Password.
10. Wait a moment. Your password has been reset successfully.

You can use this password for future logins. Thank you.

<br>


# How to Reset PIN for Store Operations?

{% embed url="<https://urbanpiper.portal.trainn.co/share/AOpBX1DvonfOYM3gHO0znw>" %}

### Steps to Reset the PIN

1. Navigate to All Apps.
2. Click on Settings.
3. Proceed to Users.
4. Search for the user name.
5. Locate your user account.
6. Open the user profile.
7. Select Edit access.
8. Scroll down to find the PIN section.
9. Enter the new PIN and save the changes.
10. Wait a moment for the changes to take effect.


# How to Archive/Delete, or Restore Atlas or Prime User?

{% embed url="<https://urbanpiper.portal.trainn.co/share/wCi4QMOkbt609c4BYiGefA>" %}

This guide will walk you through the simple steps to manage user accounts in Atlas, including how to archive, delete, and restore users. We do not delete a user completely on Atlas.

***

### Steps to Archive a User

Archiving a user allows you to retain their historical data for records while revoking their active access to Atlas.

1. Go to All Apps in your Atlas dashboard.
2. Select Settings.
3. Navigate to the Users tab.
4. Choose the user you want to archive.
5. Click the Archive button.
6. Check the box to confirm "Proceed with archiving the user."
7. Click Archive to finalize the process.

You'll see a "User archiving completed successfully" confirmation. All archived users are listed under the Archived status tab, allowing you to easily view them.

***

### Restoring an Archived User

If you need to grant an archived user access to Atlas again, you can easily restore their account.

1. Navigate to the Users tab within Settings.
2. Change the status filter to Archived to view all archived users.
3. Select the user you wish to restore.

Click on the Reactivate user button (or Restore).


# Submitting an Aggregator Go-Live Request

Learn how to raise a Go-Live Request on an aggregator platform, map your store, and get your menu published. This guide covers everything from submitting the request to tracking its status.

{% embed url="<https://urbanpiper.portal.trainn.co/share/my9ujARfzKlJb2OfKcYHuA>" %}

### How to Request Go-Live on an Aggregator Platform

This guide walks you through submitting a Request to Go Live (RTGL) on an aggregator platform.

***

#### Step 1: Navigate to Platform Settings

1. Click **All Apps**
2. Go to **Settings → Platforms**

You'll see all active integrations for your business listed here.

<figure><img src="/files/jw9ZMdcX5aSZaCthDtvz" alt=""><figcaption></figcaption></figure>

***

#### Step 2: Create a Go-Live Request

1. Select the platform you want to go live on
2. Click **Create Request**

<figure><img src="/files/WzdocpMXJ30Wa4iU8ln2" alt=""><figcaption></figcaption></figure>

1. Fill in the required details (e.g., Swiggy Platform ID, Store URL)
2. Click **Publish and Activate Store** to submit

<figure><img src="/files/wTOYLmFWGJjzVHnmAycn" alt=""><figcaption></figcaption></figure>

***

#### Step 3: Verification and Activation

Once submitted, the system will automatically:

* Verify your menu
* Raise a go-live request with the internal team

> **Note:** Going live typically takes **2–3 business days**, depending on the aggregator's SLA.

***

#### Step 4: Track Your Request

To monitor the status of any submitted request:

1. Click **View Details** on the relevant platform
2. The tracker displays:
   * Menu verification timestamp
   * Date the go-live request was submitted
   * Current mapping status

***

#### Confirmation

Once your store is live, you'll receive an **email notification** confirming that the store is active and the menu has been published.

### Annexure

Use the sections below to find the external IDs required for each platform.

### Talabat

Overview

This guide walks you through how to request a Talabat integration for an outlet that is already live on Talabat. If you are setting up a brand-new location, contact your Talabat account manager to initiate activation before following the steps below.

***

#### Prerequisites

Before raising a request, make sure you have the following details on hand:

* **Talabat Branch ID**
* **Talabat Chain ID**
* **Shop type - Talabat Go, Talabat Marketplace**
* **Integration Type - Tabletless or Tablet-based**

<figure><img src="/files/ek3ydqKpvKeKeUGhiV0i" alt=""><figcaption></figcaption></figure>

***

#### Steps to Raise a Request

1. Go to **Platform** > **Integrations** > **Talabat**.
2. Click **Create Request**.
3. Enter the Branch ID, Chain ID, and integration type for the location you want to take live.
4. Click **Submit**.

Once submitted, the team will pick up the request and coordinate with Talabat to enable the integration.

***

#### Go-Live Timeline

Talabat runs two mapping cycles per week. Your go-live will follow whichever cycle your request falls into.

**Cycle 1**

| Day     | Activity                                               |
| ------- | ------------------------------------------------------ |
| Sunday  | Preliminary configuration and menu push access granted |
| Monday  | Menu to be pushed by POS integrator                    |
| Tuesday | Order relay configuration and test orders              |

**Cycle 2**

| Day       | Activity                                               |
| --------- | ------------------------------------------------------ |
| Tuesday   | Preliminary configuration and menu push access granted |
| Wednesday | Menu to be pushed by POS integrator                    |
| Thursday  | Order relay configuration and test orders              |

***

#### Important Note

{% hint style="info" %}
This process applies only to outlets that are **already live on Talabat**. If the location is new and has not yet been activated on Talabat, contact your Talabat account manager first.
{% endhint %}

<br>


# Deactivate a Location

How to deactivate/disconnect/unmap a store location from one or all Delivery Service providers

### Overview

If a location is permanently closed or no longer in use, you should deactivate and disintegrate it for a specific delivery platform. This unmaps the location from the selected platform, takes it offline, and removes it from your active location count — stopping all UrbanPiper services for that location on that platform.

**NOTE**: you will stop getting billed for the location. However, for the current month in which you initiated the deactivation/unmapping of the location, you would still be billed.

{% hint style="info" %}
**When to use this:** Only deactivate and disintegrate a location if it is **permanently shut down** and you no longer want it mapped to a given platform. Taking a location offline this way is intended for permanent closures — not temporary deactivations or pauses.
{% endhint %}

***

### Before you begin

{% hint style="warning" %}
Make sure the location is **not active** and has **no live orders** on the platform before you disconnect it. Disconnecting a location with active orders can cause order rejections.
{% endhint %}

***

#### Steps to disconnect a location

1. Log in to **Atlas.**
2. Go to your location [listing page](https://atlas.urbanpiper.com/locations)
3. Select the location that you want to deactivate, then open the **Hub** section.
4. Click the **three-dot menu (⋯)** next to the platform you want to disconnect, then select **Disconnect**.<br>

   <figure><img src="/files/OZGVIh3tQHgZZmmMD2iD" alt=""><figcaption></figcaption></figure>
5. Once you click on **Disconnect**, you will be prompted to review the action. Select the checkbox to proceed and then confirm your action by clicking on the "Disconnect" button at the bottom.<br>

   <figure><img src="/files/XH2PSAFRCDbC2mNodq0D" alt=""><figcaption></figcaption></figure>

***

#### What happens after disconnection

After disconnection, UrbanPiper stops the following services for that location on that platform. The location is also excluded from your active location count for billing purposes.

* Order relay
* Catalogue updates
* Inventory control
* Location status updates
* You will no longer be billed for this location

{% hint style="info" %}
This action applies only to the selected platform. Other platforms linked to the same location continue to work normally.
{% endhint %}


# Cancel your subscription

How to cancel your UrbanPiper subscription through Atlas.

### Overview

If you no longer wish to use UrbanPiper services, you can raise a cancellation request directly from your Atlas account. Once your request is processed, all integrated channels are disconnected, and your subscription is cancelled.

**NOTE:** You can cancel from the current billing month or a future one. The full month in which the cancellation takes effect will be charged.

{% hint style="info" %}
**When to use this:** Only raise a cancellation request if you want to stop using **UrbanPiper services permanently**. This is not intended for temporary deactivations or pauses.
{% endhint %}

***

### Before you begin

{% hint style="warning" %}
Download any reports or data you need from UrbanPiper before your **subscription ends**, as your data will be permanently removed after cancellation.
{% endhint %}

***

### **Steps to Cancel a Subscription**

1. **Open All Apps** — Log in to Atlas and go to **All Apps**.
2. **Open Settings** — From the All Apps menu, select **Settings**.

<figure><img src="/files/KPnrifKT2dc9yXRbglwE" alt=""><figcaption></figcaption></figure>

3. **Go to Profile** — Within Settings, select **Profile**.
4. **Find the Cancel Option** — Scroll to the bottom of the Profile page and click **Cancel Subscription**.

<figure><img src="/files/UAWp0x0l7CPwFoE0RXE8" alt=""><figcaption></figcaption></figure>

5. **Review Your Journey** — A quick summary of your account activity is shown. Review it and select **Continue with cancellation.**

<figure><img src="/files/bb37rXSxPffemmqFsIcq" alt=""><figcaption></figcaption></figure>

6. **Fill Out the Form** — A short form will open. Please complete all the fields. Your responses help us understand your reasons for cancelling and gather the context we need to process your request. At the end of the form, type **close account** into the text box to confirm.

<figure><img src="/files/CMzn74Emd4tHBFIKMN57" alt=""><figcaption></figcaption></figure>

<figure><img src="/files/excOy9ysV2keAYRTkQpG" alt=""><figcaption></figcaption></figure>

<figure><img src="/files/vJjVO51edObHENk4oTmr" alt=""><figcaption></figcaption></figure>

7. **Submit the Form** — Once you submit the form, your cancellation request is registered with us.

<figure><img src="/files/D4HUZBpGWF5EORpNO2qu" alt=""><figcaption></figcaption></figure>

***

### **What happens next**

1. After you submit the form, a member of our team will get in touch with you to complete the process and answer any questions you may have.
2. While raising the request, you can choose to cancel from the current billing month or a future month.
   1. :warning: You will be charged for the full month in which your cancellation takes effect.
3. All integrated channels are dis-integrated once your cancellation request is processed, and your orders will stop flowing into UrbanPiper.
4. Orders will stop flowing into UrbanPiper (and your POS, if integrated) from the date selected for Cancellation.

   1. A week after the cancellation date, you won't be able to access your portal any longer.
   2. Should you change your mind, you can always *Withdraw* your request by going to same place you went to cancel your subscription and click on the "Withdraw request" button.

   \
   Below is a video tutorial in Arabic.

{% embed url="<https://drive.google.com/file/d/1Hx_byAlGk5CqyfzD7EhoXgNCEzGjdWd3/view?usp=drive_link>" %}


# Prime app

You can manage your store operations not just through a browser on a laptop, but also using our Android and iOS apps

Prime by UrbanPiper is your all-in-one store management app that lets you manage orders, control your menu inventory, and handle your store's availability — all from a single interface.

**Download the App**

Get Prime on your preferred platform:

* **Android (Play Store):** [Download Prime for Android](https://play.google.com/store/apps/details?id=com.urbanpiper.satellite_prime) — 4.7 stars from 2,000+ restaurant operators on Google Play. The ratings speak for themselves.
* **iOS (App Store):** [Download Prime for iPhone & iPad](https://apps.apple.com/us/app/prime-by-urbanpiper/id1535451930) — 4.8 stars on the App Store. Loved by restaurants, built for the real world.

Prime works on both **phones and tablets**, so you can use it on whichever device suits your store setup best. Before purchasing hardware, see our **Recommended Hardware** section to understand which devices are compatible with Prime.

***

**What You Can Do with Prime**

Once you're set up and logged in, Prime gives you full control over your day-to-day store operations. Here's an overview of everything the app covers:

**Getting Set Up**

* [Connect your tablet to Wi-Fi](https://help.urbanpiper.com/store-manager/prime-app-version/connecting-your-tablet-to-wifi) and [pair a receipt printer](https://help.urbanpiper.com/store-manager/prime-app-version/connecting-printer-to-the-tablet)
* [Load printer paper](https://help.urbanpiper.com/store-manager/prime-app-version/loading-printer-paper) and [configure auto-print settings](https://help.urbanpiper.com/store-manager/prime-app-version/enabling-auto-print-settings) so orders are printed automatically when they arrive
* [Log in securely](https://help.urbanpiper.com/store-manager/prime-app-version/logging-in-to-store-manger) using your email and password, or via a one-time OTP

**Managing Orders**

* View all incoming orders for the day on the [Order Tracker](https://help.urbanpiper.com/store-manager/prime-app-version/manage-orders-on-order-tracker) — your home screen when you open the app
* Accept new orders, track them through preparation stages (New → In Progress → Awaiting Pickup → Dispatched → Completed), and monitor cancellations
* Filter orders by location, platform, delivery time, or time remaining to deliver

**Managing Your Menu & Inventory**

* [Mark items or modifiers as out of stock (86'ing)](https://help.urbanpiper.com/store-manager/prime-app-version/86ing-an-item-or-modifier) directly from the app, with the option to snooze them for a set duration or indefinitely
* Quickly find items using the search bar and manage availability across multiple locations

**Controlling Store Availability**

* [Pause or resume your store](https://help.urbanpiper.com/store-manager/prime-app-version/pause-resume-store) on specific delivery platforms without calling support — useful during rush hours or when your kitchen is overwhelmed
* Manage availability independently per platform for the same store

**Notifications & Support**

* [Configure notification settings](https://help.urbanpiper.com/store-manager/prime-app-version/managing-notifications) to stay on top of new orders and status changes
* Access [aggregator and delivery partner support contacts](https://help.urbanpiper.com/store-manager/prime-app-version/aggregator-delivery-partner-support-contacts) directly within the app
* [Reset your Store Manager password](https://help.urbanpiper.com/store-manager/prime-app-version/password-reset-on-store-manager) if needed


# Connecting your tablet to wifi

{% embed url="<https://urbanpiper.portal.trainn.co/share/CLc12N49FW2C2vaBrYvQzA>" %}

## Connecting Your Tablet to Wi-Fi

In this guide, we'll walk you through the steps to connect your tablet to a Wi-Fi network. Follow these simple instructions to get your tablet online.

### Step-by-Step Guide

1. **Ensure Power Connection:** Make sure your tablet is connected to power and is turned on.
2. **Locate the Wi-Fi App:** Once your tablet is on, look for the Wi-Fi app on the home screen.
3. **Open the Wi-Fi App:** Tap on the Wi-Fi app to open it.
4. **View Available Networks:** You will see a list of available Wi-Fi connections.
5. **Select Your Network:** Search for the Wi-Fi network you wish to connect to and click on it.
6. **Enter Password:** Input the password for the selected Wi-Fi network.
7. **Connect:** Hit the connect button, and you're all set!

Once connected, your tablet will have access to the internet via the selected Wi-Fi network. Enjoy browsing!


# Connecting Printer to the tablet

{% embed url="<https://urbanpiper.portal.trainn.co/share/lwCLecSnN7mG7yH00DI3VQ>" %}

In this guide, we will walk you through the steps to connect your printer to a tablet. Follow these instructions to ensure a successful connection.

### Step 1: Prepare your Tablet

* Ensure your tablet is plugged in.
* Log in to your Prime account on the tablet.

### Step 2: Connect the Printer

* Connect the printer to the tablet using a USB cable.
* Turn the printer on.

### Step 3: Configure Prime App Settings

* Once the printer is turned on, a pop-up will appear asking if you want to always allow Prime to open when the printer is connected.
* Enable the option and click **OK**.

### Step 4: Connect the Printer to the Prime App

1. Click on **More** in the Prime app.
2. Scroll down to **Printer Settings**.
3. Click on the **USB** option to connect your printer via USB.
4. Select the connected printer, and you will see a connected symbol.

Once you see the connected status, your printer is now connected to the tablet. The printer is set to print both Bill and KOT by default.

### Step 5: Test the Printer Connection

* Go to the **Online Order** section to test a printout.
* To test Bill printing for either format, open an active order and click on either **Bill** or **KOT**.
* If you receive the desired printout, your printer connection is successful.

Follow these steps to ensure your printer is properly connected to your tablet and ready for use.


# Loading Printer Paper

Power-off the printer before Loading the paper Roll.

* Make sure the paper roll size is 3 ⅛’ x 220' in size specifications. After getting the roll in your hand, remove the glue and roll about 1 inch of paper from the roll.
* Open the printer cover: Press the “Open” button to open the cover of the printer.<br>

<figure><img src="/files/emAVSHhhsGsVRw4URwDN" alt=""><figcaption></figcaption></figure>

* Remove the used old paper roll and Place the new paper roll: Remove the used, finished paper roll and the core. Hold the thermal paper roll by the edges and place it into the printer. Make sure the paper feeds from the bottom of the roll, coming up over the top. And the thermal side of the paper is close contact to the thermal printhead.

<figure><img src="/files/M04FUeGA8cCWnPQ4GFZb" alt=""><figcaption></figcaption></figure>

* Pull out some paper, and close the roll paper cover and Close the Cover, Once the paper is threaded through the printer, close the cover securely. Some printers may have sensors that detect when the cover is closed, so make sure it clicks or locks into place.

<figure><img src="/files/qjETNi740eZqNIFLIlNW" alt=""><figcaption></figcaption></figure>

* Tear off the Excess paper.

<figure><img src="/files/8Uaw66xROwpWHqCPvkdm" alt=""><figcaption></figcaption></figure>

* &#x20;Turn on the printer and perform a test print: Power on the printer. It may automatically feed a small amount of paper to initialize. Perform a test print to ensure that the paper is loaded correctly and that the print quality is satisfactory.

<br>


# Logging-in to Store Manger

{% embed url="<https://urbanpiper.portal.trainn.co/share/661QImEdQWR6KsbBfkgA6g>" %}

## How to Log in to Prime on your Tablet

In this guide, we'll walk you through the steps to log in to Prime using your tablet device.

### Steps to Log in:

1. **Power On Your Tablet:** Ensure your tablet is plugged into power and turned on.
2. **Locate the Prime App:** Once your tablet is on, find the Prime app on the home screen.
3. **Open the Prime App:** Tap on the Prime app to open it. You will be redirected to the login page.
4. **Initiate Login:** Click on the "Login" button.
5. **Enter Your Email Address:** Type in your email address and hit "Continue."
6. **Choose a Login Method:** You have two options to log in:
   * **Enter Password:** Use your password to log in.
   * **Get OTP on Email:** Choose to receive a six-digit one-time PIN (OTP) on your registered email address.
7. **Enter the OTP:** If you chose the OTP method, enter the one-time PIN you received on your email.
8. **Complete Login:** Hit the "Login" button.

You're all set! You now have access to Prime.


# Enabling Auto-Print Settings

To connect printer to tablet, refer article: [link](broken://pages/jfCoHtXAzhckeTnce3ou)**.**

**Difference between Bill and KOT:**

* **Bill:**
  * A Bill is a formal document issued to the customer at the end of a transaction.
  * It contains details like the list of items purchased, prices, taxes, discounts, and the total amount due.
  * The bill serves as a payment receipt and is used for billing the customer.
* **KOT (Kitchen Order Ticket):**
  * A KOT is an internal order document used in restaurants to communicate food orders from the service staff to the kitchen.
  * It lists the items ordered, their quantity, and any specific preparation instructions.
  * The KOT helps the kitchen staff track orders, but it is not used for billing and has no pricing information.

**Setting up Auto-Print:**

{% embed url="<https://urbanpiper.portal.trainn.co/share/0z1X6k6hpI73iLOOe9co7Q>" %}

### Steps to Enable Auto Print

1. **Access Printer Settings:**
   * Click on *More* in the Prime interface.
   * Scroll down and navigate to *Printer Settings*.
2. **Enable Automated Printing Workflows:**
   * In the Printer Settings, scroll down to find the section for automated printing workflows.
3. **Auto Print a Bill:**
   * Click on *Automatically print bill on*.
   * Select the order status on which you would like the bill to be auto printed. It is recommended to set it to *Acknowledged*.
   * Once the order is acknowledged with the DSP, a printout will be generated for your bill.
4. **Auto Print KOTs:**
   * Click on *Automatically print KOT on*.
   * Choose the desired status for auto printing KOTs.
5. **Disable Auto Print:**
   * To disable auto print for either the bill or KOT, click on the respective option.
   * Select the dotted status, and auto print will be disabled when no status is selected.

By following these steps, you can efficiently manage your auto print settings in Prime, ensuring that your billing and kitchen orders are printed automatically based on your preferred order statuses.


# Managing Notifications

{% embed url="<https://urbanpiper.portal.trainn.co/share/hyypWqvVkERelNmBPh2fsA>" %}

In this guide, we'll walk you through the steps to customize your notification settings using Prime on your tablet.

### Step 1: Access Notification Settings

* Ensure you're logged into Prime on your tablet.
* Click on **More** and navigate to the **Notification** tab.

### Step 2: Customize Notification Settings

Within the Notification tab, you can modify settings for:

* New orders
* When a rider has arrived
* Cancelled orders

#### Enable or Disable Notifications

* By default, notifications are enabled for all statuses.
* To disable a notification, click on the toggle to turn it off.
* Click **Save** to confirm your changes.

#### Change Notification Tone

* Click on the pre-selected tone for the status you wish to change.
* Browse through the available tone options.
* Preview any tone by clicking on it.
* Select your desired tone and click **Done**.

#### Modify Notification Duration

* Click on the timer to adjust the duration of the notification.
* Choose from the available duration options.
* If you select **indefinitely**, the tone will continue until an action is taken on the order.
* Once you've selected the desired duration, click **Done**.

And that's it! Your notification settings are now customized to your preference.


# Manage Orders on Order Tracker

{% embed url="<https://urbanpiper.portal.trainn.co/share/n4K4o9XS082XZupmKuNq0A>" %}

## How to Navigate and Manage Orders Using the Order Tracker on the Prime App

In this guide, we will explore how to effectively use the Order Tracker feature on the Prime app to manage your orders.

### Accessing the Order Tracker

Once you log into Prime, the default page that opens up is the Order Tracker page. Here, you can view all your orders for the current day.

### Viewing Order Details

* Click on any order to open up the order details.
* View the items ordered, the quantities, and the price of each item.
* Click on **Total** to see the taxes, any discounts, and charges applied to the order.

### Order Summary

The summary page provides information on:

* Type of the order (delivery or pickup)
* Order ID
* Time the order was placed
* Delivery time
* Additional details such as location name, platform, platform ID, and customer name

### Managing Order Status

1. All new orders appear in the **New** tab.
2. Click **Accept** to move the order to the **In Progress** state.
3. Orders being prepared show up in the **In Progress** state.
4. Once prepared and packed, click **Food Ready** to move the order to the **Awaiting Pickup** stage.
5. Orders ready for pickup appear in the **Awaiting Pickup** stage.
6. When picked up by the rider, the order moves to **Dispatched**.
7. View dispatched orders under **Dispatch Status**.
8. Once delivered, the order moves to **Completed** status.
9. View all cancelled orders for the day under the **Cancelled** tab.

### Using Filters

To modify your views on the order tracker:

* Click on the **Filter** option.
* Add filters to view orders for a specific location, platform, or sort by delivery time or time left to deliver.

Thank you for using the Prime app to manage your orders efficiently!


# 86'ing an Item or Modifier

{% embed url="<https://urbanpiper.portal.trainn.co/share/rCxhgyi8883noi4q5pImyQ>" %}

In this guide, we will walk you through the steps to 86 an item in the Prime App Inventory section.

### Step 1: Log In and Access Inventory

* Log in to the Prime App.
* Navigate to the Inventory section.

### Step 2: Select Location

* Click on the Location selection.
* Choose the desired location from the list associated with your user.

### Step 3: Search for the Item

* View all sections associated with the menu on the left.
* Select a section to easily search for the item you want to 86.
* Alternatively, filter items by selecting all items, items in stock, or items out of stock.

### Step 4: Toggle Item Status

* To mark an item in stock or out of stock, click on the toggle to turn the item off.
* You can 86 multiple items by scrolling through the menu and toggling multiple items.

### Step 5: Manage Modifiers

* Select modifiers and toggle them on or off by clicking on modifiers for any item.
* Scroll through different modifier groups and toggle the desired modifiers.

### Step 6: Set Snooze Duration

* Return to the inventory section and click on snooze.
* Choose a time period to turn the item off, either indefinitely or for a specific duration.
* For a custom duration, set a date, click OK, and choose a time.

### Step 7: Save Changes

* Once you've selected the duration, click save.
* The items and modifiers will be snoozed until the selected date and time.

### Additional Tips

* Use the search bar to find an item by entering its name and toggle it on or off.
* To turn off selected modifiers, navigate to the modifier section, toggle them off, click snooze, select the duration, and save.

By following these steps, you can efficiently manage your inventory and 86 items as needed in the Prime App.


# Pause/Resume Store

{% embed url="<https://urbanpiper.portal.trainn.co/share/lpDqcIadvIfa547zdURVYQ>" %}

In this guide, we will walk you through the steps to pause or unpause your store on different platforms. Follow these simple steps to manage your store's availability across various delivery channels.

### Step-by-Step Guide

1. **Log in to Prime:** Start by logging into your Prime account.
2. **Access More Options:** Once logged in, click on the *More* option.
3. **Platform Toggle:** Click on the platform toggle option to proceed.
4. **Select Your Store:** Choose the store you wish to pause or unpause by clicking on the store selection bar.
5. **View Associated Platforms:** After selecting the store, you will see the different platforms that the store is associated with.
6. **Pause or Unpause:** To pause or unpause the store on any desired platform, simply click on the toggle for the respective platform.
7. **Save Changes:** Once you have made your selections, click *Save* to apply the changes.

By following these steps, you can easily manage your store's status on various platforms, ensuring that your store is available or unavailable as per your requirements.


# Password Reset on Store Manager

{% embed url="<https://urbanpiper.portal.trainn.co/share/vwoneLz56hWJFATUwb2m0g>" %}

## How to Reset Your Password on the Prime Application

In this guide, we will walk you through the steps to reset your password on the Prime application using your tablet.

### Steps to Reset Your Password

1. **Open the Prime App:** Launch the Prime application on your tablet.
2. **Click on Login:** Tap the 'Login' button to proceed.
3. **Enter Your Email:** Input the email address linked to your Prime account and click 'Continue'.
4. **Forgot Password:** If you can't remember your password, select the 'Forgot Password' option.
5. **Receive Authentication PIN:** A one-time authentication PIN will be sent to your registered email address.
6. **Check Your Email:** Access your email to find the one-time PIN.
7. **Enter the PIN:** Input the received PIN into the Prime app and click 'Verify'.
8. **Set a New Password:** You will be redirected to a page to set a new password. Enter your new password of choice. Re-enter the password to confirm the change.
9. **Reset Password:** Click on 'Reset Password' to finalize the process.
10. **Login with New Password:** You will be redirected to the login page. Enter your new password to continue using Prime.

Congratulations! You have successfully reset your password on the Prime application.


# Aggregator / Delivery Partner Support Contacts

**Need Help with Delivery Partner or Order Logistics?**\
\
If you're facing issues **after an order has been placed**, such as:

* A delivery partner is not picking up the food
* No rider is being assigned
* Delays or order fulfillment issues

We understand how frustrating this can be. Here's what you need to know:

#### 🔍 Who Handles What?

Once an order is placed on an aggregator platform (like Swiggy, Zomato, or Magicpin), **order fulfillment and delivery logistics are managed directly by the aggregator**.\
This includes:

* Delivery partner assignments
* Pickups
* Real-time tracking issues
* Delivery delays

#### ✅ What You Should Do

For the **fastest resolution**, we recommend reaching out **directly to the aggregator's support team**. They are best equipped to assist you with post-order logistics.

***

#### 📱 Where to Find Aggregator Support Contacts in Prime

You can quickly find the relevant contact numbers in your **UrbanPiper Prime App**:

1. Open the **Prime App**
2. Go to the **"More"** section
3. Tap on **"Aggregator Support."**
4. You’ll see a list of support contact numbers for all integrated aggregators

***

#### 📞 Common Aggregator Support Numbers

* **Swiggy Support**:\
  080-6744-6677\
  080-6817-9777
* **Zomato Support**:\
  011-4989-4800
* **Magicpin Support**:\
  7510-175-101

***

{% hint style="info" %}
By contacting the aggregator directly for delivery-related concerns, you ensure the **quickest and most accurate resolution** to your issue.\
\
If you encounter issues before placing your order, such as menu syncing or item availability, please don't hesitate to contact **UrbanPiper Support**.
{% endhint %}


# Prime web

Prime Web is the browser-based version of Prime, built for teams who manage orders from a desktop or laptop. It gives you the same core order management and inventory control capabilities as the app — without needing a dedicated tablet.

**Accessing Prime Web**

Prime Web is accessible directly through the **Atlas management console**. Once you're logged in to Atlas, head to the **Live Order View** section under Online Orders to get started. No additional installation is needed — it runs entirely in your browser.

> **Note:** Prime Web uses **QZ Tray** to connect printers to your browser. You'll need this installed on your system before setting up any printing. See the printer setup guides below for details.

***

**What You Can Do on Prime Web**

Prime Web covers the full order management workflow, along with printer configuration and inventory control. Here's an overview of what the articles in this section walk you through:

**Managing Orders**

* [View and manage live orders](https://help.urbanpiper.com/store-manager/prime-web-version/introduction) as they come in — accept them manually or configure auto-acknowledgement, track them from preparation through to dispatch, and view full order details including items, customer info, and pricing

**Controlling Store Availability**

* [Pause or resume your store](https://help.urbanpiper.com/store-manager/prime-web-version/managing-store-status) on specific platforms directly from the Live Orders view — changes are logged so you have a clear audit trail of when stores were toggled on or off

**Managing Inventory**

* [Mark items or modifiers as out of stock (86'ing)](https://help.urbanpiper.com/store-manager/prime-web-version/managing-stock-86ing-an-item-or-modifier) across one or multiple locations, filter by category, and verify changes through the Logs tab

**Setting Up Printers**

* [Connect a printer on Windows](https://help.urbanpiper.com/store-manager/prime-web-version/connecting-a-printer) or [on macOS](https://help.urbanpiper.com/store-manager/prime-web-version/connecting-a-printer-on-macos) via QZ Tray
* [Assign printers for KOT and invoices](https://help.urbanpiper.com/store-manager/prime-web-version/assigning-a-printer-for-kot-invoice) — configure how many copies print and keep the toggle active so your printer stays ready
* [Set up print automations](https://help.urbanpiper.com/store-manager/prime-web-version/configuring-print-automations) to trigger KOT and bill printing automatically at key order stages — acknowledgement, food ready, or dispatch
* [Configure kitchen station printing](https://help.urbanpiper.com/store-manager/prime-web-version/printing-kot-for-kitchen-stations) to route KOTs to the right counter (e.g. a separate juice bar or grill station) based on menu category

**Advanced Workflows**

* [Set up Scan and Pack](https://help.urbanpiper.com/store-manager/prime-web-version/configuring-scan-and-pack-workflow-on-prime) — a barcode-based packing workflow that uses the KDS to mark items as prepared before dispatch, ideal for high-volume or multi-item orders. Requires activation by the UrbanPiper team

**Notifications**

* [Customise your notification settings](https://help.urbanpiper.com/store-manager/prime-web-version/how-to-customize-order-notification-settings) for new orders, cancellations, customer complaints, and stock changes — pick your alert sounds and configure exactly what you want to be notified about


# Introduction

{% embed url="<https://urbanpiper.portal.trainn.co/share/KojPMTyzsW7G0jBakHl9Ew>" %}

In this guide, we will explore how to manage orders using the Prime Order Tracker tool. This tool helps in managing online orders, controlling stock, configuring printers, and managing notifications.

### Accessing the Prime Order Tracker <a href="#accessing-the-prime-order-tracker" id="accessing-the-prime-order-tracker"></a>

1. Navigate to **Online Orders** and then to **Live Orders**.
2. Here, you will see the interface where all new orders will appear.
3. On the top, you can view the different states of the orders.
4. Use the **Stock Control** button for managing stock, and access additional settings through the three dots menu.

### Managing Orders <a href="#managing-orders" id="managing-orders"></a>

1. When a new order arrives, it will appear as a new order in the Order Tracker UI.
2. You can choose to set the order to auto-acknowledgment or manually accept the orders based on your settings.
3. View all order information, including item details and customer details.
4. Accept the orders, which can be done automatically or manually.
5. Once accepted, the order moves to the **In-Progress** state ,and a Kitchen Order Ticket (KOT) is printed.

### Order Fulfillment <a href="#order-fulfillment" id="order-fulfillment"></a>

1. The KOT is sent to the kitchen for food preparation.
2. Once the food is ready, mark the order as **Food Ready**. This step can also be automated or done manually.
3. After marking as food ready, the order status changes to **Waiting for Pickup**.
4. Orders can be delivered by an aggregator or by the merchant, depending on your business setup.

That's it for managing orders using the Prime Order Tracker.&#x20;

<br>


# Managing Store Status

{% embed url="<https://urbanpiper.portal.trainn.co/share/mBX6UUm9VWMAl57E4tvdRA>" %}

In this guide, we will walk you through the steps to set up an online store using PrimeOrder Tracker. Follow these simple steps to manage your store's online status effectively.

### Step-by-Step Guide <a href="#step-by-step-guide" id="step-by-step-guide"></a>

1. **Access Live Orders:** Begin by heading to the Live Orders section in PrimeOrder Tracker.
2. **Open Session Settings:** Click on the three dots located beside the Stock Control option and select Session Setting.
3. **Select Your Store:** In the Session Setting, you will see a list of all the stores associated with your business. Choose the desired location you wish to make online.
4. **Toggle Online Status:** To mark your location online, simply toggle on the button provided.
5. **Save Changes:** Hit the Save button to queue the request.
6. **Verify Logs:** Once the request has been queued, a log will be captured in the Log section of PrimeOrder Tracker. To verify, head to the Logs tab where you can see the log confirming the store has been marked online.

Thank you for using PrimeOrder Tracker to manage your store's online presence.


# 86'ing an item or modifier

{% embed url="<https://urbanpiper.portal.trainn.co/share/jvK5OJUgxB8c6l8E3IFiLw>" %}

In this guide, we will learn how to manage stock using Prime Order Tracker. This involves managing the stock of items or modifiers efficiently.

### Step 1: Access Stock Control <a href="#step-1-access-stock-control" id="step-1-access-stock-control"></a>

* Navigate to the **Stock Control** section.
* Here, all items will be listed.

### Step 2: Toggle Item Availability <a href="#step-2-toggle-item-availability" id="step-2-toggle-item-availability"></a>

* To turn off an item, simply toggle off the button next to it.
* Ensure to save the changes made.

### Step 3: Manage Stock Across Locations <a href="#step-3-manage-stock-across-locations" id="step-3-manage-stock-across-locations"></a>

* Use the Stock Control feature to manage stock across different locations.
* View all in-stock and out-of-stock items at once.
* Filter items category-wise for more specific control.

### Step 4: Control Modifier Stock <a href="#step-4-control-modifier-stock" id="step-4-control-modifier-stock"></a>

* Navigate to the modifier section to control the stock of modifiers.
* Toggle the top button and hit Save to switch off the particular item or modifier on the aggregator's UI.

### Step 5: Verify Changes <a href="#step-5-verify-changes" id="step-5-verify-changes"></a>

* Go to the **Live Orders** section.
* Access the **Logs** to verify if the item was successfully turned off.

Thank you for using Prime Order Tracker to manage your stock efficiently.


# Connecting a printer

{% embed url="<https://urbanpiper.portal.trainn.co/share/d1LDsZQ05myN1Mj7CsvayQ>" %}

## How to Connect a Printer on PrimeWeb <a href="#how-to-connect-a-printer-on-primeweb" id="how-to-connect-a-printer-on-primeweb"></a>

In this guide, we will walk you through the steps to connect a printer on PrimeWeb. Follow these instructions to successfully configure your printer.

### Step-by-Step Guide <a href="#step-by-step-guide" id="step-by-step-guide"></a>

1. Navigate to the **Prime Online Order** tab.
2. Proceed to the **Live Orders** section.
3. Next to **Stock Control**, locate the three dots icon and click on it.
4. Select **Session Setting** from the dropdown menu.
5. In the settings menu, choose the **Printers** tab.
6. Verify if **QZTray** is connected. Ensure it shows as connected.
7. Click on **Add Your First Printer**.
8. Allow Prime to scan for available printers, then click on **Add**.
9. Once the printer is added, test the print function.
10. A printer notification will appear, confirming successful configuration.

Congratulations! You have completed the printer configuration on PrimeWeb. Thank you for following this guide.

<br>


# Connecting a Printer on macOS

{% embed url="<https://urbanpiper.portal.trainn.co/share/5IGOAS91zKGDICD8u8QC1g>" %}

In this guide, we will walk you through the steps to connect a printer to your macOS system. Follow these instructions to ensure a successful connection.

### Step-by-Step Guide <a href="#step-by-step-guide" id="step-by-step-guide"></a>

1. **Ensure the Printer is Ready:**
   * Make sure your printer is switched on.
   * Ensure the USB cable is properly connected between the printer and your macOS system.
2. **Access System Settings:**
   * Click on the Apple symbol in the top-left corner of your screen.
   * Search for "Printer and Scanner" in the search bar.
3. **Add the Printer:**
   * Click on the "Add Printer" button.
   * Click on "Search Printer" to find available printers.
4. **Select Your Printer:**
   * Choose the printer you want to add. In this example, we are adding an Epson printer.
5. **Choose the Appropriate Driver:**
   * Select a driver that is compatible with your Epson printer model.
6. **Finalize the Setup:**
   * Click on "Add" to complete the setup.
   * Your printer will now appear in the "Edit" section of your system settings.

You can also check the printer details in the system settings to ensure everything is set up correctly.

Thank you for following this guide!

<br>


# Assigning a printer for KOT/Invoice

{% embed url="<https://urbanpiper.portal.trainn.co/share/ENbEvOUv44ba1UgrZv4HhA>" %}

## How to Assign a Printer to KOT and Invoice <a href="#how-to-assign-a-printer-to-kot-and-invoice" id="how-to-assign-a-printer-to-kot-and-invoice"></a>

In this guide, we will walk you through the steps to assign a printer for KOT (Kitchen Order Ticket) and Invoice. Follow the steps below to complete the setup.

### Steps to Assign a Printer <a href="#steps-to-assign-a-printer" id="steps-to-assign-a-printer"></a>

1. Head to **Prime** and navigate to **Live Orders**.
2. Click on the three dots to access more options.
3. Select **Session Settings** from the dropdown menu.
4. Go to the **Printers** tab.
5. Scroll down to find the **Receipt Printers** section.
6. Click on the **Settings** icon next to the printer you want to assign.
7. Assign the added printer in the designated field.
8. Ensure the toggle is always enabled to activate the printer.
9. You can increase the number of printers if needed.
10. Adjust the number of copies to be printed as per your requirement.
11. Once all settings are configured, hit **Save Changes**.

Thank you for following this guide. Your printer is now successfully assigned to KOT and Invoice.


# Print automations

{% embed url="<https://urbanpiper.portal.trainn.co/share/5aMA0rVYgIv60u19ERzQFQ>" %}

## How to Configure Print Automation for KOT and Invoice <a href="#how-to-configure-print-automation-for-kot-and-invoice" id="how-to-configure-print-automation-for-kot-and-invoice"></a>

In this guide, we will walk through the steps to configure print automation for Kitchen Order Tickets (KOT) and Invoices.

### Step-by-Step Guide <a href="#step-by-step-guide" id="step-by-step-guide"></a>

1. **Access Live Orders and Session Setting:**

   Begin by navigating to the Live Orders and Session Setting section of your system.
2. **Navigate to the Printers Tab:**

   Once in the settings, locate and click on the Printers tab.
3. **Scroll to Receive Printers:**

   Scroll down until you find the Receive Printers section.
4. **Open Settings:**

   Click on the Settings icon to access further configurations.
5. **Automated Workflow Configuration:**

   Go to the Automated Workflow tab. Here, you can assign automation for various states of an order such as Acknowledgement, Food Ready, and Dispatch. Choose the desired state for automation.
6. **Save Changes:**

   After selecting the appropriate automation settings, ensure to save the changes.

Once these steps are completed, all printers will automatically print on the Acknowledgement for KOT and Bill. Thank you for following this guide!


# Print KOT for Kitchen Stations

{% embed url="<https://urbanpiper.portal.trainn.co/share/VcT16Zgc7Y8I2oc4GkaRsw>" %}

## How to Set Up and Assign a Kitchen Station for Printing KOTs <a href="#how-to-set-up-and-assign-a-kitchen-station-for-printing-kots" id="how-to-set-up-and-assign-a-kitchen-station-for-printing-kots"></a>

In this guide, we will walk you through the process of setting up and assigning a kitchen station for printing Kitchen Order Tickets (KOTs). Follow these steps to print KOTs for a separate kitchen station or category.

### Step 1: Set Up a Kitchen Station <a href="#step-1-set-up-a-kitchen-station" id="step-1-set-up-a-kitchen-station"></a>

1. Go to **Company Admin**.
2. Click on **Settings Head** and navigate to **Kitchen Operations**.
3. Click on **Add New**.
4. Enter a name for the kitchen station, for example, **Juice Counter**.
5. Click on **Add**.

### Step 2: Assign the Kitchen Station to a Category <a href="#step-2-assign-the-kitchen-station-to-a-category" id="step-2-assign-the-kitchen-station-to-a-category"></a>

1. Go to the **Catalog** and then **Category**.
2. Select your desired category.
3. Navigate to your kitchen stations.
4. Select the kitchen station type.
5. Click on **Save**.

### Step 3: Assign a Printer to the Kitchen Station <a href="#step-3-assign-a-printer-to-the-kitchen-station" id="step-3-assign-a-printer-to-the-kitchen-station"></a>

1. Head to the **Point of Sale**.
2. Click on the **three-dot button**.
3. Select **Session Setting** and go to **Printers**.
4. Scroll down to **Receipt Printer**.
5. Click on the **Settings icon**.
6. Assign a printer to the counter.
7. Click on **Save Changes**.

Now you will be able to print the KOT according to the kitchen station, **Juice Counter**.

Thank you for following this guide!


# Scan and Pack Workflow

{% embed url="<https://urbanpiper.portal.trainn.co/share/aCKMSr2ersbRRaQ9lmWSvw>" %}

**Why Use Scan and Pack?**

Online orders leave little room for packing errors — a missing item means a bad customer rating, a refund request, and a dent in your platform metrics. The Scan and Pack workflow eliminates that risk by making the packing process physically verifiable, not just assumed.

Here's what it solves:

**Accuracy — pack the right items, every time** When Print Labels are enabled, each item in an order gets its own printed barcode label. Kitchen staff scan each label before the order is sealed, creating a physical checkpoint that catches misses before the bag is closed — not after the rider has left. No more relying on memory or visual checks during a busy rush.

**Speed — keep riders moving, improve your platform standing** The moment all items are scanned and marked ready, the order status updates automatically and moves to **Waiting for Pickup**. Riders aren't left waiting for a manual food-ready confirmation, which tightens your prep-to-dispatch time. Faster turnarounds translate directly to better delivery metrics on platforms like Swiggy and Zomato — lower cancellations, better ratings, and improved ranking.

> **Note:** Scan and Pack needs to be activated by the UrbanPiper team before it's available in your account. Reach out to support to get it enabled.

***

**Setting It Up**

**Step 1: Enable the Scan and Pack Module**

1. Contact the UrbanPiper support team to request activation.
2. Once enabled, go to **All Apps → Company Settings → Internal → Module**.
3. Search for **Scan and Pack** and activate it.

**Step 2: Activate the Barcode Scan Flow**

1. Go to the **Live Orders** section.
2. Find the **Scan Barcode Flow** setting and ensure it is enabled.

***

**How It Works**

**With Print Labels (recommended)**

When the **Print Label** toggle is on in the KDS, a separate barcode label is printed for each individual item in the order. Kitchen staff scan each label as items are packed — the order only moves to ready once every item is accounted for.

**Without Print Labels**

If Print Labels are turned off, a single order-level barcode is printed on the bill instead. Scanning that barcode marks the entire order as food ready in one step.

***

**Testing the Workflow**

1. Head to the **Live Orders** section and acknowledge an incoming order.
2. A KOT and a barcoded bill are generated automatically.
3. Go to the **KDS** — the order will appear there.
4. Scan the barcode(s) using your connected scanner to mark the order as ready.
5. The order moves to **Waiting for Pickup**, ready for rider collection.

<br>


# Customise Notification Settings

{% embed url="<https://urbanpiper.portal.trainn.co/share/orEDLQ7VjEuC29vipBFOkA>" %}

This guide will walk you through the simple process of tailoring your notification preferences for various order-related events in Atlas. Stay informed about what matters most to your business!

### Step-by-Step Guide

1. Access Online Order Section: Start by navigating to the Online Order section within your Atlas system.
2. Open Session Settings: On the right side of the screen, locate and click the vertical three-dot option (⋮). From the dropdown menu, select Session Settings.
3. Manage Notifications: Within the Session Settings, you will find options to manage notifications for a variety of events, including:
4. * New orders
   * Customer complaints
   * Cancelled orders
   * Stock toggles (availability changes)
   * And other important updates.
5. Enable Your Preferred Notifications: Simply toggle on the notifications you wish to receive to stay updated.
6. Set Notification Sound: Choose a distinct notification sound from the available options to easily identify incoming alerts.
7. Save Your Settings: After making your selections, click Save to apply your changes.

Please Note: These notification settings are specific to your individual system configuration.

Thank you for using this guide to optimize your order notifications!

<br>


# Cloud printing setup guide

Cloud Printing sends Bills and KOTs to supported Epson thermal printers. The printer receives jobs even when Prime Web or Prime App is not running.

### Prerequisites

Before you set up a cloud printer, confirm the following:

* An Admin has enabled **Cloud Printing** in **Settings** → **Live Orders**.
* The printer connects to your router through a LAN cable. Its network allows outbound internet access without a firewall or proxy block.
* The printer supports Epson Server Direct Print.
* QZ Tray is set up. Add the same printer under **Receipt Printers** in Prime Web.

The receipt-printer setup provides a fallback. If cloud printing fails, print the Bill or KOT from Prime Web.

### Add the printer in Prime Web

Add the printer:

1. In **Live Orders**, click the printer icon in the top bar.
2. In **Cloud printers**, click **Add New**.
3. Enter the printer details:

| Field                | Description                                                     |
| -------------------- | --------------------------------------------------------------- |
| Name                 | A label to identify this printer (e.g., "Epson Printer")        |
| Model                | The exact Epson model, selected from the list                   |
| Print types          | Bill, KOT, or both — whichever this printer should handle       |
| Associated locations | The store location(s) whose orders should route to this printer |
| Notification emails  | Email addresses to notify if a print job on this printer fails  |

4. Click **Save**.

Prime Web displays the printer's **Printer ID** and **Server URL**. You need both values for the printer configuration.

The printer status displays as **Pending** until it connects. To view these values later, open the printer details from the settings icon beside its name.

### Configure the printer in Epson WebConfig

Configure the printer to poll the Server URL:

1. Find the printer's IP address.

   Some models print the address after joining the network. Otherwise, hold **Feed** while turning on the printer. The printer prints a status sheet. Steps vary by model.
2. In a browser, enter the printer's IP address.
3. At the security warning, click **Advanced**.
4. Click **Proceed to `<IP address>` (unsafe)**.
5. Sign in with these credentials:
   * **Username:** `epson`
   * **Password:** the printer serial number printed on its back
6. Click **Sign In**.
7. In the left navigation, select **TM Intelligent** → **EpsonNet Config for TM-i**.
8. Select **Services** → **Server Direct Print**.
9. Enter the following settings:

| Field                 | Value                                                       |
| --------------------- | ----------------------------------------------------------- |
| Server Direct Print   | Enable                                                      |
| Server1 URL           | The Server URL from the printer's details page on Prime Web |
| Server1 Interval      | 20                                                          |
| ID                    | The Printer ID from the printer's details page on Prime Web |
| Password              | Leave blank                                                 |
| URL Encode            | Disable                                                     |
| Name                  | Do not change                                               |
| Server Authentication | Disable                                                     |

10. Click **Apply & Restart**.

The printer applies the settings within one to two minutes. Its Prime Web status changes from **Pending** to **Online** upon successful connection.

### Check failed cloud print jobs

Review failed or expired jobs:

1. In **Live Orders**, click the three-dot menu in the top bar.
2. Click **Cloud Printing**.

The drawer lists failed and expired jobs. Each entry shows the order, printer, print type, and failure reason.


# Foodics

A Guide for UrbanPiper Integration with Foodics.

#### **Introduction**

The **Foodics <> UrbanPiper integration** streamlines restaurant operations by bridging the POS system (Foodics) with major food aggregators through UrbanPiper’s middleware platform. This integration ensures accurate order syncing, centralized menu control, and reduced manual errors—ultimately improving operational efficiency for restaurants.

***

#### **Integration Capabilities:**

* **Real-Time Syncing**: Automatic synchronization of orders, menus, and item availability between Foodics and online delivery platforms (e.g., Talabat, Careem, Zomato).
* **Centralized Management**: Control multiple aggregator menus and operations from a single UrbanPiper dashboard.
* **Inventory & Stock Sync**: Item stock updates from Foodics are reflected on aggregators through UrbanPiper.
* **Order Status Updates**: Seamless transmission of order status changes (accepted, preparing, dispatched) from Foodics to aggregators.

***

#### **Order Relay:**

* Orders placed on aggregators are received by UrbanPiper and instantly **relayed to Foodics POS**.
* Ensures **minimal delay** in order entry, reducing the dependency on manual punch-ins.
* **Order details** like customer info, delivery instructions, and modifiers are passed completely.
* **Order status changes** in Foodics automatically reflect on aggregator platforms via UrbanPiper.

***

#### **Menu Management:**

* Merchants can **push menu changes from Foodics to UrbanPiper**, which then syncs to all linked aggregators.
* **Menu version control** ensures changes are traceable and consistent.
* Supports:
  * Item and modifier mapping
  * Tax & pricing structure sync
  * Availability toggling (e.g., mark items out-of-stock from Foodics)
* Reduces **operational overhead** of managing menus on each aggregator manually.


# Introduction

The **Foodics <> UrbanPiper integration** streamlines restaurant operations by bridging the POS system (Foodics) with major food aggregators through UrbanPiper’s middleware platform.&#x20;

This integration ensures accurate order syncing, centralized menu control, and reduced manual errors—ultimately improving operational efficiency for restaurants.

***

#### **Integration Capabilities**

* **Real-Time Syncing**: Automatic synchronization of orders, menus, and item availability between Foodics and online delivery platforms (e.g., Talabat, Careem).
* **Centralized Management**: Control multiple aggregator menus and operations from a single dashboard.
* **Inventory & Stock Sync**: Item stock updates from Foodics are reflected on aggregators through UrbanPiper.
* **Order Status Updates**: Seamless transmission of order status changes (accepted, preparing, dispatched) from Foodics to aggregators.

***

#### **Order Relay:**

* Orders placed on aggregators are received by UrbanPiper and instantly **relayed to Foodics POS**.
* Ensures **minimal delay** in order entry, reducing the dependency on manual punch-ins.
* **Order details** like customer info, delivery instructions, modifiers, and discounts are passed completely.
* **Order status changes** in Foodics automatically reflect on aggregator platforms via UrbanPiper.

***

#### **Menu Management:**

* Merchants can **pull the menu changes from Foodics to UrbanPiper**, which then syncs to all linked aggregators.

**Product Name, Price, Description, and Image**

* These elements should be **updated directly in the Foodics dashboard**.
* **Do not update** them via UrbanPiper, as Foodics remains the source of truth for menu data.
* **Product Translation**
  * Translations should also be handled in Foodics, **not in UrbanPiper**.
* **Product Availability (In/Out of Stock)**
  * **Item-level availability** can be managed directly from Foodics.
  * It should **not be controlled from UrbanPiper**
* **Menu Sync Status**
  * Not visible or tracked in Foodics.
  * The **sync status is managed in UrbanPiper**.


# Integrate your Foodics account with UrbanPiper

This guide outlines the **onboarding steps**, **timelines**, and **key operational guidelines** for completing the UrbanPiper–Foodics integration successfully.

An UrbanPiper Onboarding Manager will be assigned to work alongside the Foodics team and support you throughout the entire integration process.

### **Onboarding Process Overview**

The onboarding process consists of **three major phases**:

1. **Authorization**
2. **Menu Setup on Foodics**
3. **Menu Pull & Aggregator Mapping**

***

### **1. Authorization**

Follow the steps below to grant integration permissions to UrbanPiper and generate your brand-specific token.

#### **Step 1: Log in to the Foodics Console**

* Log in using **Owner-level access**.
* Navigate to the **Marketplace**.

#### **Step 2: Search & Open the UrbanPiper App**

* Search for **UrbanPiper** in the Marketplace.
* Click the app to open its details screen.
* Enter the credentials:

```
Username: xxxx
Password: xxxxxxxxxxx

UrbanPiper Onboarding Manager will assist you with the password during your onboarding process.
```

#### **Step 3: Authorize the Integration**

* On the UrbanPiper screen, click **Authorize**.
* You will be redirected to Foodics — click **Authorize** again to complete the process.

***

### **2. Menu Setup on Foodics**

#### **Menu Grouping**

* Ensure the **entire menu** is placed under the **UrbanPiper** group.
* The group name must match exactly in spelling (case can differ).

#### **Add Products to the UrbanPiper Group**

* All products that need to appear on aggregator platforms must be assigned to the UrbanPiper group.

#### **Create Charge IDs**

* Create an **Open Charge ID**.
* Add both **Pickup** and **Delivery** charges.

#### **Price Tags (for Differential Pricing)**

If the brand has differential pricing, add the following price tags and associate them with the relevant products:

```
up-talabat
up-toyou
up-mrsool
up-deliveroo
up-radyes
up-eateasy
up-chatfood
up-noonfood
up-hungerstation
up-jahez
up-careem
```

* Tag names are **name-sensitive but not case-sensitive**.

**Pricing Logic**

* If a product has a price tag for a specific aggregator → **that price is used**.
* If no tag exists → **base price is used**.
* If no tags at all → **base price applies to all aggregators**.

***

### **3. Menu Pull in UrbanPiper**

* Once the menu setup is completed and verified in Foodics, UrbanPiper will **pull the menu into the UrbanPiper system**.
* This initiates the **mapping process**.

***

### **4. Aggregator Mapping**

After the menu pull, the UrbanPiper Onboarding Manager will coordinate with the various aggregators to map the brand’s locations.\
This is a **manual process,** and timelines differ by aggregator.

#### **Mapping Timelines**

| Aggregator        | Mapping Timeline                                                            |
| ----------------- | --------------------------------------------------------------------------- |
| **Deliveroo**     | 24–48 hours from request                                                    |
| **Talabat**       | Requests raised every **Sunday/Tuesday**; go-live on **Wednesday/Thursday** |
| **Careem**        | Mapping raised on **Wednesdays**; go-live on **Thursday**                   |
| **Noon / Smiles** | 24–48 hours from request                                                    |
| **Chatfood**      | 3–4 days                                                                    |
| **Keeta**         | Depends on the Keeta mapping team (variable)                                |

***

#### **Completion & Go-Live**

* Once the mapping is completed across all aggregators, the UrbanPiper Onboarding Manager will share the final status.
* Orders can then begin flowing through **Foodics × UrbanPiper**.

\ <br>


# Setting Up Your Foodics Account for Integration with UrbanPiper

{% embed url="<https://urbanpiper.portal.trainn.co/share/1Jjs4gH8JT0APS1CuyDqrQ>" %}

## Setting Up Your Foodics Account for Integration with UrbanPiper <a href="#setting-up-your-foodics-account-for-integration-with-urban-piper" id="setting-up-your-foodics-account-for-integration-with-urban-piper"></a>

In this guide, we will walk you through the necessary steps to properly configure your Foodics account in preparation for integration with Urban Piper.

### Step 1: Create a Dedicated Product Group <a href="#step-1-create-a-dedicated-product-group" id="step-1-create-a-dedicated-product-group"></a>

1. Go to the menu and navigate to the menu builder.
2. Click on groups and then click on create group.
3. Name the group "UrbanPiper" and click save.
4. Add only the items you want to sell online to this group. Items not in the UrbanPiper product group will not be published to delivery platforms.
5. Open the Urban Piper group and click on edit products to add the items you want to show on online platforms.
6. In the group section for UrbanPiper, avoid using the subgroup or combos option as they are not supported.
7. Ensure the items are active, not archived, and have their prices added.
8. Once all items are added, click save.

### Step 2: Check Language Configuration <a href="#step-2-check-language-configuration" id="step-2-check-language-configuration"></a>

1. Set the primary language to English and the secondary language to Arabic for all categories, products, modifiers, and modifier options.
2. Open any product to ensure the product name exists in both English and Arabic.
3. For the description, click on edit product and add the description in both languages.
4. Click save once updated for all platforms and products.

### Step 3: Verify Product Images <a href="#step-3-verify-product-images" id="step-3-verify-product-images"></a>

1. Go back to the products and open any product.
2. Click on edit product and upload the image if missing.
3. Click save after uploading the image.

### Step 4: Update Nutritional Information <a href="#step-4-update-nutritional-information" id="step-4-update-nutritional-information"></a>

1. Ensure each product has updated nutritional info, especially calories, which are mandatory for Saudi Arabia and Kuwait, and recommended for UAE and Egypt.
2. Click on edit nutritional value and update the information.
3. Click save once all nutritional info is updated.

### Step 5: Verify Categories and Modifiers <a href="#step-5-verify-categories-and-modifiers" id="step-5-verify-categories-and-modifiers"></a>

1. Ensure all Categories, modifier groups, options names exist in both Arabic and English, with English as the primary language.

### Step 6: Configure Pricing for Different Platforms <a href="#step-6-configure-pricing-for-different-platforms" id="step-6-configure-pricing-for-different-platforms"></a>

1. For different pricing on platforms like Talabat or Jahez, use price tags.
2. Go to the menu settings and click on price tags.
3. Create a new price tag with the format "up" followed by the platform name (e.g., up-talabat).
4. Open the price tag and add products for which you want different pricing.
5. Update the prices and click save.
6. For modifier options, update prices by adding options first in the price tag and then updating the price.
7. Click save.

### Final Checklist <a href="#final-checklist" id="final-checklist"></a>

Ensure all steps are completed and verified for a successful integration with UrbanPiper.


# إعداد حسابك في Foodics للتكامل مع Urban Piper

{% embed url="<https://urbanpiper.portal.trainn.co/share/qfTngEmDSIV67iijvzRKTQ>" %}

## إعداد حساب Foodics للتكامل مع Urban Piper <a href="#iadad-hsab-foodex-lltkaml-ma-urban-piper" id="iadad-hsab-foodex-lltkaml-ma-urban-piper"></a>

في هذا الفيديو، سنرشدك خلال عملية إعداد حسابك على Foodics لدمجه مع Urban Piper. سنوضح الخطوات اللازمة لتكوين حسابك في Foodics بشكل صحيح استعداداً للتكامل مع Urban Piper.

### الخطوة 1: إنشاء مجموعة منتجات مخصصة لـ Urban Piper <a href="#alkhtwh-1-inshaa-mjmwah-mntjat-mkhssh-l-urban-piper" id="alkhtwh-1-inshaa-mjmwah-mntjat-mkhssh-l-urban-piper"></a>

1. انتقل إلى القائمة، ثم إلى أداة إنشاء القوائم، وانقر على المجموعات.
2. انقر على "إنشاء مجموعة"، وقم بتسميتها "عزف الناي الحضري".
3. انقر على "حفظ". يجب أن تحتوي هذه المجموعة على العناصر التي ترغب في بيعها عبر الإنترنت فقط.
4. افتح مجموعة Urban Piper.
5. انقر على "تعديل المنتجات" لإضافة العناصر التي ترغب في عرضها على المنصات الإلكترونية.
6. بعد إضافة جميع العناصر، انقر فوق "حفظ".

ملاحظة: تجنب استخدام خيارات المجموعة الفرعية أو المجموعة المركبة عند إعداد قسم المجموعة في Urban Piper لأن هذه الميزات غير مدعومة من قبل النظام الأساسي.

### الخطوة 2: تحقق من إعدادات اللغة <a href="#alkhtwh-2-thqq-mn-iadadat-allghh" id="alkhtwh-2-thqq-mn-iadadat-allghh"></a>

1. اضبط اللغة الأساسية على الإنجليزية واللغة الثانوية على العربية. ينطبق هذا على جميع الفئات والمنتجات والمعدلات وخيارات المعدلات.
2. افتح أي منتج للتحقق من تفاصيل المنتج.
3. انقر على "تعديل المنتج" لتحديث وصف المنتج.
4. تأكد من وضع الوصف باللغة الإنجليزية في حقل الوصف، والوصف باللغة العربية في حقل الوصف المحلي.
5. بعد تحديث جميع المنتجات، انقر فوق "حفظ".

### الخطوة 3: إضافة صورة المنتج <a href="#alkhtwh-3-idhafh-swrh-almntj" id="alkhtwh-3-idhafh-swrh-almntj"></a>

1. ارجع إلى صفحة المنتجات.
2. اختر المنتج الذي ترغب في إضافة صورة إليه.
3. انقر على "تعديل المنتج".
4. ستجد خيار تحميل الصورة. بعد تحميل الصورة، انقر على "حفظ".

### الخطوة 4: تحقق من المعلومات الغذائية <a href="#alkhtwh-4-thqq-mn-almalwmat-alghthaeyh" id="alkhtwh-4-thqq-mn-almalwmat-alghthaeyh"></a>

1. تأكد من أن معلومات السعرات الحرارية محدثة لكل منتج في هذا القسم.
2. انقر على "تعديل القيمة الغذائية".
3. بعد تحديث جميع المعلومات الغذائية، انقر على "حفظ".

تأكد من أن اللغة المستخدمة للفئات والصفات تتوافق مع النهج المستخدم للمنتجات، مع اعتبار اللغة الإنجليزية هي اللغة الأساسية واللغة العربية هي اللغة الثانوية.

### الخطوة 5: تعيين أسعار مختلفة لمنصات مثل طلبات أو جاهز <a href="#alkhtwh-5-tayyn-asaar-mkhtlfh-lmnsat-mthl-tlbat-aw-jahz" id="alkhtwh-5-tayyn-asaar-mkhtlfh-lmnsat-mthl-tlbat-aw-jahz"></a>

1. استخدم ميزة علامات الأسعار.
2. انتقل إلى القائمة، ثم إلى إعدادات القائمة، وحدد "علامات الأسعار".
3. لإنشاء بطاقة سعر جديدة، اختر "إنشاء بطاقة سعر".
4. يرجى ملاحظة أن اسم بطاقة السعر يجب أن يكون بالتنسيق التالي: أ. مطبوعة بشرطة ثم اسم المنصة، على سبيل المثال "أ. طلب".
5. بعد وضع بطاقة السعر، افتحها تماما كما تفعل مع كيتا.
6. انقر على "إضافة منتجات" وحدد المنتجات التي ترغب في تحديد أسعار بديلة لها لشركة كيتا.
7. قم بتحديث الأسعار هنا. هذا هو السعر الذي سيظهر على كيتا.
8. انقر على "حفظ".
9. عند التعامل مع خيارات التعديل، ابدأ بإدراج الخيارات في بطاقة السعر قبل المضي قدما في تحديث السعر.
10. انقر على "حفظ".

<br>


# Syncing Menu changes to UrbanPiper

{% embed url="<https://urbanpiper-support.portal.trainn.co/share/wsiHZaI4t3U1KVUc0O6bfQ>" %}

UrbanPiper’s integration with Foodics allows you to **pull the menu directly from the Foodics POS**, ensuring consistency across all aggregator platforms. Follow the steps below once all necessary changes have been made in the Foodics console.

**Step-by-Step Process:**

1. **Login to Atlas (UrbanPiper Business Manager):**\
   Navigate to the Atlas dashboard using your UrbanPiper credentials.
2. **Go to Catalogue → Items:**\
   In the left-hand menu, select **"Catalogue"**, then click on **"Items"**.
3. **Initiate Menu Import:**
   * Click on the **three dots (⋮)** on the top right corner.
   * Choose **“Import Menu”** from the dropdown.
   * Select the appropriate **location** for which you want to sync the menu.
   * Click on **"Import"** to start the process.
4. **Wait for Sync to Complete:**\
   The import process typically takes a **few minutes**. UrbanPiper will pull the latest menu data (items, modifiers, prices, etc.) from Foodics.
5. **Publish the Menu to Aggregators:**\
   Once the menu has been refreshed on UrbanPiper:
   * Go to the **“Catalogue”** section.
   * Select the relevant location and channel (e.g., Talabat).
   * Click on **“Publish”** to push the updated menu to the aggregator platforms.

<figure><img src="/files/IUfaMPFcfblivfZR7q5o" alt=""><figcaption></figcaption></figure>


# Creating & Managing Menu Groups

The **Menu Groups** section in Foodics allows you to organize your items into categories before pushing them to UrbanPiper. Menu Groups are essential as they determine how your menu will appear on aggregator platforms.

#### **How to Create a New Menu Group**

Follow these steps to create a menu group (e.g., Starters, Main Course):

1. Log in to the **Foodics Web Console**.
2. Click on **Menu** in the left-hand sidebar.
3. Click on **Groups**.
4. Click on **Create Group**.
5. Name your group appropriately (e.g., *Burgers*, *Beverages*).

Each group created here is equivalent to a **category** in your delivery menu.

***

#### **1.2 Adding Products to Groups**

Once your group is created, add products to it as follows:

1. Go to **Menu > Groups**.
2. Click on the specific group you wish to edit.
3. Click on **Add Products**.
4. A pop-up will appear showing all existing products in your Foodics account.
5. You can filter and select items using:
   * **Product List**
   * **Tags**
   * **Categories**
6. After selecting the desired items, click **Save**.

Repeat this process to create and populate all necessary groups/categories.

***

#### **Creating the Master Group (UrbanPiper Menu)**

To push the menu to UrbanPiper, you must create one **master group** that contains all the individual category groups.

Steps:

1. Navigate to **Menu > Groups**.
2. Click on **Create Group** and name it **urbanpiper.**
3. Scroll to the **Subgroups** section within the group creation screen.
4. Click on **Add Subgroups**.
5. Select all the groups (categories) you created earlier.
6. Click **Save**.

This master group represents your **complete menu** and will be pushed to UrbanPiper.

***

**Sorting Products Within a Group**

To sort the order in which products appear on aggregators:

1. Go to **Menu > Groups**.
2. Select the desired group.
3. Click on **Sort Group**.
4. Use **drag and drop** to reorder the products as needed.

This order will be reflected when the menu is published to UrbanPiper and synced with delivery platforms.

{% hint style="warning" %}
Always ensure the name of the master group is set as **urbanpiper** and is properly structured before importing it to UrbanPiper. \
\
After syncing, you can log in to UrbanPiper and publish the updated menu to aggregators like Talabat, etc.
{% endhint %}


# Configuring payment methods

Payment methods created in **Foodics** can be **mapped to specific delivery channels** on **UrbanPiper**. For example, you can associate all orders coming from platforms like **Talabat** or **Careem** with a designated payment method (e.g., *Talabat Cash*, *Careem Online*). This helps in **accurate sales reporting and reconciliation**.

***

**How to Create Payment Methods in Foodics**

Follow these steps to create and configure payment methods in the Foodics console:

1. **Login to your Foodics Web Console**.
2. Click on **Manage** from the main navigation.
3. Click on **More**.
4. Select **Payment Methods**.
5. Click on **Add Payment Method**.

A pop-up window will appear with the following fields:

* **Name**: Enter a descriptive name (e.g., *Talabat Cash*).
* **Name Localized (Optional)**: Add a localized name for multi-language support.
* **Type**: Choose **Cash** or **Card** based on how the payment is collected.
* **Code (Optional)**: Input an internal reference code if required.
* **Auto Open Cash Drawer**: Enable this option if you want the cash drawer to open automatically when this method is used at the POS.

6. Click on **Save** to finalize.

{% hint style="info" %}
Once the payment methods are created in Foodics, coordinate with your **UrbanPiper account manager or support team** to **map these methods** correctly to the respective aggregator channels. This ensures proper payment attribution in reporting and analytics.
{% endhint %}


# Enabling Price Tags on Foodics- Aggregator-Specific Pricing

The **Price Tags** feature in Foodics allows restaurants to assign **different prices for the same product** based on the delivery channel, without duplicating the item. This is especially helpful when pricing needs to vary between channels such as **Talabat**, **Careem, etc.**

***

**How to Create and Apply Price Tags in Foodics**

Follow the steps below to configure price tags:

1. **Login to the Foodics Web Console**.
2. Navigate to **Manage > More > Price Tags**.
3. Click on **Create Price Tag**.

A pop-up window will appear with the following fields:

* **Name**: Enter the price tag name (e.g., *Talabat*, *Zomato*, etc.).
* **Order Tags (Optional)**: Link an order tag if needed.
* **Branches**: Choose whether this pricing applies to **all branches** or only specific ones.

4. Click on **Save**.

***

**Adding Products to a Price Tag**

Once the price tag is created, you can apply it to products as follows:

5. Click on the created **Price Tag**.
6. Click on **Add Products**.
7. Select the relevant product(s) from the list.
8. Click **Save**.

Now, the selected products will reflect the pricing defined under this tag when orders are placed through the corresponding delivery channel integrated via **UrbanPiper**.

{% hint style="info" %}
This setup is ideal for managing pricing strategies across various platforms while maintaining a unified product database in Foodics.
{% endhint %}


# Dos & Donts for the integration

## **Dos & Don’ts for UrbanPiper × Foodics Integration**

### **✅ DOs**

#### **Authorization & Access**

* **Use Owner-level access** while enabling the UrbanPiper app on Foodics.
* **Ensure the correct credentials** (admin login) are used for authorization.
* **Verify the authorization is completed** on both the UrbanPiper and Foodics screens.

#### **Menu Setup**

* **Create the ‘UrbanPiper’ menu group** exactly as required (spelling must match).
* **Place all relevant menu items** inside the UrbanPiper group.
* **Add correct Charge IDs** (Pickup + Delivery) as open charges.
* **Use accurate price tags** for each aggregator where differential pricing applies.
* **Double-check product names, variants, tax settings, and availability** before confirming the menu.

#### **Coordination**

* **Inform UrbanPiper promptly** once your Foodics setup is complete for menu pull.
* **Respond quickly** to mapping queries from the UrbanPiper onboarding manager.

#### **Post Go-Live**

* **Monitor orders regularly** during the stability period.
* Ensure the **menu is pulled on UrbanPiper** every time there is a change in the menu on Foodics.

***

### **❌ DON’Ts**

#### **Authorization & Access**

* **Do NOT proceed without owner-level access** — other roles may block permissions.
* **Do NOT edit or delete the UrbanPiper group** after mapping starts.
* **Do NOT change the base menu or product IDs** once onboarding begins without informing UrbanPiper.

#### **Menu Setup**

* **Do NOT rename or alter price tag labels** (names must match exactly).
* **Do NOT add products outside the UrbanPiper group** if they need to appear on aggregators.
* **Do NOT create duplicate product entries** in Foodics, as this causes mapping confusion.

#### **Coordination**

* **Do NOT contact aggregators directly** for mapping — this is handled manually by the UrbanPiper team.
* **Do NOT raise Foodics system issues to UrbanPiper** — these must go via the Foodics AM and their support team.
* **Do NOT request urgent escalations** for non-P0/P1 issues.

#### **Operational**

* **Do NOT make menu changes during mapping** without notifying the UrbanPiper onboarding team.
* **Do NOT expect instant mapping** — timelines vary by aggregator (e.g., Talabat weekly cycle).
* **Do NOT deactivate the UrbanPiper group** or make structural changes during go-live.


# Lightspeed K-Series

Learn how to connect your POS with UrbanPiper

## Introduction

The following section will provide a walkthrough of different steps to connect your Lightspeed KS series with UrbanPiper.

## Authorization

In all Lightspeed K-Series onboarding flows, authorization is the first step. This enables UrbanPiper to establish a connection with the Lightspeed K-Series POS. \
\
This can be accomplished through the UrbanPiper Atlas Portal by navigating to—\
*Settings* → *POS Integrations* → *Checking the Tick Box* → *Authorize*.&#x20;

(if you do not see the option, it could be due to the fact that your POS integration is not enabled. Connect to the customer service team to get this set up for your account)\
\
This will direct the client to the Lightspeed login page.

<figure><img src="https://lh7-rt.googleusercontent.com/docsz/AD_4nXdjTG7ulxSFwaNLQTFtrrsMaPeSOqJHmhqahxN2ZliLj7mySw3GAkDAwicWjKARi2oZ46Q27u4ZlI6-UqQWHn7_lt8ZsRgj9GPo5qQaWlIUdUswm5pxIrix78Gg7972hR-S9vsvsg?key=X9YnzjscoD_ts9KdDDsIxDoh" alt=""><figcaption><p>Authorising your UrbanPiper portal with Lightspeed</p></figcaption></figure>

\
The Lightspeed Login Page will require the user to use their Lightspeed POS backoffice `Username` and `Password`. Once logged in, the screen will display 3 options, and the Client will need to enable all 3.&#x20;

Once this is completed, the Client will be authorized and will see the following screen on UrbanPiper Atlas.

<figure><img src="https://lh7-rt.googleusercontent.com/docsz/AD_4nXdVQKWZBevaSNKSVFfQsHgzR9VJpz-AfwCAev_5SsF3cgj6FJom_BX4XQlFC_IC-QQBsx8jrg7UJpCFxwIn6jctvhQrE5EmtE9ezIxMEKMcDqmaJMc-A2urdfYuc3TKxTBPCnP74w?key=X9YnzjscoD_ts9KdDDsIxDoh" alt=""><figcaption><p>Post authorisation confirmation</p></figcaption></figure>

<figure><img src="https://lh7-rt.googleusercontent.com/docsz/AD_4nXdyZ_Ktyi_WIRgALZpvsAGaj8kqjJN6w4JDT6tBgktpO2jKNU6KmCyvCMjcOE3y6eKuCkgNk6RbIiWEEgqTyaeyjJoyz03pFxjXDZOgkWqtAHcyH5uLSXEG0tbnUcuU845uwH8p-Q?key=X9YnzjscoD_ts9KdDDsIxDoh" alt=""><figcaption><p>Configuration setup for Order injection and Menu publish</p></figcaption></figure>

\
**NOTE:** The Order and Menu Configs will need to be processed by the UrbanPiper CSM Team.

## Configs On Lightspeed K-Series POS

This is a multi-step task that requires processing on the Lightspeed K-Series POS Backoffice by the Client or by the UrbanPiper Team with Approval from the Client.&#x20;

### Create UrbanPiper Accounting Group

The Client/CSM is required to create a new Accounting Group on the Lightspeed K-Series POS Backoffice.

Login to Lightspeed K-Series:\
*Back Office* → *Menu Management* → *Accounting groups* → *Add an Accounting group*

<figure><img src="https://lh7-rt.googleusercontent.com/docsz/AD_4nXeJMmjjWFFBnEUFB1FewbZ7cHDYtY2-bcrQSv6JbOKW6ew6JTlZ45gh1_ziCwBvnxYsQ4Q2BlSwystt1YneG_U8GmfCTGyWeOmkCWTc-zyeUu17CLdiaVAVcLFIsnhcfCL13LhN4g?key=X9YnzjscoD_ts9KdDDsIxDoh" alt=""><figcaption><p>Adding UrbanPiper as an Accounting Group</p></figcaption></figure>

Fill in the following values for the fields—\
**Accounting group name:** UrbanPiper (For ease of Identification)\
**Accounting ID**: “Leave Undefined”\
**Tax profile**: No Tax (as this is a non-taxable field)

This configuration allows the characterisation of the items that will be created by the Client to manage the Integration.

### Create Charge and Discount Items

The specific charges received from the Aggregators will be relayed to the POS with the above tags. if the Client requires Aggregator-specific charges, the same needs to be created Aggregator-specific on the POS Backoffice.

Menu Management in Lightspeed K-Series \
*Back Office* → *Items* → *Create* → *Single Item*

<figure><img src="https://lh7-rt.googleusercontent.com/docsz/AD_4nXfodTZ1soDHTzcCI5CUevRBUacHxnUBogKFQThN2geYL4GmzArG91Sjm25U2w8_Ilg3dK6oyS9g6kppEJc8aZmcdnVv757G367qVKg0XHq7nWuuDi9psMNdhCb2kvGsAL0ZUTAH?key=X9YnzjscoD_ts9KdDDsIxDoh" alt=""><figcaption><p>Creating a Charge</p></figcaption></figure>

<figure><img src="https://lh7-rt.googleusercontent.com/docsz/AD_4nXcxsw4e9pNzH4rLx5sm9RT8Abt3Y8xcvH4e9DPTXm5xHS23ijOI13xiRNeH4_OMWQFmQxDLGTuc8FiYVdwTvotmJno4shlxF477W9x00PivzRDYaCbkXxPskbdoTMDcjQpOCW0Awg?key=X9YnzjscoD_ts9KdDDsIxDoh" alt=""><figcaption><p>Providing Charge details</p></figcaption></figure>

The following charge items must be created in POS Backoffice and assigned to the previously created Accounting Group named "UrbanPiper":

* Service Charge
* Delivery Charge
* Packaging Charge
* Surcharge

\
Additionally, the following discount items should also be created:

* Uber Eats Discount
* Deliveroo Discount
* Just Eat Discount

Important Configuration Details:

All items listed above must:

* Be added to the UrbanPiper Accounting Group
* Have their price type set to "Manually-entered price"
* Share SKU codes for each of the above create Items with the UrbanPiper CSM team (to be updated in the Atlas Portal)

### Create Payment Methods

To support handling third-party/ Aggregator platform transactions, the following custom Payment Methods need to be created in the Lightspeed K-Series POS Backoffice

Lightspeed K-Series POS Backoffice \
*Configuration* → *Settings* → *Payment Methods* → *Add Payment Methods*

<figure><img src="https://lh7-rt.googleusercontent.com/docsz/AD_4nXev68KFOryW7LMRn51H0S5GsEuMh1rPnueD7rzd9i-Q5BqVwdBKyjGrim0DUX0_zZz_07TXyFbeNhh6GwnQkZj4_FB64sbchiHjryFL-eznW_kS91mLABGb1PZFpvM0IDMzbEtYJQ?key=X9YnzjscoD_ts9KdDDsIxDoh" alt=""><figcaption><p>Payment methods</p></figcaption></figure>

Payment Methods to Create:

* ubereats-cash
* ubereats-online
* deliveroo-cash
* deliveroo-online
* justeat-cash
* justeat-online<br>

<figure><img src="https://lh7-rt.googleusercontent.com/docsz/AD_4nXeUvfjncexgRAl9Zf0FKcGq36Wx4HcPQs6X-58t-MRQ2gfpSwKeqjVIJuY7eJahhjBjROPeYlBHMgpc8ULgzc7fsLj4LAmoL_mrUIRvispxGS001J2D7ds8Q4K6Uhgcct9zPw4Kdw?key=X9YnzjscoD_ts9KdDDsIxDoh" alt=""><figcaption><p>Creating a new Payment Method</p></figcaption></figure>

Fields:

* Payment method type: Other Payment Methods
* Code: “the above mentioned” (Please note the code is case sensitive, please copy and paste the above mentioned as the codes)
* Name: Can be the same as code
* Accounting Reference: can be left blank
* Allow Tipping: “True”&#x20;

This data, using the same codes shared above, will be backfilled intothe  Atlas Portal.

### Create Order profiles (Optional)

The client will need to create Order profiles in the Lightspeed K-Series POS Backoffice if they require the orders to be segregated based on the Aggregators - \*Recommended\*

Lightspeed K-Series POS Backoffice Configurations > Settings > Order profiles > Add Order profiles

Order Profiles to be created:

* ubereats-menu
* justeat-menu
* deliveroo-menu

<figure><img src="https://lh7-rt.googleusercontent.com/docsz/AD_4nXcCmZYbNvdtz2QT5o7pKYN6KvA2daAWH4sq13XQ8EIwRieVu1H4GMemwJH1p3Uka0TUXyEN4Xtwzku14tEiSxCjMeYQSqWg4xr0WA2NNAMwFH4aZmmMAlkySoNP5iJ66kj151Xa?key=X9YnzjscoD_ts9KdDDsIxDoh" alt=""><figcaption><p>Order Profile details</p></figcaption></figure>

Fields:

* Name: same as code
* Code: “mentioned above”
* Play sound when receiving online order: “True”
* Takeaway mode: Pick Up
* Order completion: “Complete when ready for Delivery”
* Production deadline: “Disabled”
* Show delivery code on receipt: “True”
* Print a draft receipt when the order is created: “True”

### Other Optional Configs

<figure><img src="https://lh7-rt.googleusercontent.com/docsz/AD_4nXfGKkD9FFKht8DKQjEhJfbk-Jk-3jkcRj2zvduCBp1C84LZDNwCh3KiX64tizbsk5VY24WoHSJzsESr4YRIbFKTtrWZKvcXHJsRu8ATkXqf_Xl6urJKpLVJpiV4BbX8lJYqDTWRmA?key=X9YnzjscoD_ts9KdDDsIxDoh" alt=""><figcaption></figcaption></figure>

Fields:

* Lightspeed POS - Timezone: Select based on location
* Lightspeed POS - Tax Exclusive: Config for NOAM
* Lightspeed POS - Is region North America or not: Config for NOAM
* Lightspeed POS - Food prep time (in minutes): Set-up to establish the delay in relay of Future orders (only) to POS.
* Lightspeed POS - Food prep plus delivery time (in minutes): Set-up to establish the delay in relay of Future orders (only) to POS
* Lightspeed POS - Enable Order Failure Workflow: to track order ingestion on POS and to trigger Push to POS in case of failure via the Prime app
* Lightspeed POS - Enable Order Failure Notification: triggers notification to Lightspeed POS for order failure and reason for failure.

***

## Configs On UrbanPiper Atlas Portal

Once above mentioned Accounting Group, items, payment types and Order Profiles are created in the Lightspeed K-Series POS Backoffice you can would need to update some details on the Atlas portal to ensure that the integration with Lightspeed works as expected.

### Create your Locations

The locations can be created on the UrbanPiper Atlas Portal to match the locations on the POS end.

The Locations can be created as following:\
Navigate to *Locations Tab → Add Location → Select Single* or *More than One* → *fill in required Details* → *Save*

<figure><img src="https://lh7-rt.googleusercontent.com/docsz/AD_4nXea4ZDiCS1PiyAXgv_bX9G19KVSkT7c_Bqs7DDR3RK9xJfof27wE1gscYkEQPGBIcC8Mf1ntvQ_ytTAiHSGuFL3CEe5pYFTQp-PCCa_68R0oE1SGupP0X2U3tcwJyGwLZ0FIsCRsQ?key=X9YnzjscoD_ts9KdDDsIxDoh" alt=""><figcaption><p>Adding a Location</p></figcaption></figure>

Once the location is created, the Lightspeed POS Location ID needs to be added into the POS ID field. The Lightspeed Location ID can either be sourced from the Liughtspeed HomePage URL or Via Postman - (Automation for this process is under development)<br>

<figure><img src="https://lh7-rt.googleusercontent.com/docsz/AD_4nXd1EoPlzyxbEVrxEE3Ag6ekShbKcdgyvwTTMzeY4xaIZyzvPpCl--sSfDpfqPFATUPgIVVWLz9gU41QqrtED9FP35HVehVy0i6Bo6IxL_RluoBdLhX6rHj5tWO2ZeC_od-XAgB1iA?key=X9YnzjscoD_ts9KdDDsIxDoh" alt=""><figcaption><p>Adding details for your Location</p></figcaption></figure>

### Setting up Order Relay

These are the configurations to be done on the UrbanPiper Atlas Portal specifically for order relay to Lightspeed K-Series POS.

This step is again divided into multiple steps.

#### Lightspeed POS - Account Profile

This field directly corresponds to the Order profiles on Lightspeed K-Series POS. Here, the user will need to input the previously created Order profiles on Atlas, associating them with the correct Aggregator. <br>

<figure><img src="https://lh7-rt.googleusercontent.com/docsz/AD_4nXezmDa1pUJllYSOH8pjufXl0chsDB_xPeF_jnOYXsoM81aYHAzDQEZ75WS4x3ZANbgynsQLUZOE6jH3NckDmiLzKxWYcO_dp9g0moSuQ2fmruEXn6AhDsiFUUq_RUUIaPkRo0qvkQ?key=X9YnzjscoD_ts9KdDDsIxDoh" alt=""><figcaption></figcaption></figure>

The same structure needs to be followed for all relevant aggregators.

#### Lightspeed POS - Charge ID

This field directly corresponds to the Charge Items created on Lightspeed K-Series POS. Here, the user will need to input the previously created Charge Item SKUs on Atla, associating them with the correct Aggregator and Charge Name. (Please note that this is case sensitive.)

<figure><img src="https://lh7-rt.googleusercontent.com/docsz/AD_4nXfApapkp2te7Q6CmL0EZwFnlVYzW1Il5zpC594UyF9wLT0w7hw6f7TWs-QJOZYlTHKyywiFNwmGfIsxVIo4gSZNZVOnXEOUkDDoYHREkGVTc9FHrG5iSxx8EqcuqiMXkvAviY0iuA?key=X9YnzjscoD_ts9KdDDsIxDoh" alt=""><figcaption></figcaption></figure>

The string values are the Charge Item SKU on Lightspeed K-Series POS Backoffice.

#### Lightspeed POS - Discount ID

This field directly corresponds to the Discount Items created on Lightspeed K-Series POS. Here, the user will need to input the previously created Discount Item SKUs on Atlas, associating them with the correct Aggregator. (Please note that this is case sensitive.)

<figure><img src="https://lh7-rt.googleusercontent.com/docsz/AD_4nXeOeTcHQCi68XXiF0-lmteuKTWuTFY2LRYTdU7b3XlL6nZ-wQx_BnEfKI-g7UjxwmFcnosSD0YY1Jd-oWMc0vUEiyOLnSbpJ8h6joShpX22s-ljHnYx-w6272nzUvhlA8ktar-4?key=X9YnzjscoD_ts9KdDDsIxDoh" alt=""><figcaption></figcaption></figure>

The string values are the Discount Item SKU on the Lightspeed K-Series POS Backoffice.

This field directly corresponds to the Payment Methods created on Lightspeed K-Series POS. Here, the user will need to input the previously created Payment Methods on Atlas, associating them to the correct Aggregator and type ie. Cash and Online. (Please note that this is case sensitive).<br>

<figure><img src="https://lh7-rt.googleusercontent.com/docsz/AD_4nXfSUH1nRYK4OtK6KVasXEuv3PLapk0ykFO6C7eNSbgDJGITmF2211UluK--xdOk8DsgdJysjQ4B4XRx694w_pRmPmtEVWtqTPE0do1Qxx0vzciAS01Js7m8VnaFGWOmpb58LYys9Q?key=X9YnzjscoD_ts9KdDDsIxDoh" alt=""><figcaption></figcaption></figure>

### Menu Configuration

<figure><img src="https://lh7-rt.googleusercontent.com/docsz/AD_4nXd1F0UpWQUc6u-5Nj23kww7Q6d0Eb26Zs7zH78_wxR27JZCXYyDKklqWkkASbtCTQOyRbPzP-6FS2xa4jNG2N7ws7oxhD6puh7Z_BYcG01MC8WgeJ4sQeE_evWimRCTNopcSsl0Jg?key=X9YnzjscoD_ts9KdDDsIxDoh" alt=""><figcaption></figcaption></figure>

Fields:&#x20;

* Lightspeed POS Menu - Domain value: Menu Name on Lightspeed POS
* Lightspeed POS Menu - ikentooMenuId: Menu ID on Lightspeed POS (Can be sourced via the Menu URL or Postman)
* Lightspeed POS Menu - Merchant Biz Ref ID: Lightspeed POS Biz ID (Can be sourced via the HomePage URL or Postman)
* Lightspeed POS Menu - Accounting Groups to skip: Accounting Group ID - Use UrbanPiper Accounting Group (Can be sourced via the Accounting Group URL or Postman)
* Pull Specific Menu: If enabled, pulls only the Specified Menu using Group Names and Categories
* Use Lightspeed Internal Names: If enabled, Orderides Lightspeed Internal Names to Item Name on UrbanPiper.

Please note: Automation for this process is under development

<br>


# Touchbistro


# Introduction

UrbanPiper’s integration with TouchBistro allows you to seamlessly manage your online ordering operations directly from your POS system.&#x20;

This provides a centralised solution to handle multiple delivery service providers (DSPs) such as DoorDash, Uber Eats, and more from a single platform.

This article outlines the complete onboarding process to help you get your TouchBistro menu live and fully functional across DSP platforms using UrbanPiper.

&#x20;By following the steps in this document, you will be able to:

* Enable the integration between TouchBistro and UrbanPiper
* Prepare your TouchBistro menu for online ordering
* Import your menu into the UrbanPiper Atlas dashboard
* Set up store hours, brand configurations, and locations in Atlas
* Connect and activate your store on DSP platforms
* Manage essential workflows, including:
* Marking items out of stock (86'ing)
* Enabling or disabling stores
* Controlling item availability

<br>


# Zomato

Manage your entire Zomato business from UrbanPiper — menu, orders, discounts, and store availability in one place. Start here to find setup guides, day-to-day operations, and troubleshooting for your

UrbanPiper's Zomato integration lets you manage your entire Zomato business from one place — menu, orders, offers, and availability. Orders flow straight to your POS, and changes you make in UrbanPiper sync back to Zomato.

Here's what you'll find in this section.

### Getting started

* [**Integration Overview**](https://help.urbanpiper.com/ordering-channels/zomato/integration-overview) — What the integration supports across menus, orders, and store controls, plus timelines (activation takes up to 48 hours; menu updates show in 5–10 minutes).
* [**Integrate Your Zomato Account with UrbanPiper**](https://help.urbanpiper.com/ordering-channels/zomato/integrate-your-zomato-account-with-urbanpiper) — Step-by-step guide to going live: prep your Zomato outlet details and submit a "Request to Go Live."

### Day-to-day operations

* [**Manage & Publish Your Menu**](https://help.urbanpiper.com/ordering-channels/zomato/manage-and-publish-your-menu) — Publish menu changes to Zomato, track them in Publish Logs, and fix common publish errors using the error reference table.
* [**Manage Your Orders**](https://help.urbanpiper.com/ordering-channels/zomato/manage-your-orders) — What UrbanPiper can and can't do with Zomato orders: auto-acceptance, status updates, rider tracking, and the two exceptions (no order edits, no Dispatched push).
* [**Running Discounts on Zomato**](https://help.urbanpiper.com/ordering-channels/zomato/running-discounts-on-zomato) — The three sponsorship models (Salt, Pepper, Salt & Pepper), four discount types, and how to set up a restaurant-sponsored offer.

### Controlling availability

* [**Category Schedules**](https://help.urbanpiper.com/ordering-channels/zomato/category-schedules) — Make specific menu categories available only at set times (e.g. breakfast- or dinner-only).
* [**Manage Store Hours**](https://help.urbanpiper.com/ordering-channels/zomato/manage-store-hours) — Set and sync your outlet's operating hours from Business Manager.
* [**Common Store Availability Issue for Zomato**](https://help.urbanpiper.com/ordering-channels/zomato/manage-store-hours/common-store-availability-issue-for-zomato) — Troubleshoot when your store won't show as available: Delivery toggle, GST status, post-publish toggle, and order-rejection closures.

### Quick reference

* **New here?** Read **Integration Overview**, then **Integrate Your Zomato Account** to go live.
* **Already live?** Use **Manage & Publish Your Menu** and **Manage Your Orders** daily, **Running Discounts** for promotions, and **Category Schedules** / **Manage Store Hours** for timing.
* **Something not working?** Start with **Common Store Availability Issue** and the error table in **Manage & Publish Your Menu**.


# Integration Overview

UrbanPiper's integration with Zomato is designed to streamline your operations by giving you a single platform to manage your menu and orders. \
\
You can receive orders from Zomato and have them sent directly to your POS.\
\
You are also able to manage your menu and much more, saving you time and reducing manual effort.

{% hint style="info" %} <mark style="color:$info;">**Activation Timeline:**</mark>\
\ <mark style="color:$info;">The activation process can be completed from Monday to Friday and typically takes up to 48 hours to go live.</mark>
{% endhint %}

### Supported Features

#### Menus

| Feature                  | Supported on UrbanPiper | Description                                            |
| ------------------------ | :---------------------: | ------------------------------------------------------ |
| Real-Time Menu Publish   |            ✅            | Instantly sync menu changes                            |
| Category & Sub-Category  |            ✅            | Manage your menu's sections.                           |
| Item Images              |            ✅            | You can add images for individual items.               |
| Location-Based Pricing   |            ✅            | Apply different prices for different locations.        |
| Item-Level Tax & Charges |            ✅            | Apply taxes and charges to your items.                 |
| Nutritional Info         |            ✅            | Display nutritional information for your products.     |
| Variant & Add-on Groups  |            ✅            | Fully support complex item options and modifiers.      |
| Nested Option Group (L2) |            ✅            | Manage options within options for maximum flexibility. |
| Product Inventory Snooze |            ✅            | Toggle items as out-of-stock for a set period.         |

#### Orders

| Feature              | Supported on UrbanPiper | Description                                                                     |
| -------------------- | :---------------------: | ------------------------------------------------------------------------------- |
| Real-Time Order Push |            ✅            | Orders are sent to your system the moment they are placed.                      |
| Auto-Acceptance      |            ✅            | Automatically accept new orders without manual intervention.                    |
| Order Discount Info  |            ✅            | Receive full details on order-level and item-level discounts.                   |
| Order with Options   |            ✅            | Orders with custom options are fully supported and relayed correctly.           |
| Order Status Update  |            ✅            | Push real-time status updates (Accept, Ready, Dispatched, Delivered) to Zomato. |
| Rider Status Updates |            ✅            | Receive updates on rider status, including Assigned, Arrived, and PickedUp.     |
| Rider Reassignment   |            ✅            | The system will handle and reflect rider reassignment updates.                  |

#### Store

| Feature            | Supported on UrbanPiper | Description                                                   |
| ------------------ | ----------------------- | ------------------------------------------------------------- |
| Store Availability | ✅                       | Manage your store's availability directly from UrbanPiper.    |
| Store Hours        | ✅                       | Manage your store's operatiing hours directly from UrbanPiper |

### Menu Management

UrbanPiper allows you to manage and update your menu on Zomato efficiently. Once you publish the menu from the UrbanPiper platform, the following entities are automatically updated on Zomato

* Product names and descriptions
* Prices, taxes, and charges
* Modifier groups, options, and variants
* Product images
* Product availability

{% hint style="info" %} <mark style="color:$info;">**Important:**</mark> \
\ <mark style="color:$success;">**Always publish the menu after making any changes to prices, product details, or customisation.**</mark>

<mark style="color:$info;">**Menu updates typically take up to 5-10 minutes to appear on the UI.**</mark>
{% endhint %}

### Order Management

When an order is sent from Zomato to UrbanPiper, it includes all the essential details you need for a smooth delivery, such as:

* Items ordered and other order details
* Taxes and Charges
* Customer information (shared when you handle your own delivery)
* Preparation time

With this powerful integration, you can manage your operations with greater speed and accuracy than ever before.


# Integrate Your Zomato Account with UrbanPiper

To start receiving Zomato orders directly on your UrbanPiper account, you’ll need to set up and authorize the integration.

{% hint style="info" %}
**Note**: This requires you to be an active UrbanPiper customer.
{% endhint %}

If you don’t have an UrbanPiper account, please [get in touch ](https://www.urbanpiper.com/contact-us)with our Sales team to learn more about activating your account and getting started.\
\
If you have an existing UrbanPiper account, follow the steps below to activate your Zomato integration

## Step 1-**Prepare your Zomato account**

Ensure your outlet(s) exist in Zomato Merchant and are eligible for online ordering.

Note down:

* Outlet/Restaurant ID(s)
* Outlet URL exactly as listed on Zomato

## Step 2-Initiate Request to Go Live

**Before you begin (quick checklist)**

✅ Location created in UrbanPiper (name, address, phone).

✅ Menu ready in UrbanPiper (categories, items, add-ons/modifiers, taxes).

✅ Operating hours, prep times, and charges (packaging/other fees) decided.

✅ Zomato outlet details on hand (Outlet/Restaurant ID).<br>

* **Access the Location Tab**: Start by navigating to the Location tab and searching for your specific location.
* **Select Your Location**: Click the checkbox next to the location name you wish to activate.
* **Request to Go Live**: Click on the Request to Go Live button and choose the aggregator you want to partner with.
* **Input Aggregator Details:** Enter the aggregator's Platform ID.
* **Finalize Request**: Click the Request to Go Live button to submit your request. You will receive a confirmation that your request has been successfully submitted.

## Step 3-Post-request process

* Once your request is submitted, our **Onboarding team** is automatically notified to begin the mapping process.
* This mapping is carried out **offline**, with assistance from the Zomato team.
* You’ll receive an **email confirmation** once the outlet has been mapped and activated.
* After confirmation, your outlet will be **ready to receive orders via UrbanPiper**.

{% hint style="info" %} <mark style="color:$info;">**Verify that both the Platform ID and the URL are correct to prevent delays.**</mark>\
\ <mark style="color:$info;">**Your outlet is expected to be live within 48 hours.**</mark><br>
{% endhint %}


# Manage & Publish Your Menu

UrbanPiper integration allows you to centrally manage your menu content for all ordering channels.

If your menu is managed on your POS, please [ingest the menu ](/business-manager/importing-your-menus)from the POS to the UrbanPiper platform.\
\
Once the menu is updated on UrbanPiper, you can [publish the changes](/business-manager/publishing-your-menu) to Zomato by performing a menu publish.

You can track the status of your menu publishing requests in the Publish Logs.

* If the publishing is successful, your changes will reflect on Zomato.
* If any errors occur, check the Error Report, make the required corrections, and republish the menu.

### Handling errors

Below are the common menu publish error with possible resolutions.

<table data-header-hidden><thead><tr><th width="256.7109375">Error message</th><th>Description</th><th>Possible Fix</th></tr></thead><tbody><tr><td><pre><code>"message":"No 
Zomato restaurant 
is mapped with 
Outlet Id: 16397"
</code></pre></td><td>Store is not integrated</td><td>Kindly initiate go live from your end to onboard the location.</td></tr><tr><td><pre><code>"value":["`tags`: 
root item tagged 
with services must 
have GST of 5%."
</code></pre></td><td>Tax is not configured or incorrectly tagged between services and packaged goods items.</td><td>If it is a "service item" tax of value 5% needs to be configured. <br><br>If it is a MRP or a packaged goods item "packaged-good" tag needs to be added for all such items.</td></tr><tr><td><pre><code>"message":"Item 
Image URL must be 
end with either 
.png or .jpg or 
.ashx"
</code></pre></td><td>The item image is in a wrong format</td><td>The item image should be in .png or .jpg</td></tr><tr><td><pre><code>"value":["Multiple 
items with same 
name not allowed 
inside a category
</code></pre></td><td>Multiple items with same name is associated with a category</td><td>Remove the duplicate items present in the category.</td></tr><tr><td><pre><code>"value":["zero 
`price.price` 0 
at index 0 is not 
allowed for root 
catalogues"
</code></pre></td><td>Price at item level is zero and there is no variant added for the item</td><td>Either add the price at item level or add a variant with a price.</td></tr><tr><td><pre><code>{"value":["`max` 
should be at least 
1"]
</code></pre></td><td>The number of modifier in a group will be less than the minimum selectable</td><td>Reduce the minimum selectable or add more numbers of modifier</td></tr><tr><td><pre><code>{"value":["`tags`: 
GST Unregistered 
restaurant cannot 
sell goods."]}
</code></pre></td><td>You cannot sell packaged good, if the store has not registered the GST with Zomato</td><td>You should contact your Zomato POC and get the GST updated.</td></tr><tr><td><pre><code>{"catalogue":
{"value":["Empty 
catalogues list"]}
</code></pre></td><td>Category is passed without any item</td><td>All items should be associated with an active category.</td></tr><tr><td><pre><code>{"value":["Multiple
 order level 
 charges not 
 supported"]}
</code></pre></td><td>Multiple charges are associated with the item</td><td>Edit the item to have only one active charge.</td></tr><tr><td><pre><code>["Multiple charges
 for same service"]}
</code></pre></td><td>Multiple charges are associated with the item</td><td>Edit the item to have only one active charge.</td></tr><tr><td><pre><code>"value":["Same tax
 group has been 
 applied more 
 than once"
</code></pre></td><td>Multiple taxes are associated with the item</td><td>Edit the item to have only one active tax of same value.</td></tr><tr><td><pre><code>DELIVERY - only 
interval of 30 
minutes is 
supported TAKEAWAY 
- only interval of 
30 minutes is 
supported
</code></pre></td><td>Timing groups can have timing only with the interval of 30 minutes. Ex: Timing can be either 1:00 or 1:30 not 1:50</td><td>Fix the timing groups so that the minutes are in the interval of 30 mins. Either .00 mins or .30 mins</td></tr><tr><td><pre><code>Non-veg items must 
not contain "veg" 
item tags
</code></pre></td><td>Veg tag has been applied on an item which contains a word indicating non-veg item name or non veg item name in the description for example  "Buffalo mozzarella”</td><td>Check the configured food type for the item or add “[Veg Preparation]” in the item description.</td></tr><tr><td><pre><code>"value": Price 
cannot be greater 
than 4000
</code></pre></td><td>Check the Items who has price more then 4000</td><td>Edit the price value to be less than 4000.</td></tr><tr><td><pre><code>{"code":422,
"status":"failed",
"message":"Data 
validation failed",
"error":"",
"validation_errors":
{"MODIFIER_GROUP":
{"values":{
"mg881552":{"value":
["Cannot be mapped 
to catalogue `Fruit 
Oasis Almond Cake`",
"Cannot be mapped 
to catalogue 
`Rasmalai Elegance 
Harmony Cake`"

</code></pre></td><td>Celebration-Cake tag is missing in item</td><td>Add the tag “Celebration-Cake” and repush the menu</td></tr><tr><td><pre><code>Your outlet is not
live for online
ordering </code></pre></td><td>O2 (online ordering) is not enabled</td><td> Get in touch with the aggregator POC to enable</td></tr><tr><td><pre><code>code': 422, 'status':
'failed', 'message':
'Data validation
failed', 'error': '',
'validation\_errors':
{'CATALOGUE\_PROPERTY\_VALUE':
{'values':
{'pv4834514-59691170':
{'value': \['Invalid
`value` specified' </code></pre></td><td>Name of the modifier is in Decimal or only numerical term</td><td>Update the modifier name and ensure it contains only alphabetical characters.</td></tr></tbody></table>

If you continue to experience issues with your menu publish, please [contact support](/basics/contact-us) for further assistance.


# Manage Your Orders

UrbanPiper’s integration with Zomato enables you to **streamline online order management**, **reduce manual effort**, and **enhance operational efficiency**.

This article provides an overview of the **key features and functionalities** available on the UrbanPiper platform to help you manage your Zomato orders effectively.

### Key Features Supported on UrbanPiper for Zomato Orders:

| **Auto-Acceptance**                           |       ✅      | UrbanPiper can automatically accept new Zomato orders as they come in, speeding up your workflow.                                       |
| --------------------------------------------- | :----------: | --------------------------------------------------------------------------------------------------------------------------------------- |
| **Real-Time Order Push**                      |       ✅      | Orders placed on Zomato are instantly pushed to your UrbanPiper-integrated system, so you're always up-to-date.                         |
| **Edit Order**                                |       ❌      | Orders cannot be edited directly through UrbanPiper. Please use the Zomato partner portal for any modifications.                        |
| **Order Discount Info**                       |       ✅      | Detailed information about all discounts, including **order-level** and **item-level** discounts, is accurately relayed to your system. |
| **Discount Bifurcation**                      |       ✅      | The breakdown of how discounts are applied is supported, providing complete clarity.                                                    |
| **Charge Info**                               |       ✅      | Information regarding various charges, such as delivery and service fees, is accurately transmitted.                                    |
| **Tax Info**                                  |       ✅      | All tax details associated with the order are passed through to your system.                                                            |
| **Orders with Options**                       |       ✅      | Orders that include items with special options (e.g., toppings, sizes) are fully supported.                                             |
| **Order Status Update**                       | <p>✅<br></p> | Keep Zomato informed of your order's progress.                                                                                          |
| **Acceptance (UrbanPiper → Zomato)**          |       ✅      | Confirm order acceptance to Zomato directly from UrbanPiper.                                                                            |
| **Food Ready (UrbanPiper → Zomato)**          |       ✅      | Notify Zomato when an order is ready for pickup.                                                                                        |
| **Dispatched (UrbanPiper → Zomato)**          |       ❌      | Inform Zomato when an order has left your outlet for delivery.                                                                          |
| **Dispatched (Zomato → UrbanPiper)**          |       ✅      | Rider dispatch status updates from Zomato are relayed back to UrbanPiper.                                                               |
| **Delivered/Completed (UrbanPiper → Zomato)** |       ✅      | Mark orders as delivered or completed on Zomato via UrbanPiper.                                                                         |
| **Delivered/Completed (Zomato → UrbanPiper)** |       ✅      | Final delivery confirmation from Zomato is relayed back to UrbanPiper.                                                                  |
| **Cancellation (UrbanPiper → Zomato)**        |       ✅      | Initiate order cancellations from UrbanPiper to Zomato (before acknowledgment).                                                         |
| **Cancellation (Zomato → UrbanPiper)**        |       ✅      | Receive notifications in UrbanPiper for orders that were cancelled by Zomato or the customer.                                           |
| **Rider Status Updates**                      |       ✅      | Monitor the key stages of the rider's journey for your orders.                                                                          |
| **Rider Reassignment**                        |       ✅      | UrbanPiper can reflect when a rider reassignment has occurred for a Zomato order.                                                       |


# Category Schedules

{% embed url="<https://urbanpiper.portal.trainn.co/share/WhA7D8b4rgFe4OdyqvEBKA>" %}

Our Platform allow you to update and manage your menu’s category hours directly from the platform.

If you want certain categories to be available only at specific times (for example, **a Breakfast-only category or a Chinese menu that is available only during dinner hours**), you can use Schedules to define timings for those categories.

In the guide below, we’ll walk you through the steps to create a category schedule and associate it with a menu category.

### Create a New Schedule

* Navigate to the navigation bar.
* Click on "All Apps".
* Select "Schedules".
* Click on "Create a New Schedule".
* Provide a title for your schedule.
* Click on "Next" to proceed.

### Add Timings

Here, you can add timings based on your needs. Options include daily, weekdays, weekends, or custom timings.

* Select the desired timing option.
* **Add the timings. Note that timings should be in multiple of 30 minutes.**
* If needed, add another timing group.
* Click on "Save" to save your schedule.

### Associate Schedule with a Category

* Go to the "Catalog" section.
* Navigate to "Categories".
* Select the desired category to associate the schedule.
* Click on "Associate Category Timing".
* Click on "Save" to confirm the association.

{% hint style="info" %} <mark style="color:$info;">**Note:**</mark> \
\ <mark style="color:$info;">If there are any subcategories under the parent category, you need to assign timings for each subcategory as well. Navigate to the subcategory and associate the timing accordingly.</mark>\
\ <mark style="color:$info;">Please ensure that the support flag for category schedule is enabled before publishing the menu as shown below.</mark>
{% endhint %}

<figure><img src="/files/ivENZTjJi1BiRc4p8oNl" alt=""><figcaption></figcaption></figure>

### Publish the Menu

* Once the timing group is correctly associated, proceed to publish the menu.
* Ensure the menu is published on Zomato.

<br>


# Manage Store Hours

{% embed url="<https://urbanpiper.portal.trainn.co/share/3ykCkZHVj88v5NtJCLz2QA>" %}

UrbanPiper integrations allow you to update and manage your restaurant's operating hours directly through the platform.

To set or modify your restaurant's schedule, go to the[ "Schedules"](https://help.urbanpiper.com/business-manager/setting-up-schedules-for-locations) option available in the UrbanPiper Business Manager. After you have added the schedule for your location, you can[ ](https://help.urbanpiper.com/business-manager/publishing-your-menu)sync it with Zomato.

In this guide, we will learn how to create schedules to set the operating hours for a given location. Follow these steps to create and associate schedules effectively.

1. **Navigate to Schedules:**
   * On the navigation section, click on **Groups**.
   * Then, click on **Schedules**.
2. **Create a New Schedule:**
   * Click on **Regular Schedules** and then **Create New**.
   * Enter the name of the schedule.
   * Click on **Next** to proceed.
3. **Add Timings:**
   * Select the type of schedule: **Daily**, **Weekdays**, **Weekend**, or **Custom**.
   * Select the open and close time.
   * You can choose to add further timings if applicable.
   * Once the timings are created, click on **Save**.
4. **Associate Locations:**
   * Click on **Associate Your First Location**.
   * Select the list of locations you want to associate with the schedule.
   * Click on **Update** to finalize the association.
   * Now, the schedule has been successfully created and associated with the selected location

{% hint style="info" %}
**Note:** Any manual override of store availability will disable store timing. The store time will need to be synced again.
{% endhint %}

If you encounter any discrepancies after following these steps, please feel free to [contact our support ](/basics/contact-us)team for further assistance.

<br>


# Common Store Availability Issue for Zomato

UrbanPiper allows you to manage the availability of your store directly from the dashboard, including turning the store on or off for Zomato. However, there are a few key factors that may affect whether the store's status updates successfully on Zomato’s platform. \
\
Below are the common factors that can impact store availability.

### &#x20;Delivery Enabled Toggle (Under Fulfilment)

* This toggle controls whether delivery is active for your store.
* For newly onboarded stores, it’s essential to connect with your Zomato Point of Contact (POC) to ensure this is enabled from Zomato’s end.
* Without this toggle being enabled, your store may not appear as available, even if it's active in UrbanPiper.\
  \
  ![](https://lh7-rt.googleusercontent.com/docsz/AD_4nXfD9N9hvw36QOp9autLY1jfIqtx1aEQL6N2GMXXyny67Ws8jurEut0MXcevQMteCbWQP6co3DPkuyFf6yP2q-Q4fBDq9IxzMrhWeG-a06dhfU1mSCCada92X1mKLseqkLi4AkDb?key=beh_3J1GIUwfRtnfPGv5tQ)

### &#x20;GST Status – Unregistered

* If you are trying to turn the store on/off and the change appears successful in UrbanPiper but is not reflected on Zomato, it's likely that the GST registration has lapsed or is missing.
* Additionally, if you see the log message “All items are in inactive state” after publishing the menu and the Zomato UI shows “The store is currently unavailable for delivery”, this often indicates GST is unregistered.
* In such cases, please reach out to your Zomato POC to verify and resolve the GST status.\
  \
  ![](https://lh7-rt.googleusercontent.com/docsz/AD_4nXdQbbJ31Mcb3AsN95ImFY8YGBhMikTOxaCex-xvnkCBHg4Asr1Q9XakMdsYK5IHcwLVp_r0AwNf9bOvffdAKuZTT9rVUOFS3QO-UyKNgEccOxIL3vhG8BHLepfPOxY7v5IuAMTc?key=beh_3J1GIUwfRtnfPGv5tQ)

### Auto Store Activation After Menu Publish

* When a menu is published, Zomato automatically disables the store for a short period (about 1–2 minutes) and then reenables it.
* However, if the store was already turned off before the menu was published, you will need to manually turn it off again after the publish to retain the desired state.

### Order Rejections Can Trigger Store Closure

* If an order is rejected, Zomato may automatically turn off the store from their end.
* In such cases, please ensure the store is manually turned back on within 4–5 minutes to avoid disruptions in operations or order flow.<br>

{% hint style="info" %}
**Summary**\
\ <mark style="background-color:$primary;">Managing your store’s availability on Zomato via UrbanPiper is easy, but it’s important to be aware of the above conditions that may influence store visibility.</mark>\
\ <mark style="background-color:$primary;">For any platform-related settings, such as the Delivery toggle or GST registration, your Zomato POC is the best point of contact.</mark>
{% endhint %}

For any issues from the UrbanPiper side, feel free to raise a support request through [UrbanPiper Support](mailto:support@urbanpiper.com)


# Swiggy

Manage your entire Swiggy business from UrbanPiper — menu, orders, and store availability in one place. Start here for setup guides, menu and order management, quality-check fixes, and more.

UrbanPiper's Swiggy integration lets you manage your entire Swiggy business from one place — menu, orders, and availability. Orders flow straight to your POS, and changes you make in UrbanPiper sync back to Swiggy.

Here's what you'll find in this section.

### Getting started

* [**Integration Overview**](https://help.urbanpiper.com/ordering-channels/swiggy/integration-overview) — What the integration supports across menus, orders, and store controls, plus timelines (activation takes up to 48 hours; menu updates show in 5–10 minutes).
* [**Integrate Your Swiggy Account with UrbanPiper**](https://help.urbanpiper.com/ordering-channels/swiggy/integrate-your-swiggy-account-with-urbanpiper) — Step-by-step guide to going live: prep your Swiggy outlet details and submit a "Request to Go Live."

### Menu

* [**Manage & Publish Your Menu**](https://help.urbanpiper.com/ordering-channels/swiggy/manage-and-publish-your-menu) — Publish menu changes to Swiggy, track them in Publish Logs, and fix common publish errors using the error reference table.
* [**Swiggy Quality Check**](https://help.urbanpiper.com/ordering-channels/swiggy/manage-and-publish-your-menu/swiggy-quality-check) — How Swiggy's menu QC works and how to resolve common failures: packaging-charge slabs, duplicate names, formatting/case rules, and cake quantity/flavour requirements.

### Orders

* [**Manage Your Orders**](https://help.urbanpiper.com/ordering-channels/swiggy/manage-your-orders) — What UrbanPiper can and can't do with Swiggy orders: real-time push, order editing, status updates, and rider tracking (note: discount bifurcation isn't supported).
* [**Swiggy's Order Return Feature**](https://help.urbanpiper.com/ordering-channels/swiggy/manage-your-orders/swiggys-order-return-feature) — How reverse logistics (bag return) works: you're paid in full on post-dispatch cancellations and use the Order Return OTP to accept or reject returns.

### Controlling availability

* [**Category Schedules**](https://help.urbanpiper.com/ordering-channels/swiggy/category-schedules) — Make specific menu categories available only at set times (e.g. breakfast- or dinner-only).

### Quick reference

* **New here?** Read **Integration Overview**, then **Integrate Your Swiggy Account** to go live.
* **Already live?** Use **Manage & Publish Your Menu** (and **Swiggy Quality Check**) for menus, **Manage Your Orders** and **Order Return Feature** for orders, and **Category Schedules** for timing.
* **Menu publish failing?** Start with the error table in **Manage & Publish Your Menu** and the **Swiggy Quality Check** resolutions.


# Integration Overview

UrbanPiper's integration with Swiggy is designed to streamline your operations by giving you a single platform to manage your menu and orders. \
\
You can receive orders from Swiggy and have them sent directly to your POS.\
\
You are also able to manage your menu and much more, saving you time and reducing manual effort.

{% hint style="info" %} <mark style="color:$info;">**Activation Timeline:**</mark>\
\ <mark style="color:$info;">The activation process can be completed from Monday to Friday and typically takes up to 48 hours to go live.</mark>
{% endhint %}

### Supported Features

#### Menus

| Feature                  | Supported on UrbanPiper | Description                                            |
| ------------------------ | :---------------------: | ------------------------------------------------------ |
| Real-Time Menu Publish   |            ✅            | Instantly sync menu changes                            |
| Category & Sub-Category  |            ✅            | Manage your menu's sections.                           |
| Item Images              |            ✅            | You can add images for individual items.               |
| Location-Based Pricing   |            ✅            | Apply different prices for different locations.        |
| Item-Level Tax & Charges |            ✅            | Apply taxes and charges to your items.                 |
| Nutritional Info         |            ✅            | Display nutritional information for your products.     |
| Variant & Add-on Groups  |            ✅            | Fully support complex item options and modifiers.      |
| Nested Option Group (L2) |            ✅            | Manage options within options for maximum flexibility. |
| Product Inventory Snooze |            ✅            | Toggle items as out-of-stock for a set period.         |

#### Orders

| Feature              | Supported on UrbanPiper | Description                                                                     |
| -------------------- | :---------------------: | ------------------------------------------------------------------------------- |
| Real-Time Order Push |            ✅            | Orders are sent to your system the moment they are placed.                      |
| Auto-Acceptance      |            ✅            | Automatically accept new orders without manual intervention.                    |
| Order Discount Info  |            ✅            | Receive full details on order-level and item-level discounts.                   |
| Order with Options   |            ✅            | Orders with custom options are fully supported and relayed correctly.           |
| Order Status Update  |            ✅            | Push real-time status updates (Accept, Ready, Dispatched, Delivered) to Swiggy. |
| Rider Status Updates |            ✅            | Receive updates on rider status, including Assigned, Arrived, and PickedUp.     |
| Rider Reassignment   |            ✅            | The system will handle and reflect rider reassignment updates.                  |

#### Store

| Feature            | Supported on UrbanPiper | Description                                                   |
| ------------------ | :---------------------: | ------------------------------------------------------------- |
| Store Availability |            ✅            | Manage your store's availability directly from UrbanPiper.    |
| Store Hours        |            ✅            | Manage your store's operatiing hours directly from UrbanPiper |

### Menu Management

UrbanPiper allows you to manage and update your menu on Swiggy efficiently. Once you publish the menu from the UrbanPiper platform, the following entities are automatically updated on Swiggy.

* Product names and descriptions
* Prices, taxes, and charges
* Modifier groups, options, and variants
* Product images
* Product availability

{% hint style="info" %} <mark style="color:$info;">**Important:**</mark> \
\ <mark style="color:$success;">**Always publish the menu after making any changes to prices, product details, or customisation.**</mark>

<mark style="color:$info;">**Menu updates typically take up to 5-10 minutes to appear on the UI.**</mark>
{% endhint %}

### Order Management

When an order is sent from Swiggy to UrbanPiper, it includes all the essential details you need for a smooth delivery, such as:

* Items ordered and other order details
* Taxes and Charges
* Customer information (shared when you handle your own delivery)
* Preparation time

With this powerful integration, you can manage your operations with greater speed and accuracy than ever before.<br>


# Integrate Your Swiggy Account with UrbanPiper

To start receiving Swiggy orders directly on your UrbanPiper account, you’ll need to set up and authorize the integration.

{% hint style="info" %}
**Note**: This requires you to be an active UrbanPiper customer.
{% endhint %}

If you don’t have an UrbanPiper account, please [get in touch ](https://www.urbanpiper.com/contact-us)with our Sales team to learn more about activating your account and getting started.\
\
If you have an existing UrbanPiper account, follow the steps below to activate your Swiggy integration.

## Step 1-**Prepare your Swiggy account**

Ensure your outlet(s) exist in Swiggy Merchant and are eligible for online ordering.

Note down:

* Outlet/Restaurant ID(s)
* Outlet URL exactly as listed on Swiggy

## Step 2-Initiate Request to Go Live

**Before you begin (quick checklist)**

✅ Location created in UrbanPiper (name, address, phone).

✅ Menu ready in UrbanPiper (categories, items, add-ons/modifiers, taxes).

✅ Operating hours, prep times, and charges (packaging/other fees) decided.

✅ Swiggy outlet details on hand (Outlet/Restaurant ID).<br>

* **Access the Location Tab**: Start by navigating to the Location tab and searching for your specific location.
* **Select Your Location**: Click the checkbox next to the location name you wish to activate.
* **Request to Go Live**: Click on the Request to Go Live button and choose the aggregator you want to partner with.
* **Input Aggregator Details:** Enter the aggregator's Platform ID.
* **Finalize Request**: Click the Request to Go Live button to submit your request. You will receive a confirmation that your request has been successfully submitted.

## Step 3-Post-request process

* Once your request is submitted, our **Onboarding team** is automatically notified to begin the mapping process.
* This mapping is carried out **offline**, with assistance from the Swiggy team.
* You’ll receive an **email confirmation** once the outlet has been mapped and activated.
* After confirmation, your outlet will be **ready to receive orders via UrbanPiper**.

{% hint style="info" %} <mark style="color:$info;">**Verify that both the Platform ID and the URL are correct to prevent delays.**</mark>\
\ <mark style="color:$info;">**Your outlet is expected to be live within 48 hours.**</mark>
{% endhint %}


# Manage & Publish Your Menu

UrbanPiper integration allows you to centrally manage your menu content for all ordering channels.

If your menu is managed on your POS, please [ingest the menu ](/business-manager/importing-your-menus)from the POS to the UrbanPiper platform.\
\
Once the menu is updated on UrbanPiper, you can [publish the changes](/business-manager/publishing-your-menu) to Swiggy by performing a menu publish.

You can track the status of your menu publishing requests in the Publish Logs.

* If the publishing is successful, your changes will reflect on Swiggy.
* If any errors occur, check the Error Report, make the required corrections, and republish the menu.

### &#x20;**Handling errors**<br>

| "Price should be in between 1 to 10000"                                                            | Item price is not within Swiggy’s accepted range.                        | Ensure the item price is between ₹1 and ₹10,000. Reduce if it exceeds ₹10,000.                      |
| -------------------------------------------------------------------------------------------------- | ------------------------------------------------------------------------ | --------------------------------------------------------------------------------------------------- |
| "Item Price cannot be 0 if pricing combination is empty"                                           | Item price is set to 0 and no variants are configured.                   | Either set a price at item level or add at least one variant.                                       |
| "Given restaurant is not correct."                                                                 | Your store isn’t integrated with Swiggy yet.                             | Trigger RTGL (Ready To Go Live) from your end. Our Onboarding team will handle it after that.       |
| "Item Packing Charge cannot be greater than Item Price"                                            | The packaging charge is higher than the item price.                      | Either increase the item price or reduce the packing charge (PC).                                   |
| "size of variant\_combinations in pricing\_combinations should be equal to size of variant groups" | A variant group added to the item is also nested within another variant. | Review and remove duplicate nested variant groups that are already added as a direct add-on.        |
| Unable to connect to upstream system. Please try again later.                                      | Our system couldn’t connect with Swiggy’s servers.                       | Re-try after some time. If it keeps failing, please reach out to support.                           |
| "Addon Max Limit should be in between -1 to 50"                                                    | Add-on group’s maximum selection exceeds 50.                             | Set the maximum selectable value between -1 and 50.                                                 |
| "Item Image URL must end with either .png or .jpg or .ashx"                                        | The image file format is not accepted.                                   | Use item image URLs ending in .png, .jpg, or .ashx only.                                            |
| Proper default dependent details are mandatory in case of multiple variant groups                  | Some variants are missing nested group configurations.                   | Either associate the nested variant group with all variants, or remove the nested group completely. |
| Target server error                                                                                | Menu push is queued up due to multiple pushes or server lag at Swiggy.   | Wait for up to 4 hours. Before publishing the menu again.                                           |
| Target server error with duplicate key error.                                                      | An item and a modifier have the same name, causing conflict.             | Change the item name or modifier name to avoid duplication.                                         |

If you continue to experience issues with your menu publish, please [contact support](/basics/contact-us) for further assistance.


# Swiggy quality check

To improve the overall quality and consistency of menus on the Swiggy platform, Swiggy conducts a Menu Quality Check (QC) on all published menus.

Once the QC is completed and the menu fails:

* Any items failing QC standards are removed from the menu by Swiggy, and menu publishing will be on hold until all errors are fixed
* All subsequent menu updates for the outlet will be applied only after passing QC.\ <br>

{% hint style="info" %}
Note- Swiggy's quality check will be applied location-wise, so there may be a chance that one business location fails the quality check while another location with the same menu will not be affected.
{% endhint %}

### Common QC Failures & Resolutions

### Packaging Charges Issue

Error Message:\
"entity with id : XXXXXXXX was rejected because: Packaging charges Issue (Packaging charges can not be applied beyond the Swiggy Slab)"

Cause:\
The packaging charges set for an item are higher than allowed by Swiggy’s standard pricing slab.

Resolution:\
Configure the packaging charge as per the slab below:

| Item Price (₹) | Allowed Packaging Charge (₹) |
| -------------- | ---------------------------- |
| Less than 50   | 5                            |
| 51 – 150       | 7                            |
| 151 – 300      | 10                           |
| 301 – 500      | 15                           |
| Above 500      | 20                           |

#### &#x20;Important

If you want to set a packaging charge outside the allowed slab, you must get prior approval from your Swiggy POC (Point of Contact).

Without Packaging charge approval, your menu update will be rejected, and you will see an error message.

### &#x20;Duplicate Category Name

Error Message:\
"Category create/update failed with error: \[name: Duplicate 'Category' with id XXXXX and name 'Sandwich' found.], Can't proceed to dependent objects"

Cause:\
Multiple categories or subcategories with the same name exist (e.g., “Sandwich”).

Resolution:\
Ensure that all category, sub-category, and item names are unique. Avoid repetition in names within the same menu structure.

### Duplicate Addon Group Name

Error Message:\
"\[name: Addon group with same name already exists, Cannot update/create addon group.]"

Cause:\
There is already an addon group with the same name in the menu.

Resolution:\
Change the addon group name to something unique.\
If there are multiple (20+) such errors, share the error report with the merchant and guide them on how to rectify each one.

### &#x20;Duplicate Entity Name

Error Message:\
"Duplicate entity with same name already exists"

Cause:\
This occurs when an existing entity is archived and recreated with the same name, or when an entity is edited and ends up duplicating an existing one.

Resolution:\
Try to republish. This often requires menu clearance from Swiggy’s end for which kindly reach out to [UrbanPiper Support](mailto:support@urbanpiper.com)

### &#x20; Improper Formatting (Case Issues)

Cause:\
Menu elements are not in the proper case (e.g., all lowercase or all caps).

Resolution:\
Follow Swiggy’s formatting standards:

* Item, Category, Subcategory, Modifier Group & Modifier Names → Title Case (e.g., Chicken Biryani)
* Connecting Words (with, in, on, etc.) → Lowercase
* Descriptions → Sentence Case (e.g., A spicy rice dish made with chicken and herbs.)

### Missing Quantity or Flavour (Cakes)

Error Message:\
"entity with third\_party\_id: XXXXXXXX was rejected because: Cake Quantity/Flavour it is mandatory to update"

Cause:\
Cake items are missing quantity and flavour details in the item description.

Resolution:\
Update the description to clearly mention both quantity and flavour (e.g., 500g Butterscotch Cake).

### &#x20;Dependent Children Failed to Create/Update

Error Message:\
"Dependent Children Failed to Created/Update."

Cause:\
This is a system-side failure during menu injection on Swiggy's end.

Resolution:\
Try to push the menu again ,if the issue persists please reach out to  [UrbanPiper Support](mailto:support@urbanpiper.com)<br>

### 📝 Final Tips

* Always validate item names, descriptions, and structure before publishing.
* Keep all names unique and meaningful.\ <br>

For any recurring QC failures, reach out to your Swiggy POC for support.


# Manage Your Orders

UrbanPiper’s integration with Swiggy enables you to **streamline online order management**, **reduce manual effort**, and **enhance operational efficiency**.

This article provides an overview of the **key features and functionalities** available on the UrbanPiper platform to help you manage your Swiggy orders effectively.

### Key Features Supported on UrbanPiper for Swiggy Orders:

| Feature                                            | Supported on UrbanPiper | Description                                                                                    |
| -------------------------------------------------- | ----------------------- | ---------------------------------------------------------------------------------------------- |
| **Real-Time Order Push**                           | ✅                       | Orders placed on Swiggy are pushed to your UrbanPiper-integrated system instantly.             |
| **Edit Order Functionality**                       | ✅                       | You can edit Swiggy orders directly through the UrbanPiper platform.                           |
| **Order Discount Info**                            | ✅                       | Detailed information about discounts applied to orders is relayed to your system.              |
| **Order-Level Discount**                           | ✅                       | Discounts applied to the entire order are accurately reflected.                                |
| **Item-Level Discount**                            | ✅                       | Discounts applied to individual items within an order are also supported.                      |
| **Discount Bifurcation**                           | ❌                       | This feature is not currently supported for Swiggy orders.                                     |
| **Charge Info**                                    | ✅                       | Information regarding various charges (e.g., delivery fees, service charges) is relayed.       |
| **Tax Info**                                       | ✅                       | Tax details are not currently transmitted from Swiggy to UrbanPiper.                           |
| **Order with Options**                             | ✅                       | Orders including items with various options (e.g., toppings, sizes) are fully supported.       |
| **Real-time Status Push to Aggregator**            | ✅                       | You can push real-time order status updates from UrbanPiper to Swiggy.                         |
| **Acceptance (UrbanPiper to Aggregator)**          | ✅                       | Confirm order acceptance to Swiggy directly through UrbanPiper.                                |
| **Food Ready (UrbanPiper to Aggregator)**          | ✅                       | Notify Swiggy when the food for an order is ready for pickup.                                  |
| **Dispatched (UrbanPiper to Aggregator)**          | ✅                       | Inform Swiggy when the order has been dispatched from your outlet.                             |
| **Dispatched (Aggregator to UrbanPiper)**          | ✅                       | You will receive a notification in UrbanPiper when a rider has been dispatched by Swiggy.      |
| **Delivered/Completed (UrbanPiper to Aggregator)** | ✅                       | Mark orders as delivered or completed on Swiggy via UrbanPiper.                                |
| **Delivered/Completed (Aggregator to UrbanPiper)** | ✅                       | You will receive the final delivery confirmation from Swiggy in UrbanPiper.                    |
| **Cancellation (UrbanPiper to Aggregator)**        | ✅                       | Initiate order cancellations from UrbanPiper to Swiggy before the order has been acknowledged. |
| **Cancellation (Aggregator to UrbanPiper)**        | ✅                       | Receive notifications in UrbanPiper for orders cancelled by Swiggy or the customer.            |
| **Supported Rider Status**                         | ✅                       | UrbanPiper displays key rider status updates for your Swiggy orders.                           |
| **Rider Assigned**                                 | ✅                       | You will be notified when a rider has been assigned to the order.                              |
| **Rider Arrived**                                  | ✅                       | You will receive an update when the rider has arrived at your location.                        |
| **Picked Up**                                      | ✅                       | The order status will update when the rider picks up the order.                                |
| **Delivered**                                      | ✅                       | The order status will be marked as delivered once the rider completes the delivery.            |
| **Rider Reassignment Handled**                     | ✅                       | UrbanPiper will reflect when a rider reassignment occurs for a Swiggy order.                   |


# Swiggy's Order Return Feature

Swiggy has a feature that allows for "bag return" or "reverse logistics," giving you more control and security over your orders. Now, even if an order is canceled after it has been dispatched from your store, you will still be paid the full estimated amount.

This feature is designed to handle situations where an order can't be delivered due to operational or personal issues. It ensures you don't lose revenue, and it provides a clear process for handling potential returns.

#### How the New Flow Works

The entire process is designed to be straightforward and protect your business.

* Order Placed & Dispatched: A customer places an order, and a rider picks it up from your outlet.
* Order Canceled, You Still Get Paid. If the rider or the end customer cancels the order after it has been dispatched, you will still be paid the full amount.
* Return Flow Initiates: Swiggy makes a decision on whether to return the order to your outlet. If they do, the return process begins.

<figure><img src="/files/x2xHyWvKtIIP4ACXu71z" alt=""><figcaption></figcaption></figure>

* Order Return OTP: A special Order Return OTP will appear on your UrbanPiper screen. To get the OTP, click on the delivery person's name tab. This is your key to accepting the returned order.

<figure><img src="/files/Fo04FGJ0xA1X0mHgUhaE" alt=""><figcaption></figcaption></figure>

* You Decide When the rider returns with the order, you have the choice to either accept it or not.
* To accept the order, share the Order Return OTP with the rider.
* To reject the order, simply do not share the OTP. The order will be marked as "unsuccessful" and the rider will dispose of it.

This process ensures you have the final say on whether to take back the returned product.

***

#### Key Benefits for You

* Guaranteed Revenue ✅: You are paid the full estimated amount for the order, regardless of whether it is successfully delivered or returned.
* Full Control ✅: The Order Return OTP puts you in complete control. You can decide to accept or reject the returned order based on your preference.
* Simpler Operations ✅: This streamlined process reduces complexity and provides a clear protocol for handling cancellations that occur mid-delivery.

***

#### Frequently Asked Questions

**What is Swiggy's Reverse Logistics Flow?**

It's a feature that allows riders or customers to cancel an order after it has been dispatched. It includes a specific process for returning the physical bag to you, if needed, while ensuring you still get paid for the order.

**Will I lose money if an order is canceled after the rider has picked it up?**

No. Under this new flow, even if an order is canceled post-dispatch, you will receive the full estimated payment for that order.

**What is the Order Return OTP?**

The Order Return OTP is a unique code displayed on your UrbanPiper screen. To get the OTP, click on the delivery person's name tab. You must provide this OTP to the Swiggy rider to confirm that you have accepted the returned order bag.

**Do I have to accept the returned order bag?**

No, it's your decision. If you do not wish to accept the returned order, simply do not share the Order Return OTP with the rider. Swiggy will handle the disposal of the order.

If you have any other questions or concerns, feel free to reach out to our support team!

<br>


# Category Schedules

{% embed url="<https://urbanpiper.portal.trainn.co/share/WhA7D8b4rgFe4OdyqvEBKA>" %}

Our Platform allow you to update and manage your menu’s category hours directly from the platform.

If you want certain categories to be available only at specific times (for example, **a Breakfast-only category or a Chinese menu that is available only during dinner hours**), you can use Schedules to define timings for those categories.

In the guide below, we’ll walk you through the steps to create a category schedule and associate it with a menu category.

### Create a New Schedule

* Navigate to the navigation bar.
* Click on "All Apps".
* Select "Schedules".
* Click on "Create a New Schedule".
* Provide a title for your schedule.
* Click on "Next" to proceed.

### Add Timings

Here, you can add timings based on your needs. Options include daily, weekdays, weekends, or custom timings.

* Select the desired timing option.
* **Add the timings. Note that timings should be in multiples of 30 minutes.**
* If needed, add another timing group.
* Click on "Save" to save your schedule.

### Associate Schedule with a Category

* Go to the "Catalog" section.
* Navigate to "Categories".
* Select the desired category to associate the schedule.
* Click on "Associate Category Timing".
* Click on "Save" to confirm the association.

{% hint style="info" %} <mark style="color:$info;">**Note:**</mark> \
\ <mark style="color:$info;">If there are any subcategories under the parent category, you need to assign timings for each subcategory as well. Navigate to the subcategory and associate the timing accordingly.</mark>\
\ <mark style="color:$info;">Please ensure that the support flag for category schedule is enabled before publishing the menu as shown below.</mark>
{% endhint %}

<br>

<figure><img src="/files/UJsyEOYIoi4UyQYF7UIF" alt=""><figcaption></figcaption></figure>

If you're unsure whether this setting is active, please check with your UrbanPiper onboarding/support team.


# Uber Eats

Manage your entire Uber Eats business from UrbanPiper — menu, timings, promotions, and prep times in one place. Start here for setup, menu management, and day-to-day operations.

UrbanPiper's Uber Eats integration lets you manage your entire Uber Eats business from one place — menu, orders, timings, and prep times. Orders flow from Uber Eats straight to your POS, and menu changes you make in UrbanPiper sync back to Uber Eats.

Here's what you'll find in this section.

### Getting started

* [**Getting started**](https://help.urbanpiper.com/ordering-channels/uber-eats/getting-started) — How the integration works end to end, what data is synced with each menu push, when a push is (and isn't) needed, and what order details flow from Uber Eats to UrbanPiper.

### Menu

* [**Update and publish your menu**](https://help.urbanpiper.com/ordering-channels/uber-eats/update-and-publish-your-menu) — Manage your menu centrally in UrbanPiper and publish changes to Uber Eats (ensure store opening hours are set in Atlas first).
* [**Update menu timings**](https://help.urbanpiper.com/ordering-channels/uber-eats/update-menu-timings) — Set and manage your operating hours via Schedules in Business Manager, then publish to sync with Uber Eats.

### Promotions & operations

* [**Handling Discounts and Promotions**](https://help.urbanpiper.com/ordering-channels/uber-eats/handling-discounts-and-promotions) — Promotion options to set up with your Uber Eats account manager, and how discount data is relayed to UrbanPiper and your POS (check POS compatibility with support first).
* [**Manage order prep time**](https://help.urbanpiper.com/ordering-channels/uber-eats/manage-order-prep-time) — Configure Normal and Busy prep times in Atlas and Save & Sync to Uber Eats (no menu publish needed; active mode is controlled from Prime).

### Quick reference

* **New here?** Read **Getting started** to understand the order and menu flow.
* **Managing your menu?** Use **Update and publish your menu** and **Update menu timings**.
* **Running offers or tuning operations?** See **Handling Discounts and Promotions** and **Manage order prep time**.


# Getting started

With UrbanPiper’s integration, you can **seamlessly receive orders from your Uber Eats account** and automatically push them **to your POS system**. The integration also allows for **centralized menu management**, enabling real-time updates across platforms.

***

#### **How It Works**

1. A **customer places an order** on Uber Eats.
2. The order appears on your **Uber Eats tablet** for manual or **automatic acceptance**
3. Once accepted:
   * The order is sent to **UrbanPiper**.
   * The order is then pushed to your **POS** or **UrbanPiper Store Manager.**

***

#### **Menu Management**

UrbanPiper allows you to manage and sync your Uber Eats menu efficiently.

**Elements sent to Uber Eats with a Menu Push:**

* Product name
* Product snooze (out-of-stock)
* Prices
* Modifier groups/options
* Modifiers/options
* Product images\*
* Descriptions
* Menu availabilities (≠ restaurant opening times)
* Product tags (limit applies)

> ⏱ **Menu updates may take up to 5 minutes** to reflect on Uber Eats.

> 🎨 *Note: Banner images cannot be updated via UrbanPiper. Contact your Uber Eats account manager or Uber Eats support for manual changes.*

***

**When You Need to Push the Menu**

* After **any changes** to the menu
* When **menu availabilities** are updated

**When You Do NOT Need to Push the Menu**

* When a **product is** marked out of stock

***

#### **Order Management**

The following order data is sent from Uber Eats to UrbanPiper:

* Order details
* Pick-up time
* Order notes
* Delivery fees
* Customer information
  * *(Customer address is shared only when you handle delivery yourself)*


# Update and publish your menu

UrbanPiper integrations allow you to manage your menu content centrally for all ordering channels.\
\
If your menu is managed on your POS, please [update the menu on UrbanPiper ](/business-manager/importing-your-menus)by pulling the menu from the POS.\
\
Once the menu is updated on UrbanPiper, you can [publish the changes to Uber Eats](/business-manager/publishing-your-menu) by performing a menu publishing to Uber Eats.

{% hint style="warning" %}
You need to ensure that opening hours for your store are configured on Atlas before publishing your menu to Uber Eats.
{% endhint %}


# Update menu timings

UrbanPiper integrations enable you to update and manage your restaurant's operating hours directly from the platform. \
\
To set or modify your restaurant timings, navigate to the [schedules ](/business-manager/setting-up-schedules-for-locations)option available in the UrbanPiper Business Manager.&#x20;

Once you’ve added the schedule for your location, you can [publish the changes](/business-manager/publishing-your-menu) to Ubeats by performing a menu publish action.

In case you have any further discrepancies even after the above steps, feel free to contact our support team for further assistance.\
\ <br>


# Manage order prep time

You can set and manage your **Normal** and **Busy** prep times directly in Atlas, helping you better align with kitchen operations and improve customer experience.

***

#### **Getting Started**

Follow these steps to set up your prep times:

1. **Log in** to your Atlas account.
2. Navigate to:\
   **Settings → Platforms → Automations Tab → Food Preparation Time**
3. Enter your desired:
   * **Normal Prep Time**
   * **Busy Prep Time**\
     *(Note: Busy time must be **greater** than the normal prep time.)*
4. Select the appropriate level to apply these settings:
   * **Location level** or
   * **Business level**
5. Click **Save and Sync** to push the prep times to **Uber Eats**.

***

{% hint style="info" %}

#### **Important Notes**

* The **active prep time mode (Normal or Busy)** is controlled from **Prime** — not Atlas.
* Atlas is used **only for configuring and syncing** prep time values.
* **Changing prep time does not require a menu publish**. However, after updating, you **must click “Save and Sync”** for changes to reflect.
  {% endhint %}

***

This gives you more flexibility and control over your order flow during peak and non-peak hours.

&#x20;Reach out to our support team for further clarification.


# Keeta

Manage your entire Keeta business from UrbanPiper — menu, item and modifier availability, orders, discounts, and store hours in one place. Start here for setup, menu, and day-to-day operations.

UrbanPiper's Keeta integration lets you manage your entire Keeta business from one place — menu, item and modifier availability, orders, discounts, and store hours. Orders flow straight to your POS, and changes you make in UrbanPiper sync back to Keeta.

Here's what you'll find in this section.

### Getting started

* [**Integration Overview**](https://help.urbanpiper.com/ordering-channels/keeta/integration-overview) — What the integration supports across menus, orders, and store controls, plus timelines (activation takes up to 48 hours; menu updates show in 5–10 minutes).
* [**Integrate Your Keeta Account with UrbanPiper**](https://help.urbanpiper.com/ordering-channels/keeta/integrate-your-keeta-account-with-urbanpiper) — Step-by-step guide to going live: prep your Keeta outlet details and submit a "Request to Go Live."

### Menu & availability

* [**Manage Your Menu**](https://help.urbanpiper.com/ordering-channels/keeta/manage-your-menu) — Publish menu changes to Keeta, track them in Publish Logs, and fix common publish errors using the error reference table (unique names, category/item/option limits, restricted keywords, image formats).
* [**Manage Item Availability**](https://help.urbanpiper.com/ordering-channels/keeta/manage-item-availability) — Mark items out-of-stock in real time and in bulk (note: auto stock-in isn't supported — items must be stocked back in manually).
* [**Manage Modifier Availability**](https://help.urbanpiper.com/ordering-channels/keeta/manage-modifier-availability) — Same real-time, bulk control for modifiers (auto stock-in not supported).

### Orders & promotions

* [**Manage Your Orders**](https://help.urbanpiper.com/ordering-channels/keeta/manage-your-orders) — What UrbanPiper supports for Keeta orders: real-time push, discount/charge/tax info, full status updates, and cancellations.
* [**Running Discounts on Keeta**](https://help.urbanpiper.com/ordering-channels/keeta/running-discounts-on-keeta) — The three sponsorship models (restaurant, Keeta, shared) and four discount types (fixed, percentage, percentage dish, delivery fee), all configured on the Keeta Dashboard.

### Controlling availability

* [**Manage Store Hours**](https://help.urbanpiper.com/ordering-channels/keeta/manage-store-hours) — Set and sync your outlet's operating hours via Schedules in Business Manager (note: manual availability overrides disable store timing and need re-syncing).

### Quick reference

* **New here?** Read **Integration Overview**, then **Integrate Your Keeta Account** to go live.
* **Managing your menu?** Use **Manage Your Menu**, plus **Item** and **Modifier Availability** for real-time stock control.
* **Orders and offers?** See **Manage Your Orders** and **Running Discounts on Keeta**; use **Manage Store Hours** for operating times.


# Integration Overview

UrbanPiper's integration with Keeta is designed to streamline your operations by giving you a single platform to manage your menu and orders.

You can receive orders from Keeta and have them sent directly to your POS.

You are also able to manage your menu and much more, saving you time and reducing manual effort.

{% hint style="info" %} <mark style="color:$info;background-color:$primary;">**Activation Timeline:**</mark>

<mark style="color:$info;background-color:$primary;">The activation process can be completed from Monday to Friday and typically takes up to 48 hours to go live.</mark>
{% endhint %}

## Supported Features

### Menus

| Feature                  | Supported on UrbanPiper | Description                                            |
| ------------------------ | :---------------------: | ------------------------------------------------------ |
| Real-Time Menu Publish   |   :white\_check\_mark:  | Instantly sync menu changes                            |
| Category                 |   :white\_check\_mark:  | Manage your menu's sections.                           |
| Item Images              |   :white\_check\_mark:  | You can add images for individual items.               |
| Location-Based Pricing   |   :white\_check\_mark:  | Apply different prices for different locations.        |
| Item-Level Tax & Charges |   :white\_check\_mark:  | Apply taxes and charges to your items.                 |
| Nutritional Info         |   :white\_check\_mark:  | Display nutritional information for your products.     |
| Variant & Add-on Groups  |   :white\_check\_mark:  | Fully support complex item options and modifiers.      |
| Nested Option Group (L1) |   :white\_check\_mark:  | Manage options within options for maximum flexibility. |
| Product Inventory Snooze |   :white\_check\_mark:  | Toggle items as out-of-stock for a set period.         |

### Orders

| Feature              | Supported on UrbanPiper | Description                                                                    |
| -------------------- | :---------------------: | ------------------------------------------------------------------------------ |
| Real-Time Order Push |            ✅            | Orders are sent to your system the moment they are placed.                     |
| Auto-Acceptance      |            ✅            | Automatically accept new orders without manual intervention.                   |
| Order Discount Info  |            ✅            | Receive full details on order-level and item-level discounts.                  |
| Order with Options   |            ✅            | Orders with custom options are fully supported and relayed correctly.          |
| Order Status Update  |            ✅            | Push real-time status updates (Accept, Ready, Dispatched, Delivered) to Keeta. |
| Rider Status Updates |            ✅            | Receive updates on rider status, including Assigned, Arrived, and PickedUp.    |
| Rider Reassignment   |            ✅            | The system will handle and reflect rider reassignment updates.                 |

### Store

| Feature            | Supported on UrbanPiper | Description                                                   |
| ------------------ | :---------------------: | ------------------------------------------------------------- |
| Store Availability |            ✅            | Manage your store's availability directly from UrbanPiper.    |
| Store Hours        |            ✅            | Manage your store's operatiing hours directly from UrbanPiper |

### Menu Management

UrbanPiper allows you to manage and update your menu on Keeta efficiently. Once you publish the menu from the UrbanPiper platform, the following entities are automatically updated on Keeta:

* Product names and descriptions
* Prices, taxes, and charges
* Modifier groups, options, and variants
* Product images
* Product availability

{% hint style="info" %} <mark style="color:$info;">**Important:**</mark> \
\ <mark style="color:$success;">**Always publish the menu after making any changes to prices, product details, or customisation.**</mark>

<mark style="color:$info;">**Menu updates typically take up to 5-10 minutes to appear on the UI.**</mark>
{% endhint %}

### Order Management

When an order is sent from Keeta to UrbanPiper, it includes all the essential details you need for a smooth delivery, such as:

* Items ordered and other order details
* Taxes and Charges
* Customer information (shared when you handle your own delivery)
* Preparation time

Now you can manage your operations with greater speed and accuracy than ever before.


# Integrate Your Keeta Account with UrbanPiper

To start receiving Keeta orders directly on your UrbanPiper account, you’ll need to set up and authorize the integration.

{% hint style="info" %}
**Note**: This requires you to be an active UrbanPiper customer.
{% endhint %}

If you don’t have an UrbanPiper account, please [get in touch ](https://www.urbanpiper.com/contact-us)with our Sales team to learn more about activating your account and getting started.\
\
If you have an existing UrbanPiper account, follow the steps below to activate your Keeta integration.

## Step 1-**Prepare your Keeta account**

Ensure your outlet(s) exist in Keeta Merchant and are eligible for online ordering.

Note down:

* Outlet/Restaurant ID(s)

## Step 2-Initiate Request to Go Live

**Before you begin (quick checklist)**

✅ Location created in UrbanPiper (name, address, phone).

✅ Menu ready in UrbanPiper (categories, items, add-ons/modifiers, taxes).

✅ Operating hours, prep times, and charges (packaging/other fees) decided.

✅ Keeta outlet details on hand (Outlet/Restaurant ID).<br>

* **Access the Location Tab**: Start by navigating to the Location tab and searching for your specific location.
* **Select Your Location**: Click the checkbox next to the location name you wish to activate.
* **Request to Go Live**: Click on the Request to Go Live button and choose the aggregator you want to partner with.
* **Input Aggregator Details:** Enter the aggregator's Platform ID.
* **Finalize Request**: Click the Request to Go Live button to submit your request. You will receive a confirmation that your request has been successfully submitted.

## Step 3-Post-request process

* Once your request is submitted, our **Onboarding team** is automatically notified to begin the mapping process.
* This mapping is carried out **offline**, with assistance from the Swiggy team.
* You’ll receive an **email confirmation** once the outlet has been mapped and activated.
* After confirmation, your outlet will be **ready to receive orders via UrbanPiper**.

{% hint style="info" %} <mark style="color:$info;">**Verify that both the Platform ID and the URL are correct to prevent delays.**</mark>\
\ <mark style="color:$info;">**Your outlet is expected to be live within 48 hours.**</mark>
{% endhint %}


# Manage Your Menu

UrbanPiper integration allows you to centrally manage your menu content for all ordering channels.

If your menu is managed on your POS, please [ingest the menu ](/business-manager/importing-your-menus)from the POS to the UrbanPiper platform.\
\
Once the menu is updated on UrbanPiper, you can [publish the changes](/business-manager/publishing-your-menu) to Keeta by performing a menu publish.

You can track the status of your menu publishing requests in the Publish Logs.

* If the publishing is successful, your changes will reflect on Keeta.
* If any errors occur, check the Error Report, make the required corrections, and republish the menu.

### &#x20;**Handling errors**

<table data-header-hidden="false" data-header-sticky><thead><tr><th>What I see?</th><th>What does this mean?</th><th>How do I fix this?</th></tr></thead><tbody><tr><td>"Category title should be unique."</td><td>Each category has unique title, regardless of case sensitivity.</td><td>Review and remove duplicate category titles.</td></tr><tr><td>"Number of categories should not exceed 100."</td><td>Total number of categories should not exceed 100 in count.</td><td>Modify your menu such that the total number of categories does not exceed 100.</td></tr><tr><td>"Duplicate item names not allowed in a single category"</td><td>Items under a category should have a unique name.</td><td>Review and rename/remove duplicate item names under respective categories.</td></tr><tr><td>"Restricted keywords in category title."</td><td>Keywords like "bacon" and "pork" are blacklisted.</td><td>Ensure none of the category titles has blacklisted words.</td></tr><tr><td>"Restricted keywords in category description."</td><td>Keywords like "bacon" and "pork" are blacklisted.</td><td>Ensure none of the category descriptions has blacklisted words.</td></tr><tr><td>"Item title must be unique across the menu."</td><td>Item names should have a unique throughout the menu.</td><td>Review and rename/remove duplicate item names.</td></tr><tr><td>"Items count should not exceed 2000."</td><td>Total number of items should not exceed 2000 in count.</td><td>Modify your menu such that the total number of items does not exceed 2000.</td></tr><tr><td>"Duplicate option group names not allowed in a single item."</td><td>Option groups under an item should have a unique name.</td><td>Review and rename/remove duplicate option group names under respective items.</td></tr><tr><td>"Restricted keywords in item title."</td><td>Keywords like "bacon" and "pork" are blacklisted.</td><td>Ensure none of the items has blacklisted words.</td></tr><tr><td>"Restricted keywords in item description."</td><td>Keywords like "bacon" and "pork" are blacklisted.</td><td>Ensure none of the item descriptions has blacklisted words.</td></tr><tr><td>"Item images must have the extension of .jpeg, .jpg, .png or .webp"</td><td>Item images uploaded must have one of these extensions.</td><td>Change images to follow these one of these extensions.</td></tr><tr><td>"Option groups count should not exceed 2000."</td><td>Total number of option groups should not exceed 2000 in count.</td><td>Modify your menu such that the total number of option groups does not exceed 2000.</td></tr><tr><td>"Restricted keywords in option group title."</td><td>Keywords like "bacon" and "pork" are blacklisted.</td><td>Ensure none of the option group titles has blacklisted words.</td></tr><tr><td>"Restricted keywords in option group description."</td><td>Keywords like "bacon" and "pork" are blacklisted.</td><td>Ensure none of the option group descriptions has blacklisted words.</td></tr><tr><td>"Duplicate option names not allowed in a single option group."</td><td>Options under an option group should have a unique name.</td><td>Review and rename/remove duplicate option names under respective options groups.</td></tr><tr><td>"Maximum of 10000 options allowed."</td><td>Total number of options in a menu should not exceed 10000 in count.</td><td>Modify your menu such that the total number of options does not exceed 10000.</td></tr><tr><td>"Option images must have the extension of .jpeg, .jpg, .png or .webp"</td><td>Option images uploaded must have one of these extensions.</td><td>Change images to follow these one of these extensions.</td></tr><tr><td>"Options count should not be less than minimum selectable."</td><td>An option group requires minimum of options to be selected.</td><td>Ensure minimum number of options are selected for a given option group.</td></tr><tr><td>"Restricted keywords in option title."</td><td>Keywords like "bacon" and "pork" are blacklisted.</td><td>Ensure none of the option titles has blacklisted words.</td></tr></tbody></table>

If you continue to experience issues with your menu publish, please [contact support](/basics/contact-us) for further assistance.


# Manage Item Availability

UrbanPiper supports real-time item availability management on Keeta. You can mark items as out-of-stock instantly.

* Updates are real-time. Changes take effect immediately on Keeta.
* Bulk updates are supported. You can enable or disable multiple items at once.
* Out-of-stock is effective immediately when triggered.
* Auto stock-in by Keeta is not supported. Items do not automatically restock at the start of the day or at store closing time. Stock in must be triggered either manually in UrbanPiper.

If you continue to experience issues with your item availability, please [contact support](/basics/contact-us) for further assistance.


# Manage Modifier Availability

Modifier availability works the same way as item availability. You can manage out-of-stock modifiers in real time directly from UrbanPiper.

1. Updates are real-time. Changes take effect immediately on Keeta.
2. Bulk updates are supported. You can enable or disable multiple modifiers at once.
3. Out-of-stock is effective immediately when triggered.
4. Auto stock-in by Keeta is not supported. Modifiers do not automatically restock at the start of the day or at store closing time.

If you continue to experience issues with your item availability, please [contact support](/basics/contact-us) for further assistance.


# Manage Your Orders

UrbanPiper’s integration with Keeta enables you to **streamline online order management**, **reduce manual effort**, and **enhance operational efficiency**.

This article provides an overview of the **key features and functionalities** available on the UrbanPiper platform to help you manage your Keeta orders effectively.

### Key Features Supported on UrbanPiper for Keeta Orders:

<table data-header-hidden="false" data-header-sticky><thead><tr><th>Feature</th><th align="center">Supported on UrbanPiper</th><th>Description</th></tr></thead><tbody><tr><td>Real-Time Order Push</td><td align="center">✅</td><td>Orders placed on Keeta are pushed to your UrbanPiper-integrated system instantly.</td></tr><tr><td>Order Discount Info</td><td align="center">✅</td><td>Detailed information about discounts applied to orders is relayed to your system.</td></tr><tr><td>Order-Level Discount</td><td align="center">✅</td><td>Discounts applied to the entire order are accurately reflected.</td></tr><tr><td>Item-Level Discount</td><td align="center">✅</td><td>Discounts applied to individual items within an order are also supported.</td></tr><tr><td>Charge Info</td><td align="center">✅</td><td>Information regarding various charges (e.g., delivery fees, service charges) is relayed.</td></tr><tr><td>Tax Info</td><td align="center">✅</td><td>Tax details applied to orders are relayed.</td></tr><tr><td>Order with Options</td><td align="center">✅</td><td>Orders including items with various options (e.g., toppings, sizes) are fully supported.</td></tr><tr><td>Real-time Status Push to Keeta</td><td align="center">✅</td><td>You can push real-time order status updates from UrbanPiper to Keeta.</td></tr><tr><td>Acknowledged (UrbanPiper to Keeta)</td><td align="center">✅</td><td>Confirm order acceptance to Keeta directly through UrbanPiper.</td></tr><tr><td>Food Ready (UrbanPiper to Keeta)</td><td align="center">✅</td><td>Notify Keeta when the food for an order is ready for pickup.</td></tr><tr><td>Dispatched (UrbanPiper to Keeta)</td><td align="center">✅</td><td>Inform Keeta when the order has been dispatched from your outlet.</td></tr><tr><td>Dispatched (Aggregator to UrbanPiper)</td><td align="center">✅</td><td>You will receive a notification in UrbanPiper when a rider has been dispatched by Keeta.</td></tr><tr><td>Delivered/Completed (UrbanPiper to Keeta)</td><td align="center">✅</td><td>Mark orders as delivered or completed on Keeta via UrbanPiper.</td></tr><tr><td>Delivered/Completed (Keeta to UrbanPiper)</td><td align="center">✅</td><td>You will receive the final delivery confirmation from Keeta in UrbanPiper.</td></tr><tr><td>Cancellation (UrbanPiper to Keeta)</td><td align="center">✅</td><td>Initiate order cancellations from UrbanPiper to Keeta before the order has been acknowledged.</td></tr><tr><td>Cancellation (Keeta to UrbanPiper)</td><td align="center">✅</td><td>Receive notifications in UrbanPiper for orders cancelled by Keeta or the customer.</td></tr><tr><td>Delivered</td><td align="center">✅</td><td>The order status will be marked as delivered once the rider completes the delivery.</td></tr></tbody></table>


# Running Discounts on Keeta

You can run different types of discounts on Keeta to attract more customers. Currently, discounts can be offered in three ways:

* **Fully Sponsored by Restaurant** – The restaurant bears the entire discount cost.
* **Fully Sponsored by Keeta** – Keeta covers the entire discount cost.
* **Shared Sponsorship** – The discount cost is shared between the restaurant and Keeta.

These must be configured directly on the Keeta Dashboard. They will also be supported in order relay and reconciliation.

The article below provides an overview of the different types of discounts that can be applied on Keeta.

## Supported Discounts

### Fixed Discount

* Offer a set amount off the total bill, usually when a customer spends a certain minimum.
* Example: Get ₹100 off on orders of ₹300 or more!

### Percentage Discount

* Apply a percentage off the total cart value, also typically with a minimum spend condition.
* Example: Enjoy 30% off on orders above ₹200!

### Percentage Dish Discount

* Give a percentage discount on a single specific item that you choose. This applies once per order.
* Example: Get 20% off on our Chicken Burger (one per order)!

### Delivery Fee Discount

* Give a value discount on a delivery charge, sponsored by Keeta. This applies once per order.
* Example: Get QAR 8 off (one per order)!

Once your menu is successfully published, your discount will be live on Keeta for the selected item, ready to delight your customers and boost your orders!


# Manage Store Hours

UrbanPiper integrations allow you to update and manage your restaurant's operating hours directly through the platform.

To set or modify your restaurant's schedule, go to the ["Schedules"](https://help.urbanpiper.com/business-manager/setting-up-schedules-for-locations) option available in the UrbanPiper Business Manager. After you have added the schedule for your location, you can[ ](https://help.urbanpiper.com/business-manager/publishing-your-menu)sync it with Keeta.

In this guide, we will learn how to create schedules to set the operating hours for a given location. Follow these steps to create and associate schedules effectively.

1. **Navigate to Schedules:**
   * On the navigation section, click on **Groups**.
   * Then, click on **Schedules**.
2. **Create a New Schedule:**
   * Click on **Regular Schedules** and then **Create New**.
   * Enter the name of the schedule.
   * Click on **Next** to proceed.
3. **Add Timings:**
   * Select the type of schedule: **Daily**, **Weekdays**, **Weekend**, or **Custom**.
   * Select the open and close time.
   * You can choose to add further timings if applicable.
   * Once the timings are created, click on **Save**.
4. **Associate Locations:**
   * Click on **Associate Your First Location**.
   * Select the list of locations you want to associate with the schedule.
   * Click on **Update** to finalize the association.
   * Now, the schedule has been successfully created and associated with the selected location

{% hint style="info" %}
**Note:** Any manual override of store availability will disable store timing. The store time will need to be synced again.
{% endhint %}

If you encounter any discrepancies after following these steps, please feel free to [contact our support](/basics/contact-us) team for further assistance.


# Getting Started

{% embed url="<https://urbanpiper.portal.trainn.co/share/ptf2obMKsnkQAsNeh0tmOQ>" %}

The UrbanPiper platform offers a powerful suite of reports designed to give you a clear, data-driven view of your business. By transforming raw order data into actionable insights, these reports help you make smarter decisions, optimize operations, and drive growth.

### **Exporting Reports on UrbanPiper 📤**

The UrbanPiper platform makes it simple to fetch and export the data you need. Follow these steps to get your reports:

* Navigate to the **All Apps** section and select **Central Report**. 🗺️
* You will see a list of all available reports, including **order transactions**, **item-wise transactions**, **item summaries**, and more. 📋

### **Export Order Transaction Report: 🛍️**

* Click on **Order Transaction Report**.
* Choose a pre-defined time range (**daily**, **yesterday's**, **this week's**, **monthly**) or select a custom date.
* Apply filters to sort by **brand**, **location**, or **aggregator**. You can also choose to select all locations.
* Customize your report by selecting which order statuses you want to display.
* Click **Preview** to view your report, or click the download button to export it directly.
* You can download the report in either **CSV** or **XLSX** formats. 📁

### **Receive  Report by Email: 📧**

1. When you're ready to export, select the option to receive the report via email.
2. Enter your email address, choose your preferred format, and click **Send**.
3. A secure link to download the generated report will be sent to your inbox. 🔗

### **Scheduling Reports ⏰**

You can set up a recurring schedule to automatically receive your most important reports.

1. Click on the **Schedule** button and choose the report you want to schedule. 🗓️
2. Customize the data by selecting a date range and applying filters for brands, locations, platforms, or Meraki channels.
3. Note that the default schedule is set to deliver reports at 8 a.m. for the previous day. At this time, custom delivery times are not available.
4. Once you've set your preferences, click **Confirm and Schedule**.
5. Choose your desired format to finalize the schedule.

You will now receive your scheduled order transaction report in your email every day at 8 a.m. 🚀 This is a great way to start your day with fresh data.


---

[Next Page](/llms-full.txt/1)